Solo Hike To Mt Baldy (2nd Time For 2016)


On an early Monday morning, I woke up at 3:30 AM and drove all the way to the trailhead of Mount Baldy with the thought that I would be the first one to “summit” the peak for the day.

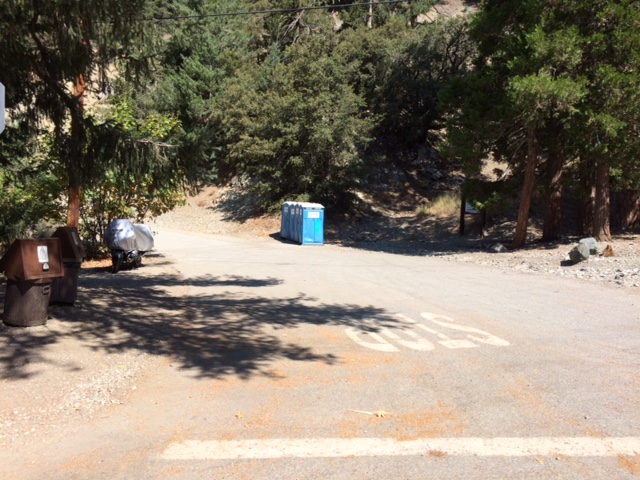
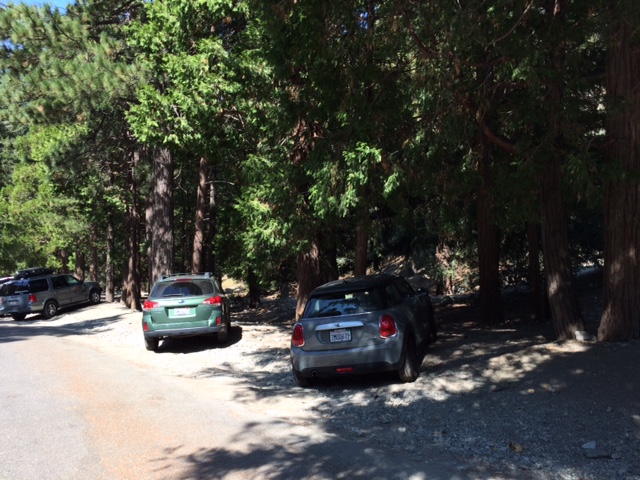
From my house to the trailhead was an easy drive for 45 minutes and it was still dark when I arrived at the Parking Area at Manker Flats. While I was preparing my things (hydration pack and shoes), another vehicle arrived and parked across the road where I was preparing my things. The other vehicle had two hikers in it and they immediately opened their vehicles’ trunk to retrieve their packs and went directly to the trailhead. They were 5 minutes ahead of me when I finally started after taking a pee in one of the Portalets.

2016-mt-baldy-06
Parking Area Beside The Road
2016-mt-baldy-05
Trailhead Going To The Mt Baldy Falls

They were wearing headlights as I saw them in front of me for about 200 meters. I was not wearing a headlight and I was confident that the light from the moon could easily illuminate the dirt road towards the commercial establishment at the Ski Lift. Before I was able to hit my first mile, I had already overtaken them after I greeted them. As I moved ahead of them, I could still hear their conversation as they were taking their time for the hike.

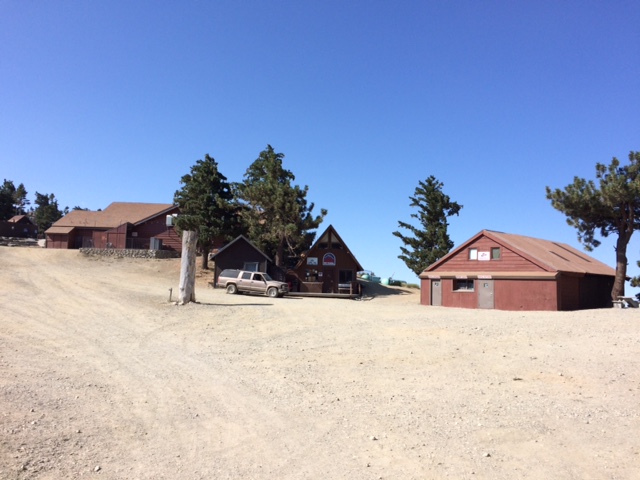
Being confident that I was already the first one on the trail, I maintained my hiking pace until I reached the Ski Lift’s Commercial Center. It was already daybreak when I reached the place and nowhere I would find find the two hikers behind me.

2016-mt-baldy-07
Mt Baldy Ski Lift & Commercial Center

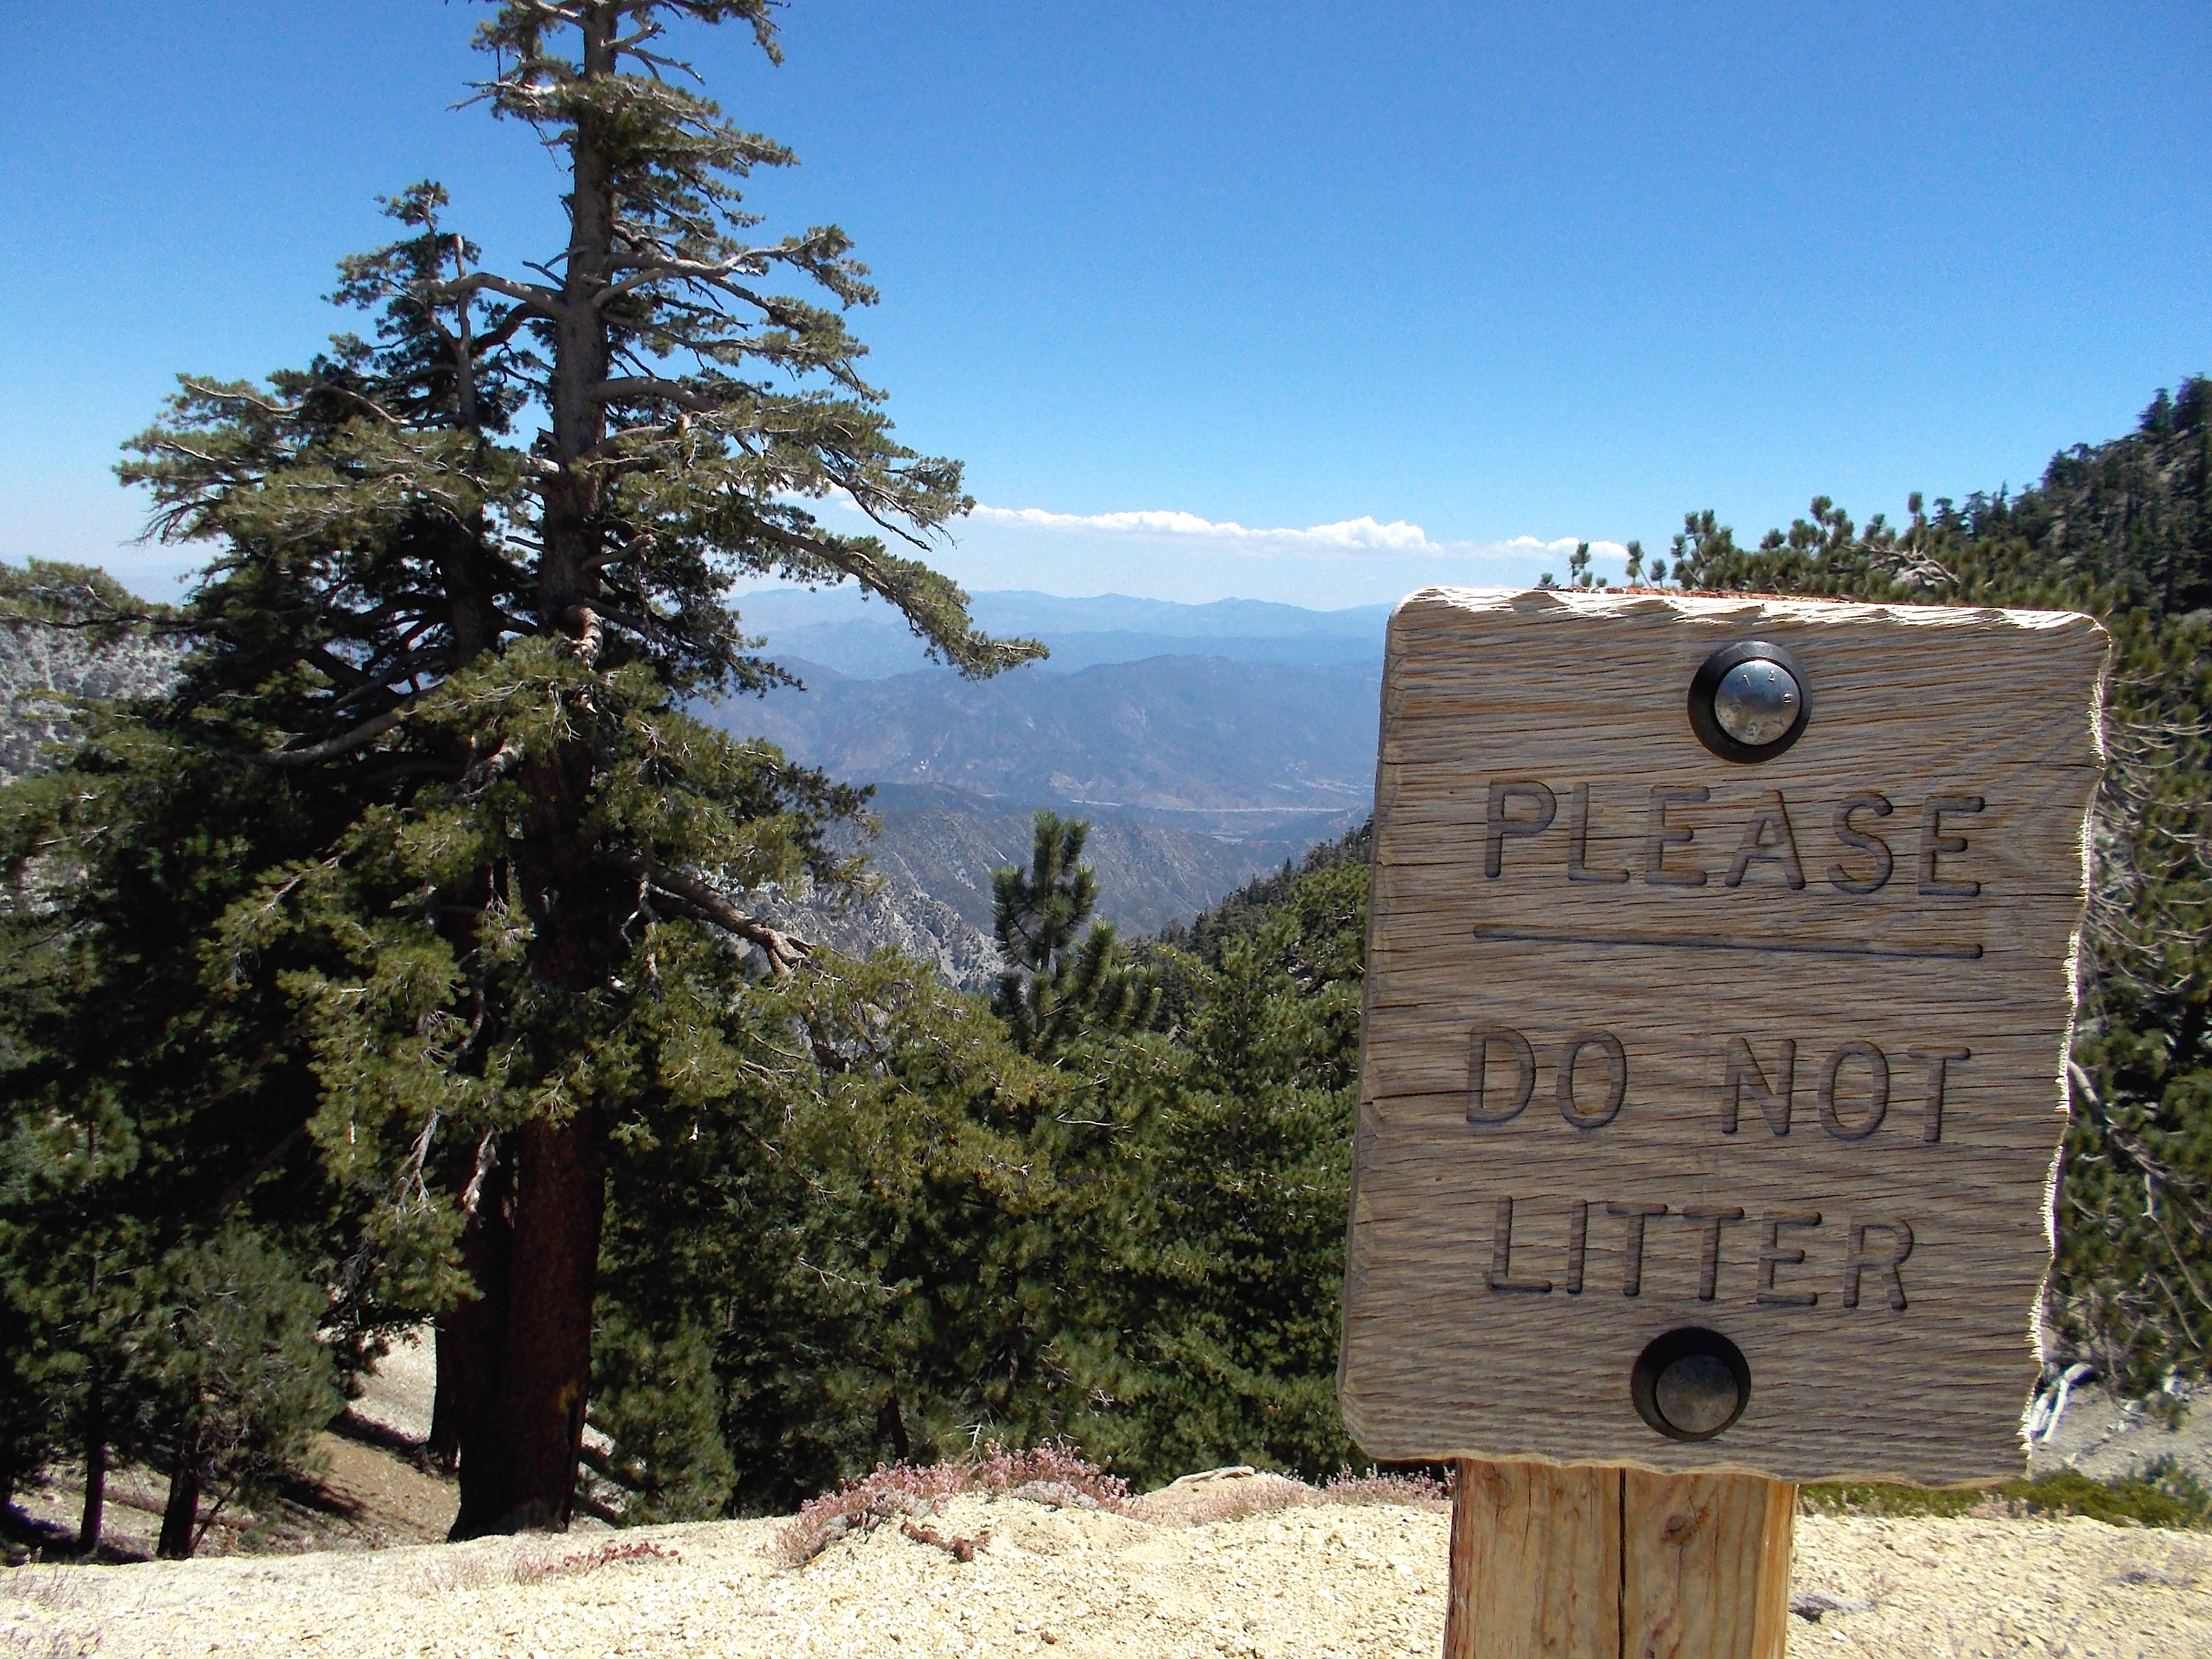
As I passed the Ski Lift’s Commercial Center towards the Devil’s Backbone Trail, I saw a Rescue Truck parked at the end of the Fire Road, the farthest that a four-wheeled vehicle would reach towards the peak of Mt Harwood. I was thinking that those guys aboard in it were just ahead of me but as I saw at the horizon and the trails above me, I would not see any individual/hiker ahead of me towards the peak of Mt Baldy.

2016-mt-baldy-02
Devil’s Backbone Trail

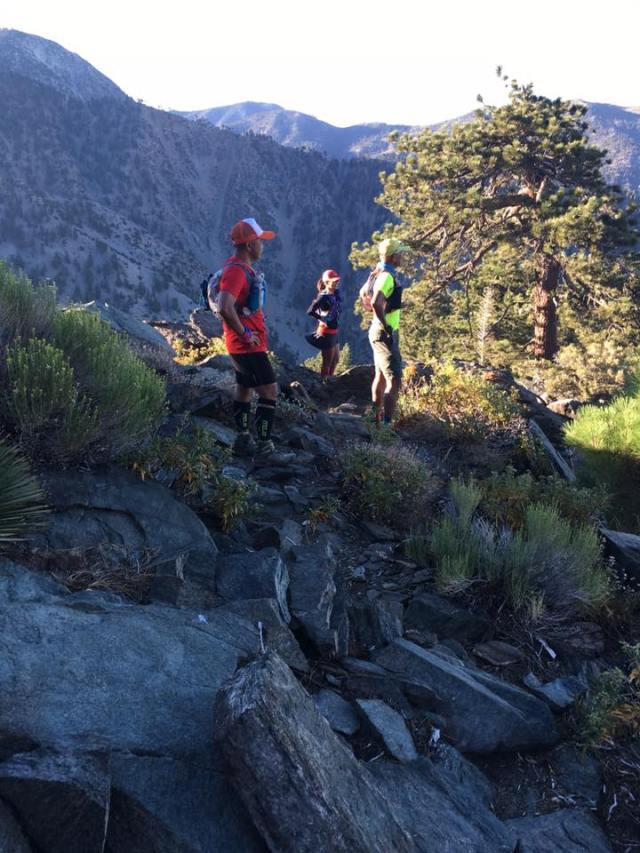
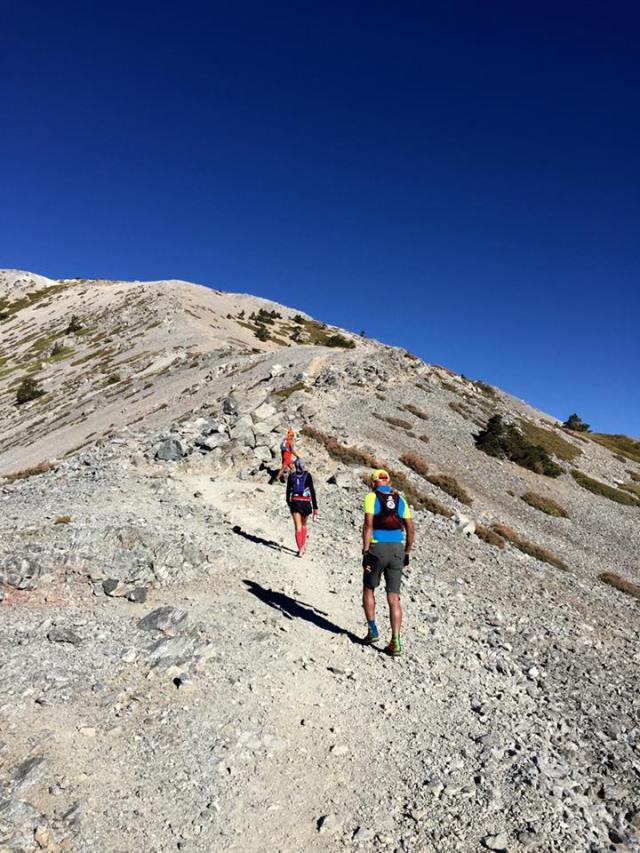
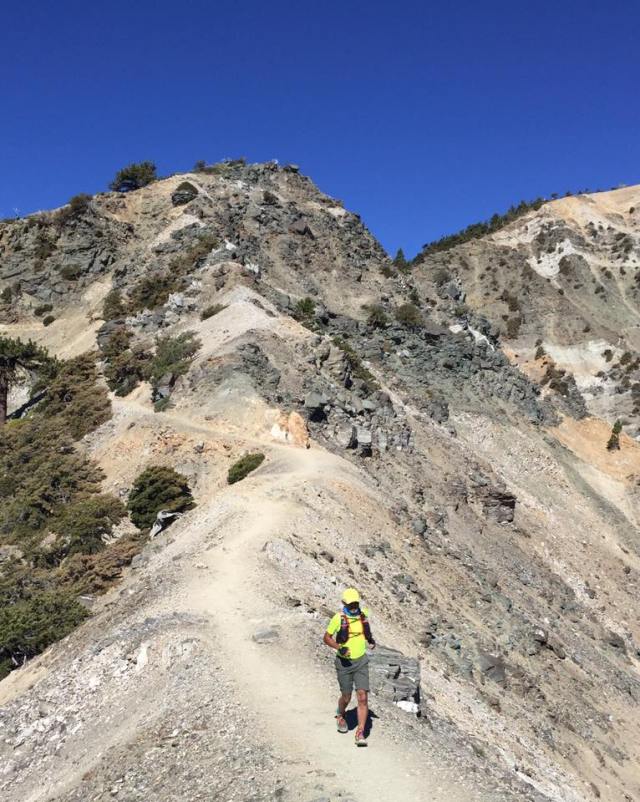
Looking at a distance ahead of me, I would see the Devil’s Backbone Trail and it looks like a very challenging and intimidating ascending part of the trail where both sides have steep slopes that the lowest portion could not be seen. If anybody would slip or feel dizzy and plunge to any of the sides of the slope, I would suspect that a hiker would be hard to be rescued from atop the trail. But if you are already standing and doing your hike at the said place, you can feel that your courage is slowly taking over your mind and for you to be able to cross this dreaded part of the trail. As you passed this trail, you are rewarded with a higher elevation and a flatter portion of the trail with the peak of Mt Harwood in front of you!

2016-mt-baldy-00-copy
Mt Harwood’s Peak

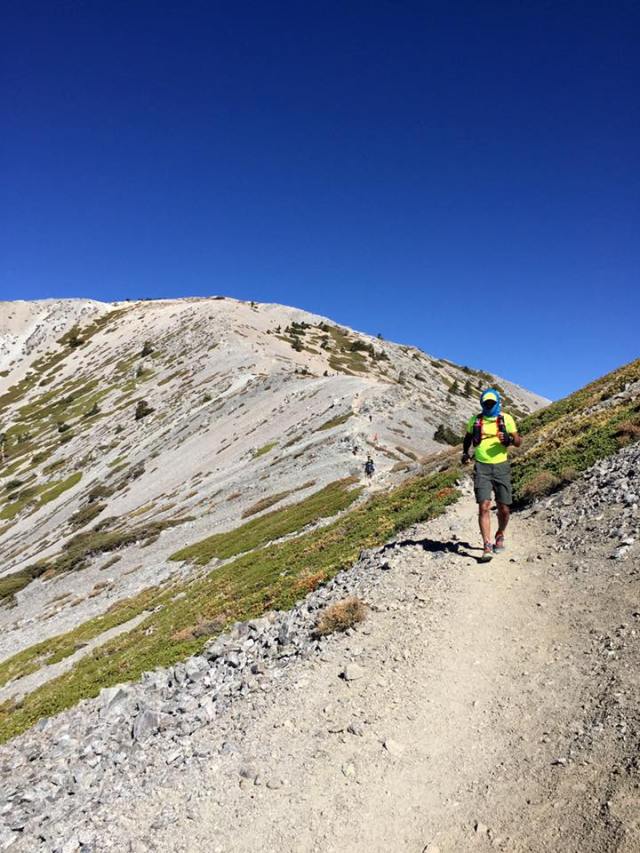
I decided not to “peak bag” Mt Harwood as I was trying to be fast as possible in reaching the peak of Mt Baldy. As I was hiking on this flatter portion of the trail, I had my first sip of water and I started to feel some perspiration on my back as I was wearing my Uniqlo Water Repellant Windbreaker.

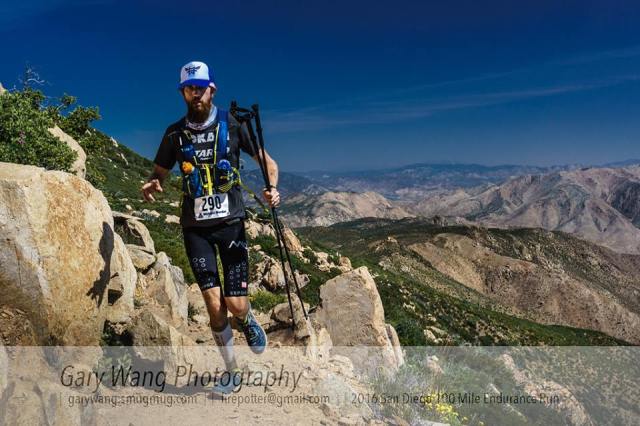
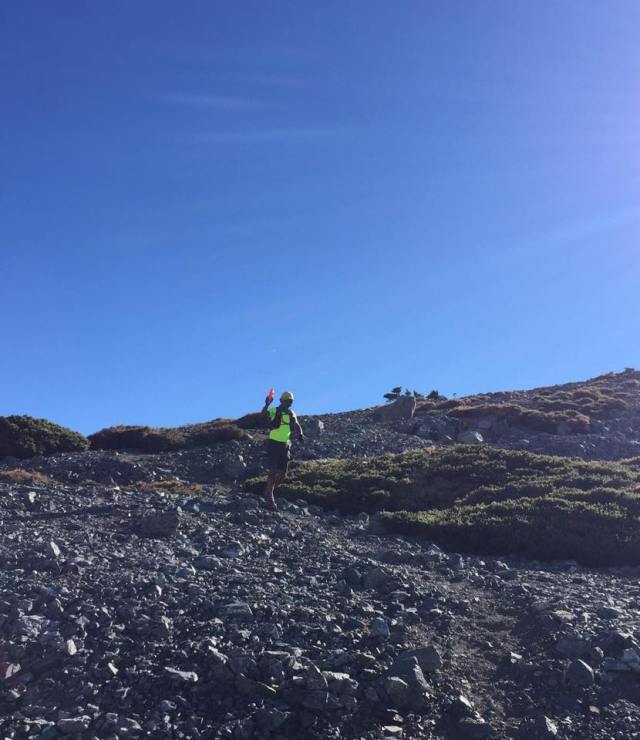
Finally, I was on my last mile before the peak of Mt Baldy! After about 200 meters, I saw a hiker going down from the trail and I said to myself that the guy could have started way ahead of me! He looks like he is a good hiker with all those beard and moustache on his face and the hiking boots he was wearing. He was not using trekking poles. A simple greeting and look on each others eyes as we met were part of the usual practice among hikers and it feels a good sign of showing respect to one another on the outdoors.

2016-mt-baldy-03
At Mt Baldy’s Peak With Piles Of Rocks With Orange Ribbons

On my final 100 meters towards the peak of Mt Baldy, I met two hikers with backpacks and trekking poles telling me that a helicopter will be arriving at the peak in 45 minutes and my understanding of the message was that there was an urgency for me to reach the peak and spend a short/quick time at the peak. I said thank you to the two hikers as I moved faster and closer to the peak.

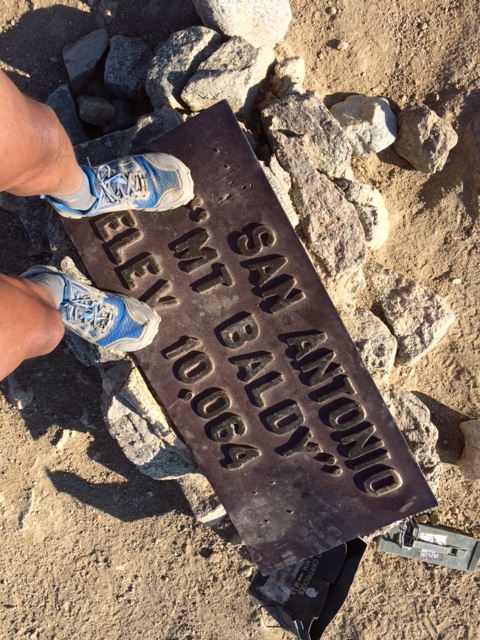
Few meters from the peak, I have observed that there were lots of stakes with orange ribbons tied on them that were placed surrounding the peak of the mountain. I concluded that those ribbons were markers for the pilots of the helicopters for them to visually know where exactly they would land. On the peak, I saw three (3) guys with big backpacks and orange jackets whom I assumed to be those who rode in the Rescue Truck parked along the trail going to the mountain. They were lying on their backs and talking to each other and not minding about my arrival in the area. They were inside the area where those pile of rocks formed in a semi-circle which I believed is being used for those hikers who would set their tent and sleep for over night in the area. The pile of rocks is so high that it can protect strong winds from hitting a pitched tent inside the semi-circle area.

2016-mt-baldy-01-copy
Mandatory “Selfie” At The Peak’s Marker

I could still remember where one of my ultra friends who lives in Los Angeles had to stay and camp at the peak of Mt Baldy for one week as part of his training for the 2015 Angeles Crest 100-Mile Endurance Race. He would pitch his tent at the peak and then hiked and run towards the Ski Lift’s Commercial Center and then back to the peak during the duration of his stay in the mountain. I guess, camping in the said area is FREE as long as one has an Adventure Pass displayed on ones vehicle at the trailhead. As a result of his training, the guy finished the race in less than 24 hours!

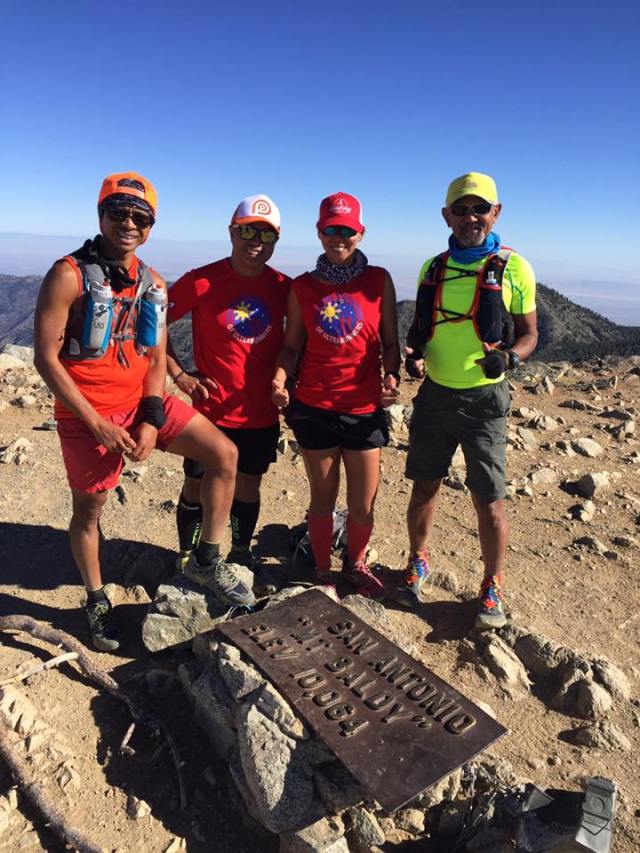
I spent almost 30 minutes at the peak, taking some “selfies” and eating my nutrition bars/trail mix fruits & nuts, before starting my descent from the peak. On my way back, I started to move faster and run the flatter sections. If the descending part of the trail is smooth and without any roots or rocks, I would run and quicker with my pace.

2016-mt-baldy-08
“Selfie” At The Bell Near The Commercial Center

I did not stop at the Ski Lift’s Commercial Center as they were still closed but three (3) SUVs suddenly arrived at the area full with “newly-recruited” Park Rangers and they were instructed to proceed to the establishments. I said to myself that I had to run 3.5 miles down to trailhead and be able to finish my hike before 10:00 AM.

As I was running down along the Fire Road, I could hear the sound of an approaching Helicopter to the mountain but sad to say that I could no longer have the view of the peak of Mt Baldy. Whatever, the activity that was being done in the area was part of the regular training being done in response to any contingency or emergency situation that is usually being experienced among hikers in the area. This is what I call being prepared and work’s efficiency among those people responsible in the safety and protection of the parks.

2016-mt-baldy-11-copy
Mandatory Pose After The Hike Overlooking The Mt Baldy Falls

At 10:30 AM, I was driving on my way back to the house in Downtown, Los Angeles.

My next plan will be to pitch a tent at the peak and sleep thereat for an overnight stay!

Trekking Poles (2016)


I have discovered the use of trekking poles in my readings in the Internet about 5 years ago where it was used to aid older people in their walking and hiking on the road and on the trails. As we know, these trekking poles or first popularly known as ski poles which were always being seen in every event in the Winter Olympics and other skiing sports in temperate countries. Some writers would say that the origin of these trekking poles came from the European countries where trekkers, hikers, and trail runners (during the Summer Season and drier months) would use them for balance as well as to preserve their leg strengths for the long haul and also aid them in steep ascents and descents.

For the past few years, almost in all the European Trail Running Events as well as Ultra Trail Running Events you would see almost all the participants carrying with them trekking poles during the race. I would have the impression that the routes of these events have very steep ascents and descents that one would need these trekking poles.

When I first used these trekking poles on the paved road, I received some laughs and negative comments from cyclists who would pass me along the road to the point that they would ask me where is the SNOW and my SKI? But a few months after such incident, I would see Marshall Ullrich using these trekking poles on his successful USA Trans-Continental Run few years ago. If only these cyclists would see the video and read the book of this famous ultra runner, they would be convinced that trekking poles are also used in ultra running.

Trekking Poles Adventure Runs
Using Trekking Poles In My Adventure Runs

Lately, I’ve seen that some of the Ultra Trail Running Events in the United States have already allowed the use of these trekking poles as compared when it was then a “no-no” for runners to use these poles. Some would say that one is having an undue advantage from the other runners who would not use these poles. Some would say that it is a form of cheating in ultra trail races. But whatever it is worth, I have a personal experience in using these trekking poles on the road and on the trails.

Let me first give some suggestions on the use of trekking poles with the following enumerated observations:

1. Do not use trekking poles for the first time in a trail running race without having used them extensively in your training. It follows the over-used advice in racing of not using something new during race day.

2. If the trail running event is a marathon distance or 50K, do not bother to bring or use these trekking poles if the total elevation gain is less than 3,000 feet or in a relatively flat course.

3. If the number of runners is more than 300 runners where the course is 100% single-track trail with less than a marathon distance (42K), don’t bother to use trekking poles as it will slow you down, slow down the runners behind you, or you might hurt somebody else in front or behind you. Use good judgement in using trekking poles on a single-trail trail, most specially in a most populated trail running event.

4. It is highly recommended to buy those trekking poles which could be folded in 3 parts as they could be easily stashed and held by the hands as if one is holding a baton while running. Since they are light, their weight is insignificant and they could be easily brought back to their intended lengths in a few seconds. There are hydration packs that have strings or elastic bands that could hold these poles or stashed/held by the pack while they are folded. Make some practice in removing or stashing the poles to and from the hydration pack during your training runs.

5. If you carry the trekking poles with your hands, while running, on its expanded length, make sure that there is no one behind you as you might poke the tip of the trekking pole to the runner while swinging your arms. If there is somebody behind you, make sure you don’t excessively swing your arms to the point that you might hit the runner behind you. You can have the option to carry the trekking poles with only one hand and be able to control that arm from excessive swinging or you can simply fold the poles and stashed them in your hydration pack or hold them with your hands.

Michael Wardian Trekking Poles
Michael Wardian At San Diego 100 Carrying Trekking Poles

6. If you intend to use the trekking poles with their extended length and if you are a slow runner or if you intend to power hike the first half of a 100K or 100-mile run, I suggest you start behind the runners and not mingle with the faster runners behind the starting line. However, if you are a fast runner and intend to be in the podium finish, you can have you folded trekking poles stashed with your hydration pack or just simply hold them with your hands.

7. In my experience of using trekking poles and seeing the faster runners using effectively these poles, I highly recommended buying a longer length from the suggested size or length that is based on your height. Three years ago, I bought a Black Diamond Ultra Distance Z-Poles with the length of 120 cms and I found it to be useful in my training runs as well as in my races. Last year, I bought another Black Diamond Ultra Distance Carbon Z-Poles with the length of 110 cms thinking that they are lighter and which are specifically recommended for my height. But I would find them to be the same weight with my 120-cm poles and I found them a little short for my height. In my ultra races in Hongkong, I found out that most of the trail runners have longer trekking poles than what their recommended size for their height and I tried one of my friends’ trekking poles which are 130-cm in size and I found them to be more adapted to my hiking/running style. Hopefully, I would be able to buy them soon!

Having stated my experiences and observation in the use trekking poles in running events, the following are their advantages and disadvantages:

Advantages:

1. If used in 50-milers, 100Ks and 100-milers and other longer trail runs, these poles will preserve ones leg power and strength for the long haul.
In a technical route and with lots of stream/water crossings, the poles with provide an extra “leg” for balance and stability for the body, instead, of falling or injuring oneself along the route.
2. For safety and protection from wild animals and “creatures” along the route. The poles can be used to ward off snakes and other creatures in the forest/mountain that have the tendency to attack you. I once used my poles to “whack” or strike on the head of an attacking and barking dog in one of the populated areas in the mountains. My swing with the poles to the dog was so strong that it tumbled down as if the dog was knocked out by a baseball bat!
3. For contigency purposes, the poles can be used as a support to ease the pain or body imbalance just in case one has rolled an ankle, or in cases when a runner is injured. In cases of extreme accidents where there is fracture to the runner, I guess, these poles could be used as emergency splints!
4. I’ve seen a runner during the Translantau 100K where he was holding a very long trekking pole and I’ve seen him using the poles as “pole vault” as he jumped along the sides of a single-track trail while overtaking a group six runners on a single file! He did it while we were descending on the said trail. The runner was so fast that I was not able to see his back even if I was able to pass these six runners after him.
5. In this year’s Translantau 100, the winds on the second night was too strong that my body would not be able to stand on my own. But having my trekking poles as extra “anchor” to the ground as I was ascending on the last two mountains of the course, I would have stopped or crawled along the slope up to the peak of the mountain avoiding to be knocked down by the strong winds with almost zero visibility due to thick fog. I was glad that I had my trekking poles with me while trying to keep my sight on the couple of runner in front of me.

Translantau 100 Trekking Pole
2016 TransLantau 100K With Trekking Poles

6. One time when I first joined the TNF Philippines 100, the trail was blocked by two water buffalos/carabaos and I with the rest of the runners behind me could hardly drive them away from the trail. By using the trekking poles as extension of my arms and raising them into the air, the carabaos thought that I was a BIG figure to contend with and slowly I was able to drive them away from the trail. But that incident and delay wasted a lot of my time and I eventually DNFd after one kilometre away from the place of incident. The trail was supposed to be the start of an ascending trail route towards Mt Santo Tomas which considered as the most challenging part of the course.

Disadvantages:

1. Obviously, it is an additional gear to be carried by the runner which means additional weight. Even if the trekking poles has a total weight of 280 grams, carrying it or holding it on a 50-mile, 100K or 100-mile or within a duration of 30 hours would be taxing to the body and you may end up carrying a total of about ten kilos or 5 pounds on the course. Additionally, it will delay you for some seconds in unfolding and folding them while you are running. If you add these few seconds within the distance of 100 miles, they will add up to minutes of maybe half an hour! Without proper training and technique on how to effectively use these trekking poles would mean a delay in finishing ones race.
2. In my three-year successive finishes of the Clark Miyamit 50-Mile Run (CM50), I have never used my trekking poles. I was then 61 years old when I had my first finish in this race and I would outpace and pass younger and stronger runners on my way up to the highest elevation of the course which happens to be the turning point of the race back to the Start/Finish Line. Simply put, if you have the proper training and preparation, there is no need to use those trekking poles in a 50-mile race. If you are less than 50 years old and I see you using a trekking pole while we are competing in the same race, my smile to you would mean that you are a “weak & newbie” trail runner!
3. In some of the international races, they allow runners to carry trekking poles but if the route is a “single-track” trail, they advise you not to use them, most specially if you have runners in front or behind you who are one or two steps away from you. There are also ultra races that require the runners not to use their trekking poles at the first 20-25 miles as most of the runners are running near to each other. Make sure that to ask from the Race Organizer/Face Director if the use of trekking poles are allowed in the race if their use is not stated in its rules and regulations.
4. Do not use trekking poles for the first time in a race you are going to compete. You will be saving the strength of your legs but your shoulder and arms muscles will take a lot of beating that you might no longer move your arms during the later part of the race or after the race.

At my present age of 64 years old, the trekking poles are my “necessities” and mandatory gear in my training and future races. I will be using them more often as I have already bought the proper size for me.

Trekking Poles
Training With Trekking Poles Has Started

I have one year to train with them in preparation for my plan to join the @CCC in Chamonix, France next year, hoping that I will be in the race after the lottery.

Go out and run!

Hike & Run To Mt Baldy (2016)


Almost every time I visit and stay in Los Angeles, California, I always make a schedule to trek to the peak of Mt Baldy. I have read a lot of blogs and FB status of running friends in Los Angeles that they would go and hike up to the peak of the said mountain. One of my ultra running friends, Benjamin Gaetos, is a regular visitor of this place and one time, I asked him for directions in going to Mt Baldy. And he generously stated the directions and the things to be required to be able to park ones vehicle near the trailhead. This was 4-5 years ago. From then, I was a regular visitor/hiker to Mt Baldy (Mt San Antonio).

Coming from Downtown, Los Angeles, I would drive to Highway 2 North and enter Highway 134 until it merges to Highway 210 East going to Pasadena up to Azusa/La Verne area. I have to exit at Baseline Road, turn Left at the Stop Light/Intersection and then drive towards Padua Street. At Padua Street, turn Right until I would reach the Mt Baldy Road. Turn right at Mt Baldy Road and go north, passing through the big lawns and nice houses in Claremont, until I would reach Manker Flats. A few yards (along the paved road) above Manker Flats, there is a road on the left with Portalets and within the said vicinity is where anybody could park their personal vehicle. The trailhead is the start of the road called “Mt San Antonio (Baldy) Falls Road”.

San Antonio Falls Trailhead
San Antonio Falls Trailhead (BR’s Photo)
Trailhead
Trailhead With Four (4) Portalets (BR’s Photo)

However, one has to display an “Adventure Pass” on Dashboard of the Vehicle to be able to park in this hiking destination. The “Adventure Pass” can be bought in any of the REI Stores in Los Angeles and some of the Outdoor Stores in the area. It costs $35 which is valid for One Year. One-time Day Pass is also available for the price of $5.

Parking Trailhead
Parking Area (Side Of The Road). Adventure Pass Needed (BR’s Photo)

On my first hike, I would follow the “Fire/Dirt Road” going up to the mountain from the trailhead by following where the Ski Lift would end. At the end of the Ski Lift which has commercial establishments and Public Toilet, I would turn left on another Dirt Road that would lead me to the Devil’s Backbone Trail, Mt Harwood, and to the peak of Mt Baldy. Round Trip distance would be 14 miles and it would take me almost 8 hours for the first time that I hiked to the peak.

Commercial Establishments
Ski Lift Commercial Establishment/Water Refilling Station (BR’s Photo)

But later on, on my yearly visits, I would be introduced by running friends on some of the shorter distance and steeper trails towards to the peak of the mountain.

For this year’s visit, it will be my 5th visit to “peak bag” the mountain. And I could make it with my 6th “peak bag” before I would leave Los Angeles for Manila.

Rowell Ramos, an ultrarunner from Los Angeles, invited me to join their group, for my 5th hike to the said mountain. For Rowell and his friends, it is their “bread & butter” as they would peak bag the mountain almost every week. Rowell would sometimes hike alone by starting early in the morning and then before 10:00 AM, he is done with his hike.

2016 Mt Baldy 14
Very Steep Trail & Impossible To Run Or Jog

I joined Rowell, Peachy Poso, and Rico Bagayawa on this hike which was done on the first Saturday of August 2016. We met and assembled at Manker Flats at 6:00 AM and we started to hike as soon as possible. We took the steepest trail leading to Mt Baldy where we veered left after hiking along the Mt Antonio Falls Road for about a mile. But before going to the said mountain, we “peak bagged” Mt Harwood first which is one mile away from Mt Baldy. This “new” trail experience was very challenging as I have to stop along the way for me to adjust slowly to a higher elevation. For the past weeks before this hike, I’ve been running on the road and never had the chance to accumulate vertical distance in preparation for this hike. However, slowly along the way, I was able to adjust my breathing as I positioned myself at the back of the group.

2016 Mt Baldy 18
Brief Rests & Stops To Adjust The Body To Higher Elevation

We started to meet the gusty winds from Mt Harwood but the wind temperature was not too cold that I would be able not to use my Windbreaker/Jacket. After a brief stop at the peak of Mt Harwood, we immediately proceeded to Mt Baldy. I was telling to the group that the same intensity of the wind was the same wind that stopped the race in this year’s TransLantau 100 in Hongkong. After a short descent from Mt Harwood, we were on our final assault to the peak of Mt Baldy. After 30 minutes of relentless hike, we finally reached the marker of San Antonio or popularly known as “Mt Baldy”.

2016 Mt Baldy 17
Short Downhill Run From Mt Harwood

It is self-explanatory that the mountain is called as such because it is devoid of any kind of vegetation, except for a few shrubs on the side of the mountain. From a distance, you can see see its peak as whitish in color.

I think we stayed at the peak for about 30 minutes, taking some of our pictures and talking to some of the other hikers who happen to be friends of Peachy Poso. I was able to eat my energy bar and drink some of my water.

2016 Mt Baldy 16
Final Assault To The Peak Of Mt Baldy
2016 Mt Baldy 10
Finally, At The Peak of Mt Baldy (Rico, Rowell, Peachy, & BR)

We were trying to locate where Mt Baden-Powell was located in relation to Mt Baldy as the 2016 Angeles Crest 100-Mile Endurance Run was being held on that day that we were in Mt Baldy. I was supposed to be in that race but because of lack of training, I opted not to join the said race.

From the peak, we descended via the Devil’s Backbone Trail all the way to the Ski Lift Commercial Area. Since it was all descending trail, we took advantage to run and jog until we reached the commercial establishment. We had some water refill on the public faucet and ate some Empanada brought by Rowell Ramos. After a brief rest, Rowell and Peachy had to continue their trek to the Triple T Peaks which is another 10 miles before reaching the trailhead while Rico and I had to return to the Mt Baldy Falls Road Trailhead which has a distance of 3.5 miles from the Ski Lift Commercial Center.

2016 Mt Baldy 13
Descending Run From Mt Baldy
2016 Mt Baldy 12
Running Along The Devil’s Backbone Trail (Do not look at your sides!)

Rico and I were done before noon time and we parted ways. I was able to hike and run a distance of 10.4 miles with a total elevation of 4,937 feet. The details of my hike & run could be seen here—https://connect.garmin.com/modern/activity/1291507392.

2016 Mt Baldy 15
Filipino Empanada As Trail Food

I promised to be back to this mountain for another solo hike and run before leaving for Manila.

If you happen to be in Los Angeles and would like to hike a mountain, Mount San Antonio (Mt Baldy) is a must!

(Note: Pictures and Empanada Were Provided By Rowell Ramos)

Why I Hate “Selfies” In Running Events


In my early years of joining running events, which is about 40 years ago, runners then were not particular with their pictures before, during, and after finishing a race. What was important to them was to finish the race, get their Certificate of Finish and hoping that the race result will be published in the daily newspapers. It was only the Top Male & Female picture that would be featured in the next day’s newspapers, if the race is a Marathon distance. It was only the Marathon Races that award Finisher’s Medal to the runners!

Now that we are in the Age of the Internet and Social Media, the tendency is that you need an evidence that you are participating in a running event by posting a picture of yourself in the Internet/Social Media showing that you are really in the said event. Added to this is a “bragging right” to your friends that you are really a legitimate endurance athlete. No evidence, no “bragging rights”! And the more your pictures is being SHARED and have LIKES, the better for you that your feat is being recognized.

Let me define what I mean by “selfies” or a “selfie” picture. “Selfies” are those pictures taken by ones digital camera or cellphone’s camera where you click the shutter button by yourself with your face or body and the surroundings as a product/result in the said picture. Sometimes, I can consider “selfie” pictures when I see runners stopping by the trail or road to take a picture of the scenery or the surroundings. I don’t consider “selfie” pictures taken by official photographers as well as pictures taken by the support crew or pacer of a runner.

Let me then tell you the reasons why I hate “selfies” in running events and they are the following:

  1. Runners taking “selfies” with another runner on the background or taking a “selfie” behind another runner don’t ask permission to take a picture of you as the background. Most of the time on these “selfies”, they would show that I was walking or having some “low/down moments” when these pictures are taken while the one taking the “selfie” is smiling or laughing happily behind my back or in front of me. Just imagine what the picture would depict if it is posted in the social media.
  2. It slows me and breaks my racing momentum in races. Ok, I admit that I am a very positive person and I don’t say “No” to the requests of other runners to have a “selfie” during a race. But for God’s sake, please don’t ask for a “selfie” with me at the peak of a mountain in a trail race if I am about to continue my run to proceed on the descending/downhill part of the course. As a rule, never ask another runner for a “selfie” during the race. Every runner has their goal to finish the race as fast as they can and that is the simple essence of race!
  3. “Selfies” or pictures taken at the Turn-Around Points in trail runs are also annoying as it delays the momentum of a runner. Simply have the Race Marshal on these points/locations to take note or write the Bib Number and time of arrival of the runner and don’t delay the runner from finishing the race. Just imagine if you are in a group of 4-6 runners in that turn-around point and each runner would wait for his/her turn for him to pose a picture showing that he/she actually reached or passed the said place!
  4. In the Aid Stations, Race Marshals and Volunteers should not take “selfies” with the runners while they are being helped with their food and while refilling their hydration bottles or packs. These requests for “selfies” would alter or disturb the runner’s focus on what he decides to do in the Aid Station at the fastest time possible. Once a runner’s focus is unnecessarily disturbed, his or her temper would spike most specially if his target time to reach that Aid Station/Checkpoint is not met. To be safe, never ask a “selfie” to those who are fast and runners who are focused to improve their finish time/s in a race. Moreso, if they are elite international runners or “good-looking” lady international runners.
  5. Let it be known that even if I am already 64 years old, I am still a competitive runner. Having said this, I have target pace, speed, and finish time in all the races that I join. I would be happy and contented to race with the younger runners in road and in trail races, whether they are non-ultra or ultra distance events. So, a simple delay for a “selfie” would be a reason for my targets to be altered, resulting to slow performance or sometimes, bad temper!
13336014_1144616122267656_2275559872737707322_n
I am already tired!

So, what is my advise on “selfies” or taking of pictures during the race?

  1. If you want to improve your PR in a certain race, leave your cellphone/camera behind. Aside from being a distraction (of taking selfies/pictures), carrying a cellphone or camera adds weight to your body.
  2. If you have a blog or planning to document your races and need to have some pictures of scenery or places along the race route, do a recon run along the route and you can have all the time to take pictures along the route. On race day, your only goal is to focus to finish the race without any distractions.
  3. If you are a fast runner, you have all the time to take your pictures but do not distract or interrupt other runners and request them to take your picture or ask them to have “selfies” with you. In one of my trail races, a runner in front of me suddenly stopped along a single-track descending part of the route and requested me to take a picture of him that I wanted to deny his request. But I just smiled and did the favour to take a picture of him…not once but three times!
  4. In international races, don’t be stoked to world-class/elite runners by asking them to have “selfies” with them during the race. You can have “selfies” with them during the Race Briefing (a day before the race) or after the Race. These international elite ultra runners are kind and easy to talk with as they would accommodate a “photo-ops” with them once you request them to have one. I never had any problem talking to these people before and after the race.
  5. In races where one of the mandatory gears is a cellphone, the cellphone is a gear that is very vital for your survival just in case of any emergency/accident or serious injury that will happen to you. Bringing out ones cellphone to take pictures of the scenery and “selfies” adds up to the extra time spent in the course, most specially if you are “cut-off time beater” like me. If you successfully finished the race within the prescribed cut-off time, you can register again for the next year’s edition if you intend to run it faster and have a chance to take selfies during the race.
  6. You must be warned also with runners who intentionally request you to have “selfie” with them must specially if you running ahead of them. This kind of runner will destroy or impede your momentum in the race and after taking a “selfie” and making some time to pack or stow your cellphone or camera in your pocket, the one who requested you to have a “selfie” with your will just leave you without even saying “thank you”. Just when you realised that you have been tricked by this runner for stopping, you would see him almost one hundred yards ahead of you with a blistering pace.

“Selfies” are already a “norm” in most of the Social Media outlets and platforms and they are already part of being a runner and as an avid outdoor adventurer. But if you don’t have any time to beat, it is fun and self-satisfying because it creates memories to your activities or events.

With or without “selfies” running is still fun but don’t do it to me when I am racing.

Go out and run!

H1 Recon 02
Smiling But Actually Tired

Blogging Reboot (2016)


Starting with this post I am back again with my blogging.

Thinking back almost nine (9) years ago, I started this blog to document or journalize my daily running activities; write Race Reports in my running events (whether I am a participant or a Race Director); try to remember and document my previous running experiences; and re-post whatever running resources or information I have read in the books that I’ve purchased and read and what I’ve read in the Internet. Sometimes, I would post my personal opinion on what has transpired in the running world, whether it is within the local or in the country and in the international arena.

So, I am going back to what I know about blogging——sharing and letting my readers know what is happening to me in my running workouts, activities, and adventures. From time to time, I would also share things that are important or worth knowing in the field of running (specially on ultra running).

However, this blog will remain as the main source of information on the Ultra Races that I organise and direct.

I will not be competing with my Facebook account but in essence this blog will be “What is on my mind…about running”.

Now, it is time to go out and run!

Trail Running In Kayapa, Benguet, Philippines

Race Report: KOTM’s Four Lakes 100K Mountain Trail Race (Part 2)


In about one month, I will turn to a 64-year old mountain trail runner and I have accepted the reality that I am getting old and about to retire from ultra mountain trail running with the hope to leave some legacy to the next generation of runners, most especially to the local ultra runners. I also accepted the fact that I am becoming the “cut-off time chaser” in all my past international ultra races. But for the past months, I improved on my nutrition strategy; more rest and recovery in my training; and getting smarter during races. And because of these reasons, I became more confident to finish the ultra races that I intended or scheduled to join this year. I guess, I might not retire in the near future after all.

I was surprised with my performance in last month’s Translantau 100K in Hongkong even if I was stopped at Km 90 due to severe weather conditions in the mountains. If only the race was not stopped by the Race Organizer, I would have improved my previous finish time last year by one hour or more. Instead of earning 3 UTMB Points, all of us who were stopped along the course were considered as Official Finishers and were given 2 UTMB Points. Due to this setback to earn 9 UTMB Points in 3 Ultra Races, I decided to join the 2016 KOTM’s Four Lakes 100K (FL 100) Trail Run and earn 3 UTMB Points from it.

Here are the reasons why I did good in this race:

More Time To Recover & Rest—-The Translantau 90K that I’ve finished 2 weeks before the FL 100, became my “peak LSD” in preparation for the said race. And the last 50K LSD “heat training” that I did one week before the race was my taper run. Within those two weeks, I did two sessions of leg workouts and the rest were devoted to rest and more sleep. However, before the Translantau 100, I finished the Condura Skyway Marathon (42K) and my Fort Magsaysay To Dingalan 65K Ultra Marathon Race.

Total Elevation Gain——As a mountain trail runner, this is the most important factor to consider in one’s training and looking at the data gathered and recorded by my Suunto Ambit 3 Peak GPS Watch, I was able to satisfy the suggested Total Elevation Gain that I have to attain within a certain distance. For example, if the 100K trail course has a total elevation gain of 15,000 feet, one must be able to train in a course that has at least, a total elevation gain of 1.500 feet within a distance of 10 Kilometers, 3,000 feet in 20 Kilometers, and so on. My playground offers a Total Elevation Gain of 2,100 feet within a distance of 8 kilometers and if I extend it to 22 kilometers, I would attain a total elevation gain of 4,250 feet! This explains why I have the endurance to go up to the peak of any mountain during races.

Screen Shot 2016-04-03 at 11.10.39 PM
Four Lakes 100 Elevation Profile From SUUNTO Ambit 3 Peak GPS Watch

Nutrition & Hydration Strategy——Don’t wait till you feel you are hungry or thirsty that you start ingesting your food or drink your water/hydration mix. To be safe, once my GPS Watch beeps to register that I have completed ONE MILE (1.6 Kilometers), it usually reminds that I have to eat a bite food or drink my hydration mix. If I have an average speed of 3 miles per hour, then I would hear 3 beeps within the hour which means that I ingest any solid food and drink my water 3 times within the hour. Drinking and Eating are done while on the move which I usually do during my training runs.

Train Heavy, Race Light——I usually bring a lot of water during my training runs but in my races, I only carry enough water to sustain me in between the Aid Stations. But I carry my CarboPro mix packs which I programmed to sustain me for the whole course in my pack. For this race, I carried 12 packs (1 pack/serving in every two hours of running/hiking) but in the end, I only used 7 packs for the whole course. The pack that I carried during the which consisted of the mandatory kits and extra solid foods which was lighter in weight than the pack that I carry in my training runs.

Running Kit——The ASICS Running Shorts that I’ve been using in my ultra trail races since last year’s CM50 is becoming my favourite and my best running shorts so far. The ALTRA Superior 2.0 which I used in Translantau 100 is becoming my favourite choice for my 100K trail races, too! My Salomon 5-liter Advance Skin 3 Pack with its accessible pockets had been also helpful that I could easily reach for my bite foods and candies while on the move. My reliable PETZL Tikka XP which is very light gave me more confidence to run during nighttime.

Reduction of Stop Time in the Aid Stations——It would have been smarter not to stay long in the Aid Stations but I committed some mistakes in having unnecessary “long breaks” in between Aid Stations to sit and eat my food. My experience in the FL 100 taught me some lessons and with the hope to improve on them in my next races.

Screen Shot 2016-04-03 at 11.06.31 PM
SUUNTO Ambit 3 Peak Data

Looking at the data that had been recorded by my SUUNTO Ambit 3 Peak GPS Watch, I will have to improve on my average pace by eliminating some of the mistakes that I’ve committed in this race. I think I brought so many CarboPro Packs and bite foods in my pack. My lack of knowledge on the route from East Market Proper to Dayap made me slower during the race. I think I was also overdressed when the heat of the sun was at its strongest along this part of the route. Hopefully, I will be able to correct all these mistakes on my next race!

FL 100 Results
Ranked #109 Out Of 127 Finishers

I will be back to this race next year!

Race Report: 2015 Clark-Miyamit 50-Mile Ultra Trail Run (CM50)


There are three (3) important things or information that I would like to report on this challenging ultra trail run here in the Philippines: First, I finished this race with a faster time as compared to my last year’s performance; Second, This is my third consecutive finish and I am on my way of getting the most coveted Baddest Ass Award for this event with two more editions to finish; and Third, I am still the Defending Oldest Finisher for three consecutive years for this Event.

Even if there is no specific award for the Oldest Finisher for this race, I am sure that I will be the First Senior Citizen to have coveted the Baddest Badass Award before the end of 2017. And maybe, it will mark my “retirement” from ultra trail running. Just maybe!

As compared to my last year’s five-month training preparation, I have a shorter training period for this year which are mostly done on the road, oval track, and hiking in the mountains on the first month of my 4-month training period. However, on the last six weeks/peak period, almost all my training long runs were done on the road, specifically on the road races that I have Race Directed since the middle of September. My Mt Batolusong 25K Trail Run participation was a test to validate my new nutrition strategy and narrow down the things that I need in a hot environment. However, I had more time to work on on my core and to rest/sleep as recovery for my running on the pavement.

Last year’s Race Report on my second time finish on this event was very detailed and it was divided into four (4) parts and I believe that this is now considered as the number one resource or reference material for those “newbies”/”first-timers” for the CM50-Mile Event. I will not go through to the detailed description of the course and the usual “section-by-section” narrative of my experience on this Race Report but rather state or tell those significant things that made me faster and more efficient in my finish this time. The following are the things that I’ve considered and applied during the race:

  1. Simplicity and Being Light—One week before the race, I’ve decided to use my two-year old New Balance MT  Minimus 1010v2 Trail Shoes which is very light (240 grams per shoe) and it proved to be the best shoes for this kind of trail running. Believe me, there was no grain of lahar that penetrated its upper mesh and therefore, its lightness did not change throughout the race. I did not use any Hydration Vest but I’ve used three (3) Simple Hydration Bottles with only one bottle filled with my nutrient mix (Carbo Pro) diluted with water; one bottle of Carbo Pro Powder only; and one empty bottle as my previsionary “Water Cup”. It was only from the AS4 to the Peak that the three (3) Simple Hydration Bottles were filled with Carbo Pro Mix and Water. On my way back to the Finish Line from AS3, I have one bottle filled with Carbo Pro mixed with water and one bottle filled with Water Only. Stashed in my UD Waist Belt Pockets are two (2) Clif Meal Bars & Whistle. I was not wearing a pair of Calf Sleeves.
  2. Familiarity of the Route—One month before Race Day, I went up to the “peak” and Miyamit Falls for a training run. It was on this run that I was able to “program” and plan for my hydration and nutrition requirements. I was able to register also my Average Pace on this part of the course in order for me to determine the “timeline” on each part of the course (from Km #24 to Km #56). I found out that I must be able to leave AS3 on my way to the Finish Line not later than 2:00 PM (13 hours elapsed time) so that I have enough “buffer time” before the cut-off time of 18 hours.
  3. Simple/Light Nutrition—-Eating a Full Meal (Rice & Meat “Adobo”/Beef Steak) before the Start of the Race (30 minutes before) with hydration (water + Carbo Pro), proved that I could last for the first 3 hours without any hydration or food intake. I took two (2) packs of Clif Bloks and One Meal Bar for the whole duration of the race. I would place a Coffee Candy in my mouth regularly in order to maintain a little sugar to my saliva. In every Aid Station, I would drink a lot of water and Coke/Sprite and ingest a number of watermelon bites. I never used the two (2) Sports Gels stashed in my gloves during the race. I did not have any Drop Bags, instead, I used a “FlipBelt” where I stashed my CarboPro Powder Mix and Clif Bloks.
  4. Heat Training & Hydration Strategy Training—One month before the Race Day, I’ve conditioned myself to start drinking my water after running 10 miles (16 kilometres) under the heat of the sun. Yes, I would carry a lot of water on my vest and waist during my training runs but I would finish my workout with only one-third being consumed. I suspect that my practice of ingesting Succeed Salt Capsules (it started last August this year) during my training runs had helped conditioned my body to take in a limited amount of water even if I was sweating profusely without having a “bonking” feeling/situation.
  5. Focused On Moving Forward—I did not spend a lot of time staying on the Checkpoints and Aid Stations. I guess, two minutes of stay was my longest and it could be when I asked one of my running friends to take a picture of me at the “Turn-around” Point at Km #40 and another picture taking at the Miyamit Falls’ Checkpoint. The rest of my brief stops in the Aid Stations were purely on refilling my hydration bottles and mixing my nutrition powder. Instead of stopping in sari-sari stores for ice cold sodas along the populated areas, I opted to take a “quick shower” in a place where the locals were washing their clothes and it made my core and body to be more relaxed.

There are also things that made me slow down during the run. First, I’ve experienced “muscle cramps” on the groin area of my legs along the section AS4 to the Peak that I needed to slow down and hiked on this section. I expected this to happen as I knew I lacked the necessary total elevation gain in my training. This experience never happened in my previous two editions. Second, The heat of the sun slowed me down on the section from the Miyamit Falls to AS4 that I spent almost one hour for a section that is ONE MILE long, instead of power hiking it for about 25 minutes during my recon run. And of course, I carried all my gear down to the Falls from AS4 and back. From AS4 to AS3, I “power hiked” alone on the trail and started running downhill when another runner from behind was trying to pass me.

Looking at my Suunto GPS Watch once I arrived at AS3, I began to be in a “panic” mode knowing that I was registering an Average Pace of 3.0 miles per hour. I knew that it will take me five (5) hours to reach the Finish Line from this point. So, I started to run, jog and power hike until I was able to pass runners who were either lost, simply walking, resting on the side of the trail, or those who would stop in each of the Aid Stations or Convenience Stores along the way.

Finally, I finished the race with a time of 16:43:58 hours, faster than the time I had last year (17:50+), with a ranking of #87 among the 132 finishers within the cut-off time of 18 hours. I am still the Oldest Finisher of this race and I have the intention of defending this title for the next two years. Hopefully, I will get the most coveted Baddest Ass Award of this Event.

Crossing The Finish Line
Crossing The Finish Line With RD Jonnifer Lacanlale

Congratulations To All The Finishers and Thanks to RD Jonnifer Lacanlale and his staff/marshals/volunteers for a successful event.

The training for the next year’s edition will start next week. Keep on running!


Key Lessons On Ultrarunning From Ann Trason


If you don’t know Ann Trason, then you are not an Ultrarunner. Before you type her name on Google, I would like to briefly mention that she was the Lady Champion of the Western States 100-Mile Endurance Run for 14 times after failing to finish the race on her first two attempts. She has also broken twenty (20) World Records On Ultrarunning during her career.

She is now a Running Coach of a Middle School in Berkeley, California; coach for a High School Track Team; a Race Director; and an On Line Ultrarunning Coach. She is also a columnist/writer for the Ultrarunning Magazine where this post was taken/copied. The following is the complete copy of the “Ask Ann” Column in the said magazine.

Ann Trason
Ann Trason

Dear Ann,
Now that you’re a coach, are there some, key lessons you pass down from your own coaches?
—Michael

Dear Michael,

I have always loved being a student of the sport—reading, asking questions, trying new things and learning what worked for me. I have been fortunate to have had several coaches who helped fill in gaps in the complex puzzle we call ultrarunning. Your question gets me thinking about the one who did the most to make me the runner and coach I am. Here are 17 lessons I learned from my favorite coach.

Consistency My coach made sure I would get out and do something every day, every week, every month, year after year. Sometimes a lot, sometimes just a little, occasionally fast, often very slow. Consistent training yields consistent racing.

Smile Happiness is infectious. She taught me that no matter how tough the day, there is always something to smile about. How can I mope about something going wrong when it makes such a great story to tell my friends?!

Passion I learned that a good coach must be as passionate as her runner. She made it obvious that she shared my passion for running.

Adaptability I always admired her instinctive ability to accept and instantly adapt as situations changed. We all have that ability buried inside us. I’ve worked hard to let it out.

Running is play, not work I have no idea how many miles I’ve run in my career. I can thank my coach for that. She viewed running as a chance to play. For her, there was no focus on checking the pace, tracking the miles, counting the hills. A good run was being out there having fun.

Positive attitude My coach never scolded me, never barked orders. She did give me a sly look occasionally when I did something wrong, but it was always to encourage me to do something better.

Relax let yourself run free. My coach had a naturally beautiful running form. Just watching her glide along, no tension, no unnecessary motion, made me a better runner.

Keep it simple My coach was always about simplicity. She was not into fancy gear. It was simple running.

Don’t overthink things She taught me to never overthink my running.

A steady trot is the fastest way to cover ground I’ve never been the fastest runner, nor the most talented. My coach helped me learn to run steady, mile after mile, never worrying about the other runners or the terrain ahead.

Enjoy the journey For my coach, it was always about the journey, not the destination.

Explore new places My coach made sure we searched for new trails, trotted across green meadows and bounded up hills just because they were there.

Stop to sniff the flowers My coach taught me to look around, smell the fresh air and feel the breeze blowing my hair. No matter how long or hard a run I had scheduled, there was always time to take in the unexpected view.

Get wet Every stream, every lake is a chance to refresh yourself with a quick dip.

Enjoy the moment There are times in life when we need to run long and hard. There are other times when the best thing to do is sit quietly at the edge of a meadow. In either case, enjoy the moment.

Passing the torch Seeing her love of running increased my desire to give back to the sport by mentoring and coaching others.

Unleash your potential There are times to hold back, but there comes the moment when you need to take off the leash and let yourself run free.

Things That Went Right During The Zamboanga 50K Run


Since it is the first PAU-sponsored event in Zamboanga City and being the one who suggested this event to be conducted, I have to join this race as one of the participants. It is also a part of my “evaluation runs” to test if my training program is working and to determine some feedback on the improvements of my speed, endurance, and nutrition. Lastly, it is also a way of sharing my experience to my readers, hoping that one day they will be a part of this race.

The following are the things that went right (nothing went wrong) during my race:

  1. Nutrition & Hydration——It is the most important thing that one have to plan and have a strategy to be strictly followed. Although there are Aid Stations along the route, I was not well-informed on the details and what kind of drinks and food that are available in the race. Although, I have a general idea of what to expect in those Aid Stations. So, I brought my own “mini-nutrition pack” stashed in my Ultimate Direction (UD) Belt. I had 2 Packs of Clif Bloks (one pack in the UD Belt & one pack in my shorts front pocket); one Meal Bar (in my UD Belt); and two (2) GU Gels stashed in my shorts back pockets. I have also a CarboPro mix (with water) in my Simple Hydration Bottle and 2 Packs of it in my other Simple Hydration Bottle and in a tiny 3-oz bottle (without liquid). I brought with me two (2) Simple Hydration Bottles where one of it is filled with CarboPro Mix without water and the other one with water mixed with CarboPro. Both bottles were clipped with my UD Belt and placed on the back of my waist. A reserve CarboPro powder was inside a 3-oz bottle which is stashed in one of the pockets of my UD Belt.

My Nutrition & Hydration Strategy went this way: Eat 3 pieces of Clif Bloks every hour or when I feel hungry; sip my Carbo Pro mix every time my GPS watch makes a “beep” sound which tells me that I just finished one mile which is approximately equivalent to 14-16 minutes; drink at least 16-oz of cold water in each of the Aid Stations; eat something solid and fruits in the Aid Stations; take one Succeed S-Cap Capsule every 1.5 hours; and then mix the remaining CarboPro mix with Gatorade Drinks. The routine was repetitive and boring but it was the key for having successfully finished the race without any issues or problems.

CarboPro Powder Mix
CarboPro Powder Mix

2. Run Light——I did not use a hydration vest in this race and I only used my UD Belt where I stashed my IPhone and my food/mix powder. I was practically running with one Simple Hydration Bottle with liquid in it entire the race. I would have been lighter if I did not bring my Clif Protein Bar and two (2) GU Gel Packs but these food were my “reserves” just in case of any “bonking” during the race. I was using my Hoka One One Huaka which is more of Road Shoe but it is the lightest shoes that I can use for this race. No need for Calf Sleeves; Arm Sleeves; or Gaiters for this run.

3. Metronome——For the past months, whether it is a trail run workout or speed workout on the flat paved roads, I would use the Metronome Application stored/downloaded in my iPhone. This is the very reason why I had my IPhone with me with only one earbud on either on my right or left ear during the race. Metronome Application is now available Free for download and it is very useful in my making sure I was consistent in my running cadence. My Metronome is set at 180 steps per minute and the “tick-tock” sound could be easily followed every time I step each foot on the ground. Since my steps are short, quick and fast, I could easily keep in step with the beat. In the early 70s whenever I join Marathon Races, I’ve been using a metronome which was installed in earlier models of TIMEX/CASIO Running watches where there was no need for earphones. The continuous beat would remind or motivate you to keep up with your cadence during the run. Try it in your training runs and you will be surprised on how fast you can keep up with your pace. Additionally, it will generate constant reminder and at the same time distract the pain and suffering you are experiencing during the run. Whether I am the in the ascending or descending parts of the route, the metronome reminded me to maintain my cadence even if I was power hiking on the ascents.

The Actual Metronome

4. Heart Rate Monitor——As soon as I reached the first peak of the course (Km #7), my HR reached its highest Average Record of 163 beats per minute (bpm) which happens to be my Maximum Heart Rate as shown by my Suunto Ambit 3 Peak GPS Watch. I made a quick stop and rest at AS 1 by drinking some water and eating a suman (rice cake). It was a quick stop just to lower my HR and after about a minute, I continued the race by walking and only started to jog again when my HR was lowered to 150 bpm. Throughout the race, I was monitoring HR every mile and I was satisfied that I was able to maintain an average of 150 beats per minute and would not exceed my Maximum Heart Rate of 163 bpm in the steep ascents. Through my HR Monitor, I did not feel any tiring moments even when I was hiking up the “Gulod de Medyo” area.

5. Electrolytes & Salt Tablets——Aside from the CarboPro mix, I used one tablet of GU Electrolyte Tablet every bottle of mixed drinks and constantly orally had taken Succeed S-Caps Capsule every 1.5 hours throughout the race. While my drink mix maintain the continuous replenishment of electrolyte loss through excessive sweating, the S-Cap Capsules made me pee regularly and try to give some feedback on the color of my urine if I am dehydrated or not. This combination of Electrolyte Tablets and S-Caps had been very effective to me in my training for the past 2 months.

6. Quick & Short Stops In The Aid Station——Except for the “turn-around” points where I refilled my bottles (with the CarboPro & Electrolyte Tablet inside) with Gatorade, ate some foods, and drink at least one bottle of 16-oz mineral water and some Cola drinks, where I would spend at least 3 minutes, the rest of the Aid Stations were short and quick to pick-up some bottled water to drink and then leave to continue the race. I think I spent not more than 2 minutes in these remaining Aid Stations during the race. I ate my Clif Bloks and then drinking my CarboPro mix while I was hiking the ascents.

7. No “Selfies” & Unnecessary Picture Taking——Taking some pictures with ones camera or IPhone is very cumbersome and very irritating sometimes as you have to bring out and bring in your camera to your race belt’s pocket or hydration pocket. If it is wrapped with Ziploc or some plastic pouch, the opening and closing of this protection from being wet and damped would entail some unnecessary movements that result to being not focused to the main task of running efficiently. Even if it takes a few seconds to “point and shout” ones camera, if these seconds are totaled or accumulated, it would add up to more minutes of delay on the course. Since there are members of the Running Photographers in the race, I just let them, as the experts with better cameras, take my pictures and just wait for them to post their pictures on Facebook.

In a nutshell, proper training/preparation where one has to test his apparel, hydration system, nutrition & hydration strategy and positive mental attitude is the key to a successful finish in an ultra running event. Although, running is an experiment of one, I hope my experience will guide you or test the above mentioned factors if you can adopt them or incorporate them in your running style or manner of finishing an ultra running event/race.

Expenses:

Round Trip Ticket (Cebu Pacific)——P 1,200.00 (Promo Fare/Sponsored By ZRC)

Hotel Accommodation & Meal——P 4,000.00 (2 Days)

Gratuitous Expenses (Tips)—-P 500.00

Total Expenses——P 5,700.00

My Running Kit (Picture By Running Photographers @ Km #17)

Even if I am not an sponsored athlete, I would mention the things that I’ve used during the event:

Running Shorts & Shirt——ASICS

Running Shoes——Hoka One One Huaka

Runner’s Cap & Compression Shorts——Under Armour

Sunglasses——Oakley

Buff/Neck Sleeves——BUFF

GPS Watch——SUUNTO Ambit 3 Peak

Hydration Bottles——Simple Hydration Bottles

Race Belt & Pouch——Ultimate Direction

Socks——DRYMAX

Nutrition——CarboPro Powder Mix; Succeed S-Caps; GU Electrolyte Tablets; Clif Bloks; Water & Gatorade (@Aid Station); Rice Cake (Suman), Boiled Banana, Ripe Bananas, Watermelon, & Hotdog Sandwich (@Aid Station)

My training continues…Go out and run!

Four Weeks


I did not realize that I’ve been through with four weeks of my training since I’ve started for the 2015-16 Ultra Trail Running Season. I started my training on August 3, 2015 and the first day was a Rest Day with some stretching exercises.

I am still following a training schedule program which I’ve been using for the past two years with a little adjustment on my weekly training volume which I’ve increased within the range of 5-10 miles per week which are mostly done in my weekend LSDs. Before, I was doing an average of 50-55 miles per week but for the past weeks, I’ve have reached a peak of 66-67 miles per week. I feel okey, healthy, and pain-free from my knees and legs and had no bouts of leg cramps or “bonking”. I guess, there must a lot of good reasons why at my age of 63, my knees are still holding up and I could still hike some steep mountains.

Surprisingly, the bottle of Aleve that I bought lately have not been opened yet and for the past four months, I’ve never taken any pain-killer tablet in my races and trail running workouts.

My past failures to finish a 100-mile mountain trail run were caused by nutritional and hydration problems on my part. It took me two or more years to experiment what is good for my body. I really don’t have any problems with 50Ks, 50-milers, and 100K trail races with regards to nutrition but when I join 100-milers in higher elevations, my nutrition just put me down on the last 30 miles of the race. Following my experiences in the 100Ks that I’ve finished, I would only take in Energy Gels and Water and some solid foods offered at the Aid Stations and I would finish the course without any problem. I bought some nutrition books for endurance athletes and made some researches on the Internet. In addition, I was able to get some suggestions and advise from the Filipino veteran ultra runners residing in the United States. These suggestions from them confirms the studies and researches that I’ve read on books and on the Internet.

On this new training season, I’ve concentrated on my nutrition, not only before during, after my workout, but completely observed my daily nutritional intake to my body. I don’t count the calories of the food that I ingest but I make sure that I have Carbohydrates, Fats, Proteins, and Vegetables/Fruits in my 3 meals a day. Snacks in between meals would be anything, whether it is a fruit juice, milk, fruits, yogurt, or snack bars. I’ve never drink milk when I was in the military up to 2 months ago. Lately, by accident, I found out that Organic Fresh Milk does not give me stomach trouble caused by lactose intolerance. I’ve indulged myself in eating avocado as part of my meal or snacks and ate more foods rich in fats.

On my nutrition before my runs, I would have a breakfast of coffee, oatmeal or cereal with milk, avocado with milk & sugar, yogurt or fruit juice.

During my runs, I would hydrate every time my GPS watch would beep to indicate that I’ve covered a mile and have to strictly do the said “drill” every time I hear a beep. For my runs less than 8-9 miles, I would just drink water and ingest one 1 capsule of S’Cap every hour and after the workout. But for my LSDs on weekends which are more than 9 miles, I would carry with me a Tailwind Mixed with water in two bottles and purely Water in my 1.5-liter hydrapak on my backpack. I would alternately, drink Tailwind and water every other mile. I would also ingest 1 capsule of S’Caps every hour. At the turn-around or after finishing the first half of my run, I would eat any solid food I brought with me like, boiled potatoes, power bars, dried fruits, and some baby foods (fruit/vegetable).

I’ve stopped using Energy Gels in my runs since the start of this training but I still carry at least two packs just in case of emergency. I’ve have observed in my past races that Gels, after ingesting about 10 pieces, I would end up throwing up even if I use different flavors and flavors that I liked that didn’t give nauseated feeling in my past ultra runs.

My post-nutrition intake would be immediately after the workout——lots of water, one can of coke or one bottle of Ensure and a Power Bar. Once I arrive home, I would eat a complete meal. For the rest of the day, I would continuously hydrate myself with water, sometime consuming 1.5 gallons of water, and strictly adhering to my complete meals—carbohydrates, fats, protein, vegetable and fruits.

I have also incorporated “speed” workouts in my weekly program. Wednesday is usually my “speed” day where I do it on a flatter ground and paved road. This is the only time that I don’t go to the trails and mountains. Since there is no oval track near my place, I would go to a Public Park (Echo Lake Park) where the streets that surround it has a total loop distance of exactly one mile. I would do 1 mile X 5-6 repetitions or 2 miles X 3 repetitions with at least 5-6 minutes rest/jog intervals in between repetitions. In the mountains/trails, I usually do some “strides” or fast & quick leg-turn-overs on flatter portions within a distance of 50-100 meters just to give some “wake-up” drill to my tired leg muscles.

Once or twice a week, I would go to a mountain which has an “up and down” route where I have measured on each way (2.5 miles up & 2.5 miles down). I would wear my hydration vest full of 2 water bottles and 1.5-liter of hydra pack on my back with solid foods. I would practice “power-hiking” on the UP portion of the course and never attempt to do any run or jog. I would register the time from the start up to the time I reach the peak of the mountain. I have observed that I had been improving my time to reach the peak every week. The 2.5-mile distance has a vertical distance of 1,280 feet and my best time so far is 43 minutes for the power hiking in the UP direction.

On the ridge of the mountain, I would continue jogging and hiking for about 2 to 3 miles. On my way back, I would start my fast “downhill run” on the measured portion where I had my “power-hiking” workout. My attitude here in the fast downhill run is a “go for broke” one! A fast and continuous downhill hill run for 2.5 miles would “thrash” my legs! I am surprised that my old knees can still withstand the hard pounding of my feet on the ground. Every week, I would improve on my time on this downhill run! My fastest time for the downhill run is 20 minutes!

Power Hiking and Fast Downhill Running made me register a faster pace and speed for my daily runs!

Two years ago when I shifted to trail running, I did not give any attention to the vertical distance (total ascent/descent) in my workouts but it was later last year that I have concentrated more on the vertical distance of the trails I’ve been into. However, since I’ve started this new training season, I made sure that my weekly totals on the vertical distance will not be lower than 6,000 feet.

On Mondays and Fridays, I would do some stretching and calisthenics/core strengthening exercises. I would also do “foam rolling” to my legs for about an hour with more concentration to my calves, hamstrings, quads, and butt muscles. I stopped my lap swimming for the past weeks and by the end of the 7th or 8th week, I would incorporate (stationary) cycling in my weekly workouts.

On my weekend LSDs, I don’t eat a heavy breakfast (ingesting only coffee) as I want to simulate how I would apply my nutrition and hydration strategy when I am about to reach my “bonking” period which is about 1-2 hours after the start of my run. This is where I would observe how my body would react to any food or fluids that I take in, whether it is water, Tailwind, S’Caps, solid foods (power bars/baby foods/power bars/dried fruits), electrolyte mix, or Clif Bloks. So far, my maximum LSD distance was 20 miles in 6 hours, carrying a heavy load of water in my hydration vest (2-20 oz of water bottle & 1.5-liter hydrapak on my backpack + solid foods). However, if I use my 2-16 oz Simple Hydration bottles (tucked in my race belt with power bars) and one hand-held 12 oz handheld water, that same distance of 20 miles is usually done in 5 hours or less!

On the technical aspect and the monitoring of my body’s feedback on my performance every workout, my Suunto Ambit 3 Peak GPS Watch, had been very useful in monitoring my Heart Rate, VO2, Cadence, Calories Consumed/Burned, and Recovery Period. From these data, I would be able to know on what to do for my rest and recovery for the next workout. My daily workouts are properly recorded in a notebook/journal that I would religiously write every time I finish a workout, to include, what I feel before, during , and after the workout.

In summary, I attribute my faster and better performance in my 4 weeks of trail running due to the following: (1) Better nutrition before, during , and after every workout; (2) Constant hydration with water every mile with Tailwind every other mile; (3) Speed workouts on Wednesdays and incorporation of “strides” in my daily runs; (4) Adapting my body to ingest S’Caps/Salt Sticks during the run on hotter days without any negative reaction to my body; (5) More vertical distance and higher altitude hiking/downhill running would acclimatize my respiratory system; and (6) “Foam Rolling” & Stretching with Core Exercises twice a week.

I’ve been using my Hoka One One “Speedgoat” Trail Shoes for my LSDs and most of my daily runs while my Inov-8 Race Ultra 270 Trail Shoes and Hoka One One Challenger ATR would be used in my recovery and tempo runs.

Monthly Mileage (August 2015): 238.65 Miles or 381.84 Kilometers

Monthly Vertical Distance (August 2015): 41,605 feet

"Leave No Trace"
“Leave No Trace”