First thing that a person should learn and keep in mind if he/she plans to engage in any activity or sports is to know the rules, regulations and the etiquette that go with it. Rules and Regulations are there to ensure orderliness and safety for everyone. Etiquette, whether they are written or not, are accepted norms which translate to good manners and courtesy among a group of individuals which encourages discipline and respect to one another.
In trail running or hiking the trail, a person’s etiquette gives some impact to himself, to others who are using the trail, and in general, to the preservation of the beauty of nature, the outdoors and our surroundings. If you know and apply etiquette on the trails, it is a reflection of who you are and the attitude you show to other persons and to the nature around you. In a broader aspect, you also try to maintain or preserve the nature around you.
For the past days, I’ve been reviewing my blog posts and trying to see if I was able to post a list of etiquette for persons using the trails. I found out that I simply made a link to a website where a Trail Etiquette was listed but that link is no longer available nowadays. So, it gave me the idea to come up with a list of Good Manners to observe while enjoying the trails so that anybody would have a reference or as a reminder. Most of the list of etiquette I will be posting are generally accepted practices but there will be some which are also emphasized for the local (Pinoy trail runners/hikers) to ponder and apply due to our culture and traditions in the locality/area.
Strictly adhere to “Leave No Trace” Principle——This is the “umbrella” practice that should be strictly observed which covers almost all the detailed etiquette in the outdoors. It does not simply mean that you should dispose your waste properly but it should also mean that one should plan ahead and prepare properly before hitting the trails; do your running/hiking on established and durable surfaces; leave whatever thing/s you see or find along the route; respect the wildlife, whether they are plants or animals; and always be considerate and courteous of other visitors or co-users of the trail. In essence, do not alter or disturb the “cycle of nature” in the mountains, forests, and outdoors. Always consider yourself as a “guest or visitor” of the outdoors and you should stop the practice of getting “pasalubong” or gift for your friends or souvenirs for your collection or getting a physical evidence to brag about. A “selfie” picture with nature speaks a thousand words of appreciation or envy from your friends!
2. Stay On Marked And Established Trails——In the Philippines, most of the established trails were made by our tribal ancestors which they repeatedly used in “foraging” or hunting for food. Later, these trails were extended when they explore and expand their reach to other territories and lands or when they transfer from one place to another due to survival from the elements, wildlife, or from other tribes or factions. Except for the established communities and villages of our Mountain People/Tribes, most of these trails are single-track that became deeper and wider due to “flash floods” or raging waters coming from the peak of the mountains during the rainy season. These trails were used during those times when our forefathers were fighting against our foreign invaders during the Spanish, American and Japanese occupation periods. Now, insurgents, bandits, and illegal settlers/loggers/miners are the ones using these trails in the unexplored mountains, deep forests, and some of the known trails in the country. It is sad to observe that most of the trails do not have any names or any markings. There is no initiative from the central government as well as from the local government to establish these trail markings. Maybe, it will take another one or two generations for these trails to be properly marked. In short, in the Philippines, it is safer to run or hike on trails which are often and usually used by the locals and tourists. If one has to make some exploration, a runner/hiker must have an appropriate land navigation/map reading skills.
Pacific Crest Trail Marking (Cycling NOT Allowed)
3. Leave Your Itinerary To Your Parents, Relatives Or Friends——Whether you are going to the trails alone or with a friend or group of group of friends, make sure that somebody who is left behind in your home/house knows your itinerary. Let him/her know how many hours or days you will be in the outdoors and if possible, provide an information on the expected time of the day that you will be arriving back in your house. In this age of Internet and fast communication or GPS technology, it would be easy to communicate to your loved ones through mobile cellphone connections or through the Social Media. In a group of hikers/runners, it is mandatory that at least one among the group is very familiar on the trail systems in the area who will be automatically designated as the official guide of the group. If not, get a local guide at the nearest barangay where the trailhead is located. In the Philippines, it is mandatory to inform the Barangay Captain or village chief or his/her designated representative of your presence in the area. Most of the barangays have a registry or logbook/journal where each of the visitors are required to sign in upon their entry to any of the trail system in the area. It is also a part of the protocol to inform the Barangay upon your exit from the area.
4. Weather Forecast Means Everything——Whether it is sunny or with a chance of rain or thunderstorms, one must be able to prepare for any eventuality or contingency that may arise as a result of the situation. When it is sunny or dry, one has to prepare for hydration and appropriate nutrition. Depending on your rate of sweating (as per experience) you can determine the volume of water that you will be bringing with you. If you have planned for your route and know of sources of potable along the way, you can at least arrange for the proper re-supply of your hydration needs. In case of chance of thunderstorm, decide properly if you intend to push through or not with your outdoor activity, most specially if the place where you are heading is under the Area of Influence of the rain or thunderstorm. In crossing rivers and streams during thunderstorm, it is better not to cross the river and decide to look for a higher ground and establish your camp or look for a nearby village where you can rest and wait for a better weather condition. If you are with a group of trekkers/backpackers, make sure to always bring a considerable length of rope which could be used in crossing rivers. If you plan to be in a place where there is an occurrence of daily rain or thunderstorm, a water-proof jacket is a must in ones pack. Bottomline, do not fight with nature, it always win in the end!
5. Stay On Switchbacks——This is related to #2. It is with ease, comfort and feeling of being relaxed to be running and hiking a switchback towards the top/peak of a mountain. It is more energy-sapping and mind-breaking to be slogging it out on a direct, assault and steep trail towards the peak as compared to going along a switchback. However, on the way back from the peak to the foot of the mountain, it is very tempting to cut the switchbacks and take the direct route down the mountain taking advantage of one’s gravity/weight and this is where most of the violations occur. Aside from altering the landscape of the mountain and creating a footpath for others to follow, it will also have a great impact on one’s knees and quads to be overworked and stressed due to heavier load on the downward motion of the body. These additional paths due to making shortcuts on switchbacks will ultimately become another trail in due time and ultimately, the starting point of erosions during flash floods or heavy rains.
6. Warn & Say Something Before Passing A Runner/Hiker——If you intend to pass a slower runner or hiker on the trail, make a distinct sound to warn that you are behind the person. The sound could be a “fake cough”, a “tweet” sound from your lips, or a sound from the pounding of your feet on the ground. or a simple clapping of your hands. Once you are few feet or “hearing distance” from the back of the person, you can say that you are passing him/her on the left or right. Simply say, “On Your Left” if you are passing him/her on the left or “On Your Right” if you are passing on the right. If the person would stand aside or give way for you to pass, don’t forget to say “Thank You” or “See You Later On The Trail” just to be polite and very encouraging to the runner that somewhere along the trail, the person whom you passed will be able to catch you. If you are meeting somebody head on along the trail, the slower one should step aside from the trail and give way to the faster runner. This is best exemplified if the faster runner is going downhill on a single-track trail while the slower person is going uphill. Don’t try to impede or distract the speed and momentum of a faster runner you meet on a trail. Also, It is customary to greet anybody whom you meet along the trail with simple greetings of “Good Morning”, “Good Afternoon”, “You’re looking great”, or simply say, “Good Job”. It is best if you say such greetings with a smile! If you can’t speak, just simply nod or wave your hand with a smile to the other runner/hiker.
7. Know The Capacity Of The Trail——If you are a Race Organizer, you should know the Capacity of the Trail or the number of persons that could pass or use the trail without causing any damage, erosion, or that will cause the widening of the trail or establishing another new parallel trail from the old one. If the trail is single-track, make sure that the runners are spaced on a single file in running/hiking through it. Have a good judgement in conducting a trail running event if the trail can accommodate more than 100-300 runners without endangering the original condition of the trail. In my observation in the Philippines, trail running events shorter than a marathon distance with hundreds of participants is not “healthy” to the preservation of our trails, most specially of the event is held during the rainy season/months.
8. Expect To Be A Dirty Trail Runner——Expect a lot of dirt, dust, mud, debris, and skin scratches in a trail running event. It is a given fact that a clean runner at the start will become the dirtiest and most obnoxious runner at the finish line. This is true in the country due to our extended rainy season/monsoon rains and the presence of stream and river crossings. To add to the dirt & mud, we have a lot of leeches, snakes, mosquitoes, ants, ticks/biting insects and sharp grasses & thorny bushes in our mountains and forests. If you are a victim of leech-attacks, expect to have your blood to be flowing on your body. If you fall on slippery and muddy trails, expect your shorts and shirts to be dirty and your butt to be full of bruises. However, there is always a chance to come out clean if the trail passes through a flowing stream or river where one would have a dip and a chance to wash the dirt and mud from ones apparel or body.
10. Unload Your Body Wastes Properly——I am already an expert in urinating while I am trotting or jogging on the trail provided nobody is around to see me doing it. As for the ladies, it takes a lot of guts for them to pee on their tights while running. As practiced by many, a person would look for a place where he/she could hide while urinating in about some distance from the trail and this is a good practice for everybody. However, if the time on how fast one can do it will be considered, there are a lot of techniques that one could follow to pee efficiently. These techniques are efficiently done if one is using the traditional running shorts. For men, one way to do it is to pull down the front waistband of the shorts and bring out ones “thing” and let the urine flow. The other way is to pull the inseams of the shorts (bottom of the shorts) inward and let ones “thing” out of the panty-liner of the shorts and allow the urine to flow. If you want to be nearer to the ground, you can take a “lunge” position or kneel to the ground while peeing. For the ladies, it is fast for them to bring down their shorts as they squat nearer to the ground and once the shorts is clear from the flow of urine, their problem is solved. The other way is for them is to grab and stretch the inseam of their shorts while they squat nearer to the ground until there is no impediment as to the flow of their urine. If these techniques are put into practice during training, there will be lesser time to be wasted during the race. For the more difficult task of taking a crap on the trail, it is either you do it in the Aid Station (if there is a facility) or do it along the route but it should be far enough that the smell of your crap & fart would not affect the breathing of the other runners passing the place where you take your crap. You can prepare a shallow hole or depression on the ground where you can “shoot” your crap and then cover it with soil, debris, dry leaves, or anything that you could see on the ground. Make sure to bring your toilet paper or used “wet wipes” with you for disposal at the next Aid Station. If there is a stream or river along the trail or near the trail, it is the best option to relieve yourself on the water and let the flowing water clean your butt!
11. Of Burps, Farts, and Vomits——Whether you are a casual or serious trail runner, hiker or outdoors lover, you will not miss having some GI (gastro-intestinal issues) due to what we are eating or drinking during our activity. Drinking carbonated liquid or sodas results in burping, as always. Last year after one of the many treks to the peak of Mt Baden-Powell in Wrightwood, California, I immediately drank one can of ice cold Coca-Cola from my Ice Chest at the back of my car parked at Vincent Gap and took a sit at the baggage compartment. In a few seconds, I had the loudest burp in my life that it created an echo within the parking area. A lady who was fixing her things in her car after coming from the mountain had an immediate reply to the sound by saying, “I heard that!” I immediately replied, “I am sorry!”. She was laughing and brought out her arm with a thumb’s-up sign! If you are in a company of other runner or hikers, you can burp while covering your mouth with your buff or hands and if you can not control the sound, just release the sound and then say that you are sorry. Farts or farting on the other hand are totally different matter or situation that could be dealt with properly with “class” or proper demeanor. Whether your fart has sound or not, you must step aside from the group or go behind the group but make sure that nobody is behind you when you release the air! If you can not control the release of the air, you can alert the group that a “good fart” is coming! It is best to accept that you are the source of the “bad air” if you are the “silent-type” of hiker/trail runner. You can also jokingly say that you stepped on a frog or you can create a loud sound while doing your fart. As for vomits, simply step aside from the group and the trail and let your “food burst” come out of your stomach and mouth. There is no harm with nature if you just leave what you vomit on the trail, the liquid form will be absorbed by the ground while your digested food will be devoured by the insects and/or animals around the forest/mountain.
12. Be Courteous To Others——In the country, while in the mountains, you will encounter locals in the area who are involved in farming/“kaingin”; illegal loggers; charcoal makers; hunters; other hikers/backpackers; firewood gatherers; armed security guards in private areas; patrolling soldiers or policemen; or if you are lucky, you can meet also armed insurgents or bandits. It is for this reason why one has to register at the nearest barangay hall (local government unit in the area) where the trailhead is located upon arrival and then upon departure from the area. The best way to deal with these people is to greet them and communicate with them briefly by telling them that you are a visitor in the area and that you want to share the use of the said trail. Talk to them nicely with respect and good intention. In other countries, you could meet bird watchers; painters; photographers; equestrians; shepherds; mountain bikers/cyclists; hikers/backpackers/campers; rock climbers; and other outdoorsmen. Simply greet them if they are on your way or pass them with “Good Morning”, “Good Afternoon”, “Have a good day”, or “Good Job”.
13. Right Of Way——In other countries, there are trail markings that states who has the right of way. These trail markings could be seen in most of the Parks in the United States and in other countries which is depicted in a triangle which says that a Hiker gives way to an Equestrian; a Cyclist gives way to a Hiker and an Equestrian. However, there are also trails that are exclusively for Hikers Only.
Trail Markings (USA)
14. Follow The Rules——In countries where I have visited, like Hongkong, Taiwan, Singapore, and the United States, the use of the trails is FREE but each user is responsible to strictly follow the rules stated in the trailheads. If there are no rules/regulations posted in the trailheads or in the Park Stations, “common sense” and good manners is the way to go for you to enjoy the outdoors. In the United States, there are Parks within the City and populated areas which are FREE but one should be able to park his/her car on designated parking areas or street curbs without red or yellow paint (No Parking areas). In Mountain Parks, there is a need for a Permit or Pass which is displayed on the Dashboard if one needs to park his/her car/vehicle in the trailhead/Park Station. Such permit/pass is called “Adventure Pass” (California) which is worth $5.00 for a single day-use or $35.00 for One Year to any of these Mountain Parks. In higher elevation mountain parks, one has to make a request for a schedule of visit in the park through On Line or e-mail on the Park’s Website. Such request is efficiently answered if your request is approved or denied. Just the same, always bring with you your Adventure Pass.
15. Help & Give Back Something To Others-—In my exposure to trail races abroad and in the company of trail runners, I have observed that they stop and ask the condition of a runner who is on the side of the trail resting or simply sitting. In one of my races abroad, I have experienced tripping with my knees and arms landing on the ground. The runner behind me immediately stopped behind me and asked if I am okey and if I am hurt. I immediately forced myself to stand with his help and answered him that I was alright. Whenever I stop at the Aid Stations, I would be greeted by my FB/Ultra running friends and ask what I need to eat or ask if I need a refill to my hydration bottles. If I am being passed along the route, they would leave me with encouraging words like, “You got this!”, “See you at the next Aid Station”, “You are looking good and still strong”, or “See you at the Finish Line”. One time in a mountain race, I saw a pack of unused Amino Acid Liquid Mix and a Power Bar on the ground which I think was dropped from the pack of a runner ahead of me. Since there was no runner within my sight, I picked it up with the intention of leaving it in the next Aid Station. However, after trotting for about 15 minutes, I saw a runner ahead of me and asked him if he dropped the said liquid mix and he said “No”. So, I offered him to have the liquid pack and the energy bar since I observed that he was walking along the trail. He accepted the offer and thanked me. He said, “This is why I love this sports, runners take care with each other!” And I replied, “You are right, my friend!” There are so many ways for these ultra runners to give back something to the community. They volunteer as support crew and/or pacer to other runners new to the sports; they serve as marshals or personnel in the Aid Stations in Races; they help in the marking of the trail as well as in collecting these trail markings after the race; they also act “sweepers” for the last runner and race; they also provide HAM Radio Communication for the event; and volunteer as “cooks” for the food served at the Finish Line. What is good about these ultra runners is that they BLOG about their detailed experiences whenever they finish or do not finish their race. I think this is the only sports where the elite, average, and “back of the pack” runners SHARE their experiences through a blog on their training, nutrition, racing strategy & techniques, and racing experiences.
Always remember, be good to nature and nature, in return, will be good to you! Everything about etiquette is COURTESY & COMMON SENSE.
If you don’t know Ann Trason, then you are not an Ultrarunner. Before you type her name on Google, I would like to briefly mention that she was the Lady Champion of the Western States 100-Mile Endurance Run for 14 times after failing to finish the race on her first two attempts. She has also broken twenty (20) World Records On Ultrarunning during her career.
She is now a Running Coach of a Middle School in Berkeley, California; coach for a High School Track Team; a Race Director; and an On Line Ultrarunning Coach. She is also a columnist/writer for the Ultrarunning Magazine where this post was taken/copied. The following is the complete copy of the “Ask Ann” Column in the said magazine.
Ann Trason
Dear Ann,
Now that you’re a coach, are there some, key lessons you pass down from your own coaches?
—Michael
Dear Michael,
I have always loved being a student of the sport—reading, asking questions, trying new things and learning what worked for me. I have been fortunate to have had several coaches who helped fill in gaps in the complex puzzle we call ultrarunning. Your question gets me thinking about the one who did the most to make me the runner and coach I am. Here are 17 lessons I learned from my favorite coach.
Consistency My coach made sure I would get out and do something every day, every week, every month, year after year. Sometimes a lot, sometimes just a little, occasionally fast, often very slow. Consistent training yields consistent racing.
Smile Happiness is infectious. She taught me that no matter how tough the day, there is always something to smile about. How can I mope about something going wrong when it makes such a great story to tell my friends?!
Passion I learned that a good coach must be as passionate as her runner. She made it obvious that she shared my passion for running.
Adaptability I always admired her instinctive ability to accept and instantly adapt as situations changed. We all have that ability buried inside us. I’ve worked hard to let it out.
Running is play, not work I have no idea how many miles I’ve run in my career. I can thank my coach for that. She viewed running as a chance to play. For her, there was no focus on checking the pace, tracking the miles, counting the hills. A good run was being out there having fun.
Positive attitude My coach never scolded me, never barked orders. She did give me a sly look occasionally when I did something wrong, but it was always to encourage me to do something better.
Relax let yourself run free. My coach had a naturally beautiful running form. Just watching her glide along, no tension, no unnecessary motion, made me a better runner.
Keep it simple My coach was always about simplicity. She was not into fancy gear. It was simple running.
Don’t overthink things She taught me to never overthink my running.
A steady trot is the fastest way to cover ground I’ve never been the fastest runner, nor the most talented. My coach helped me learn to run steady, mile after mile, never worrying about the other runners or the terrain ahead.
Enjoy the journey For my coach, it was always about the journey, not the destination.
Explore new places My coach made sure we searched for new trails, trotted across green meadows and bounded up hills just because they were there.
Stop to sniff the flowers My coach taught me to look around, smell the fresh air and feel the breeze blowing my hair. No matter how long or hard a run I had scheduled, there was always time to take in the unexpected view.
Get wet Every stream, every lake is a chance to refresh yourself with a quick dip.
Enjoy the moment There are times in life when we need to run long and hard. There are other times when the best thing to do is sit quietly at the edge of a meadow. In either case, enjoy the moment.
Passing the torch Seeing her love of running increased my desire to give back to the sport by mentoring and coaching others.
Unleash your potential There are times to hold back, but there comes the moment when you need to take off the leash and let yourself run free.
I did not realize that I’ve been through with four weeks of my training since I’ve started for the 2015-16 Ultra Trail Running Season. I started my training on August 3, 2015 and the first day was a Rest Day with some stretching exercises.
I am still following a training schedule program which I’ve been using for the past two years with a little adjustment on my weekly training volume which I’ve increased within the range of 5-10 miles per week which are mostly done in my weekend LSDs. Before, I was doing an average of 50-55 miles per week but for the past weeks, I’ve have reached a peak of 66-67 miles per week. I feel okey, healthy, and pain-free from my knees and legs and had no bouts of leg cramps or “bonking”. I guess, there must a lot of good reasons why at my age of 63, my knees are still holding up and I could still hike some steep mountains.
Surprisingly, the bottle of Aleve that I bought lately have not been opened yet and for the past four months, I’ve never taken any pain-killer tablet in my races and trail running workouts.
My past failures to finish a 100-mile mountain trail run were caused by nutritional and hydration problems on my part. It took me two or more years to experiment what is good for my body. I really don’t have any problems with 50Ks, 50-milers, and 100K trail races with regards to nutrition but when I join 100-milers in higher elevations, my nutrition just put me down on the last 30 miles of the race. Following my experiences in the 100Ks that I’ve finished, I would only take in Energy Gels and Water and some solid foods offered at the Aid Stations and I would finish the course without any problem. I bought some nutrition books for endurance athletes and made some researches on the Internet. In addition, I was able to get some suggestions and advise from the Filipino veteran ultra runners residing in the United States. These suggestions from them confirms the studies and researches that I’ve read on books and on the Internet.
On this new training season, I’ve concentrated on my nutrition, not only before during, after my workout, but completely observed my daily nutritional intake to my body. I don’t count the calories of the food that I ingest but I make sure that I have Carbohydrates, Fats, Proteins, and Vegetables/Fruits in my 3 meals a day. Snacks in between meals would be anything, whether it is a fruit juice, milk, fruits, yogurt, or snack bars. I’ve never drink milk when I was in the military up to 2 months ago. Lately, by accident, I found out that Organic Fresh Milk does not give me stomach trouble caused by lactose intolerance. I’ve indulged myself in eating avocado as part of my meal or snacks and ate more foods rich in fats.
On my nutrition before my runs, I would have a breakfast of coffee, oatmeal or cereal with milk, avocado with milk & sugar, yogurt or fruit juice.
During my runs, I would hydrate every time my GPS watch would beep to indicate that I’ve covered a mile and have to strictly do the said “drill” every time I hear a beep. For my runs less than 8-9 miles, I would just drink water and ingest one 1 capsule of S’Cap every hour and after the workout. But for my LSDs on weekends which are more than 9 miles, I would carry with me a Tailwind Mixed with water in two bottles and purely Water in my 1.5-liter hydrapak on my backpack. I would alternately, drink Tailwind and water every other mile. I would also ingest 1 capsule of S’Caps every hour. At the turn-around or after finishing the first half of my run, I would eat any solid food I brought with me like, boiled potatoes, power bars, dried fruits, and some baby foods (fruit/vegetable).
I’ve stopped using Energy Gels in my runs since the start of this training but I still carry at least two packs just in case of emergency. I’ve have observed in my past races that Gels, after ingesting about 10 pieces, I would end up throwing up even if I use different flavors and flavors that I liked that didn’t give nauseated feeling in my past ultra runs.
My post-nutrition intake would be immediately after the workout——lots of water, one can of coke or one bottle of Ensure and a Power Bar. Once I arrive home, I would eat a complete meal. For the rest of the day, I would continuously hydrate myself with water, sometime consuming 1.5 gallons of water, and strictly adhering to my complete meals—carbohydrates, fats, protein, vegetable and fruits.
I have also incorporated “speed” workouts in my weekly program. Wednesday is usually my “speed” day where I do it on a flatter ground and paved road. This is the only time that I don’t go to the trails and mountains. Since there is no oval track near my place, I would go to a Public Park (Echo Lake Park) where the streets that surround it has a total loop distance of exactly one mile. I would do 1 mile X 5-6 repetitions or 2 miles X 3 repetitions with at least 5-6 minutes rest/jog intervals in between repetitions. In the mountains/trails, I usually do some “strides” or fast & quick leg-turn-overs on flatter portions within a distance of 50-100 meters just to give some “wake-up” drill to my tired leg muscles.
Once or twice a week, I would go to a mountain which has an “up and down” route where I have measured on each way (2.5 miles up & 2.5 miles down). I would wear my hydration vest full of 2 water bottles and 1.5-liter of hydra pack on my back with solid foods. I would practice “power-hiking” on the UP portion of the course and never attempt to do any run or jog. I would register the time from the start up to the time I reach the peak of the mountain. I have observed that I had been improving my time to reach the peak every week. The 2.5-mile distance has a vertical distance of 1,280 feet and my best time so far is 43 minutes for the power hiking in the UP direction.
On the ridge of the mountain, I would continue jogging and hiking for about 2 to 3 miles. On my way back, I would start my fast “downhill run” on the measured portion where I had my “power-hiking” workout. My attitude here in the fast downhill run is a “go for broke” one! A fast and continuous downhill hill run for 2.5 miles would “thrash” my legs! I am surprised that my old knees can still withstand the hard pounding of my feet on the ground. Every week, I would improve on my time on this downhill run! My fastest time for the downhill run is 20 minutes!
Power Hiking and Fast Downhill Running made me register a faster pace and speed for my daily runs!
Two years ago when I shifted to trail running, I did not give any attention to the vertical distance (total ascent/descent) in my workouts but it was later last year that I have concentrated more on the vertical distance of the trails I’ve been into. However, since I’ve started this new training season, I made sure that my weekly totals on the vertical distance will not be lower than 6,000 feet.
On Mondays and Fridays, I would do some stretching and calisthenics/core strengthening exercises. I would also do “foam rolling” to my legs for about an hour with more concentration to my calves, hamstrings, quads, and butt muscles. I stopped my lap swimming for the past weeks and by the end of the 7th or 8th week, I would incorporate (stationary) cycling in my weekly workouts.
On my weekend LSDs, I don’t eat a heavy breakfast (ingesting only coffee) as I want to simulate how I would apply my nutrition and hydration strategy when I am about to reach my “bonking” period which is about 1-2 hours after the start of my run. This is where I would observe how my body would react to any food or fluids that I take in, whether it is water, Tailwind, S’Caps, solid foods (power bars/baby foods/power bars/dried fruits), electrolyte mix, or Clif Bloks. So far, my maximum LSD distance was 20 miles in 6 hours, carrying a heavy load of water in my hydration vest (2-20 oz of water bottle & 1.5-liter hydrapak on my backpack + solid foods). However, if I use my 2-16 oz Simple Hydration bottles (tucked in my race belt with power bars) and one hand-held 12 oz handheld water, that same distance of 20 miles is usually done in 5 hours or less!
On the technical aspect and the monitoring of my body’s feedback on my performance every workout, my Suunto Ambit 3 Peak GPS Watch, had been very useful in monitoring my Heart Rate, VO2, Cadence, Calories Consumed/Burned, and Recovery Period. From these data, I would be able to know on what to do for my rest and recovery for the next workout. My daily workouts are properly recorded in a notebook/journal that I would religiously write every time I finish a workout, to include, what I feel before, during , and after the workout.
In summary, I attribute my faster and better performance in my 4 weeks of trail running due to the following: (1) Better nutrition before, during , and after every workout; (2) Constant hydration with water every mile with Tailwind every other mile; (3) Speed workouts on Wednesdays and incorporation of “strides” in my daily runs; (4) Adapting my body to ingest S’Caps/Salt Sticks during the run on hotter days without any negative reaction to my body; (5) More vertical distance and higher altitude hiking/downhill running would acclimatize my respiratory system; and (6) “Foam Rolling” & Stretching with Core Exercises twice a week.
I’ve been using my Hoka One One “Speedgoat” Trail Shoes for my LSDs and most of my daily runs while my Inov-8 Race Ultra 270 Trail Shoes and Hoka One One Challenger ATR would be used in my recovery and tempo runs.
Monthly Mileage (August 2015): 238.65 Miles or 381.84 Kilometers
Griffith Park is the Pride and Most Popular Outdoor Park of Los Angeles City. It is one of the world’s biggest city parks with a total area of 4,467 acres, about five times bigger than the size of the New York’s City Central Park, and considered as the biggest municipal park completely surrounded by urban areas.
There are so many access roads/streets that lead to the park depending on your purpose of visit or activity. There is Greek Theater which is a popular venue for music concerts and stage plays; an 18-hole Golf Course & Driving Range; a Museum; The Griffith Observatory; The HOLLYWOOD Sign; a Horse Back Riding Facility; Carousel/”Merry-Go-Round”; Old Train & Railroad Museum; more than 50 miles of Fire Roads & Trails; and 20+ miles of paved roads for cycling. Griffith Park is the city’s “People’s Park” where its residents would enjoy the outdoor and its trails for free. The Fire Roads and Trails are strictly for hiking; running; and horse-back riding as MTBs or mountain trail cycling is not allowed.
The “Merry-Go-Round” Parking Lot #1 to Dante’s View/Peak Trail Route is my favorite trail running route which has a “one-way” distance of 4.5 miles, making it a total of 9 miles in going back to the Parking Lot retracing the route on the first half.
In order to go to Griffith Park and to experience running or hiking this trail route, one has to take the Golden State Freeway 5 North and Exit at Crystal Spring Drive (Exit 141B), turn Right at Crystal Spring Drive and after 1/4 mile turn left on the first intersection. The ascending paved road goes to the “Merry-Go-Round” Parking Lot #1. The toilet is located near the Merry-Go-Round facility.
“Merry-Go-Round” Parking Lot #1
I usually start from the place where I park my car. Across the paved road from the Parking Lot #1 are two fire roads; one that goes south and the other that goes east. I usually take the fire road that goes to the east (it’s called the Coolidge Trail) that has an abrupt ascent until it levels up for about 15 yards. Follow this fire road as it goes up immediately after a right turn. From this trail you would see on your left shoulder the Crystal Spring Road and the Golden State Freeway 5 and this will be the sight on your first mile with the uphill and winding trail ahead of you. The 2nd mile will be a gradual uphill climb where one will be passing a Golf Driving Range on your left. Do not turn left on the fire trail that goes back to Crystal Spring Road. One should be turning RIGHT on every trail intersection along this 2nd mile section. There is only way but UP to the peak of the hill.
Trailhead. Take the Trail On The Left (Coolidge Trail)Golf Academy’s Driving Range5-Way Trail IntersectionBeacon Hill
At the 2.5-mile point, the route shall level off and one will encounter a 5-way trail intersection. I usually turn right from this point and go to a peak which is popularly known before as Beacon Hill. As I reached the peak, I would turn around and back to the 5-way intersection. I would continue my run by going to the fire road that goes up and there is only one fire road that leads you to a ascending direction. After about 50-60 meters of uphill climb, you will see a marker that says, “Joe Klass Water Stop”. The water fountain is located on a clearing on your right. Don’t pay attention to the bees that “guard” the said fountain, they are always there the whole year round. If you need to drink, just drink or refill your bottles and then immediately leave the place. Don’t mess up with those bees!
Signage Of The Joe Klass Water StopThe Water Fountain (Bees Are Not Visible In The Picture)Vista Del Valle Drive
Once you get out from the water fountain clearing, you will hit a paved road (it’s called Vista Del Valle Drive). After about 50 meters running on this paved road, you have covered already 3 miles! Follow this road and on your left is a paved flat area which is a popular site for photo-ops overlooking the city and sometimes, it is being used as a helipad or location for movie shootings. As you passed this flat paved area, you can see ahead of you two fire roads on your left: one that goes down and one that goes up. Go to the fire road that goes up! This fire road splits from Vista Del Valle Drive and it has a closed wooden hut beside the start of the trail.
Griffith Park Helipad AreaUphill Trail Beside The Hut (Left Side Of The Hut)
After two or three turns, you will see a wooden bridge and a higher hill where the fire road is leading to. You are now approaching the dreaded Hogback Trail. This trail is too steep on some sections and make sure that you have a good traction on your trail running shoes. Before the last climb of this trail, you must have covered 4 miles. I always have the urge to drink a lot of water from my hydration bottle before the last climb. Once you finish the last climb on the Hogback Trail, there is a water source (a water fountain and a faucet) and you can make your water refill here.
Wooden Bridge & Hogback Trail
From the water source, follow the fire road as it continuously go on a higher elevation (don’t turn left on the trail that goes down after the faucet/water source). In about 30 meters from the faucet, there is a three-way intersection, turn left on the fire road and in about 100 meters, you can now see some concrete tables and benches inside a corral on the Dante’s View/Peak and the Hollywood Sign can be seen on your right. The Dante’s View/Peak is usually the resting place of those who hike and jog. One could see the City, the Griffith Observatory, the Hollywood Sign and the trails/fire roads that snake within the perimeter of the park. But for me, I just get inside the corral and touch the biggest rock where the Survey Marker is located and immediately turn-around. The distance covered is 4.5 miles at this point!
Dante’s View/Peak
From the turn-around, I retrace my route as I go back to where I started, to include going to the peak of the Beacon Hill. One has to be very careful in going down along the Hogback Trail as there is great possibility that one makes a mistake of slipping from the trail which is purely a rock.
My Fastest Time to complete this trail running route is 2 hours. It has a total ascent of 1,857 feet and total descent of 1,837 feet. Dante’s Peak/View has an elevation of 1,608 feet above sea level. Allocate at least 3 hours for an average hiking with picture/hydration stops for this route.
A Runner’s Circle (ARC) Specialty Store is only 1 Mile away from the “Merry-Go-Round” Parking Lot. From the Parking Lot, turn right to Crystal Spring Road towards the Los Feliz Avenue Entrance to Griffith Park. Turn Left on Los Feliz Avenue and immediately after crossing the bridge, the ARC Store will be on your Right.
More trail routes to come within Griffith Park and other parts in the Los Angeles Area and its Suburbs in my future posts.
My friends and contemporaries would always tell me that I am CRAZY to be running ultra marathon distances in the mountains in the country as well as in Asia and the United States. I just smile because that is the best description we (as ultra runners) could get to those who have not yet experienced our sports. But now, more ultra runners have extended their body limits and endurance by introducing a 200-mile endurance mountain trail event which has doubled the famous 100-mile distance which is now being accepted as the NEW Marathon Distance in Ultra Running. The runners of this new event could be the CRAZIEST of them all and since it was introduced only last year in the first edition of the Lake Tahoe 200-Mile Endurance Run, three of these events had been scheduled for this year and called the Grand Slam of 200-Milers (it was supposed to be 4 races: Colorado 200; Arizona 200; Lake Tahoe 200; and Bigfoot 200 but the Arizona 200 was cancelled).
Let me introduce to you the CRAZIEST Ultra Runner who just recently finished the 1st edition of the Bigfoot 200-Mile Endurance Run——Conrado Bermudez Jr! Being the FIRST Pinoy to have finished this mountain ultra trail running event, it would be proper and fitting to have his story in running to be published here as one of the main highlights of this blog with the hope of inspiring others and telling to the world that we, Filipinos, are very strong and resilient in nature.
Bigfoot 200-Mile Endurance Race Picture Collage
Conrado Bermudez Jr, or fondly called as “Jun”, finished the 200-Mile Race in 94 hours, 26 minutes, and 30 seconds, placing himself as #40 among the 59 finishers where 80 runners started in the morning of Friday, August 7, 2015 at the Mt Helens National Monument in Washington State. The race has a cut-off time of 108 hours which is equivalent to 4 1/2 days, forcing the runners to complete 45 miles per day during the race. The following is the general description of the race as taken from its Website:
“The Bigfoot 200 is a trail running event in the Washington State that seeks to give back to the trails by inspiring preservation of the wild lands and donating money to trail building in the Pacific Northwest. The race is a point to point traverse of some of the most stunning, wild, and scenic trails in the Cascade Mountain range of Washington State. The Race ends in Randle, WA after traversing the Cascade Mountains from Mt St Helens to Mt Adams and along ridge lines with views of Mt Rainier, Mt Hood, and more!
The race will bring together people from all over the world to tackle this incredible challenge. With over 50,000 feet of ascent and more than 96,000 feet of elevation change in 2015 miles, this non-stop event is one of a kind in both its enormous challenge and unparalleled scenery. The race is not a stage race nor it is a relay. Athletes will complete the route solo in 108 hours or less, some without sleeping.”
Jun finished the race with barely 6 hours of sleep during the race! He was supported by his wife, Kat, their daughter and running friends who would meet him in Aid Stations where there is vehicular access. For more details of the race, one can visit the following link:
Finish Line Of The Bigfoot 200-Mile Race With The Race Director (Photo From Facebook)
Jun is a native of General Santos City, graduate of the Philippine Military Academy belonging to Class 1996, a Special Forces Airborne, and Scout Ranger of the Philippine Army before his family migrated to the United States.
In my interview with him on the later part of last year after he finished the other 3 100-Milers in the Grand Slam of Ultrarunning (except Western States 100); he recollected that he first personally met me when he was the Aide-De-Camp of the Commander of the Southern Command in Zamboanga City and I was then the Commander of the Task Force Zamboanga. The year was 2000 and he was barely 4 years in the military service. He went further to tell me that he got inspired by my blogs and photo running galore through my posts in our PMA Bugo-bugo Facebook Page.
Jun finished the prestigious Boston Marathon Race in 3:11:14 hours.
The following are the some of the data about Jun and the answer to the questions I’ve asked him:
1. Home Province-Gen. Santos City; Age-42 ; Height- 5’9″; Present Body Weight-146 lbs ; Schools Attended (Elementary to Graduate Schools)-Notre Dame of Mlang, Noth Cotabato (Elem), Notre Dame of Dadiangas College-High School Dept; PMA Class-1996 and Special Training in the Military-Scout Ranger, Airborne.
2. Places of Assignments and Positions held in the Military/Philippine Army:
Platoon Leader- Alpha Coy, 25IB, PA as Ready Deployment Force (striker battalion) of 6ID in Maguindanao, Sultan Kudarat, Cotabato Province. My platoon was also involved in capturing Camp Rajamuda in Pikit, Cotabato Province in 1997.
Company Commander- Bravo Coy, 25IB, PA , mostly deployed in Maguindanao. My company was also deployed in the front lines of Matanog and Buldon and was very instrumental in capturing Camp Abubakar.
3. Present Job & Working Hours-Security Officer in the United Nations Headquarters in NYC and works on day shift; City of Residence in the US-Jersey City, New Jersey; Wife’s Job- ER Nurse; Gender & Number of Children- one daughter
4. Brief Background of Running (during Childhood up to College and as Cadet of the PMA)
I started running when I was 7 years old. I grew-up in a farm and the only playground we had was an open field and trails where we would run and tag each other. In elementary and high school, I was so engrossed on soccer games than any other ballgames. This is why when I joined the PMA, I discovered that I was a decent runner because I was always in the lead pack when we had our 2-mile run as part of our physical fitness test. I also represented my company (PMA) in various races but most of the time I bonked because I usually go all out at the start and faint halfway through, which resulted to my ER visits. My style of running then was with a “do or die” mentality; no technique, no proper hydration and nutrition. It was just a plain “old-school” way and lots of brute force.
5. Best time in 5K- 19:22; 10K-42:08 ; Half-Marathon-1:26:52 ; and Marathon-3:11:14 All were done in 2013.
6. Brief story on your exposure to ultra distance running events—-first 50K; first 50-miler; first 100K; and first 100-miler.
I started joining races in 2012. That year I only finished 2 marathons. I was following your blogs and postings about the Bataan Death March 102 and 160 and the other races you directed and I got inspired by the spirit of the running community, and it was that I got curious about ultrarunning, especially the 100-mile distance.
To start my ultrarunning quest, I signed-up for a local flat, out-and-back, looped course. Thinking that 50km was just over a marathon, and 50 miles was just 2 marathons, I signed-up for a 100k, which was held in March 2013 in New Jersey. I’m glad that I met some new good friends there, who are now like a family. I was so proud that I finished in that muddy, swampy, and cold course third place. My wife and daughter were there for my first ultra. As a solitary person, running alone for a day was not such a big deal. The feeling of finishing a long distance further boosted my spirit… I got hooked. Then I signed-up for my first 100 miler scheduled three months after. It was in June in the inaugural Trail Animal Running Club (TARC) 100-Mile Endurance Run and the first 100-mile run in Massachusetts. The race started at 7 pm Friday with a cut-off of 30 hours. The course was in a 25-mile flat trails with some creeks spread along the way. I was very enthusiastic to train knowing that some of my friends are also running the race. As part of my preparation, I was reading some blogs and race reports, and I even asked your advice on how to deal with the distance. You discussed to me the proper nutrition and hydration and also incorporating hike into running. The course got indescribably muddy, with most sections in knee-deep mud in every mile, but with my grit and determination, I was able to finish despite a big number of DNF in the race. I felt reborn and my spirit was so high. It took me a week to recover from the pain.
In November, I did my first 50-mile race as a finale for the year. The JFK 50 Mile is the oldest and the largest ultramarathon in the US. The course is a combination of road and trail. It passes through the Appalachian Trail and C&O Canal Towpath then ends in an 8-mile paved road in Maryland. The course was pretty easy and fast. This is where I met some new hardcore ultrarunners from the Virginia Happy Trails Club.
After running all long distances, I signed-up for my first 50k as part of my back-to-back training for my incoming six 100’s. The Febapple Fifty was held on Saturday of February 2014. Then the next day, I ran the Central Park Marathon. The Febapple race was fun. The course was filled mostly with knee-high ice and snow in a rolling hills of South Mountain Reservation in New Jersey. It was quite a tough race because the ice turned slushy and it was a bit hard to run. I still managed to finish in the top ten.
All of my first attempts of these distances were mostly to get me into groove to venture and discover ultrarunning. I realized the 100-mile distance is my favorite.
7. Training Preparation in your 100-Miler Races and Nutrition Strategy in your Races. How do you balance your training with your work and family? (*I will discuss my training in item # 9).
In short ultra races, I carry a handheld bottle or belt hydration system. They are lighter that I could run faster. I take one salt tablet every hour but if I sweat a lot, I take two every hour and nothing at night when it’s cold. In aid stations, I eat potato, banana, watermelon, and PB & J aside from the Ensure that I carry as my basic load. I make sure I take more nutrition at the early stage of the race. I also drink ginger ale and Coke/Pepsi to refresh my mind from the lows.
I come home from work around 8pm and do my chores and help my daughter do her homework. If all is done, I relax for awhile and train. It usually takes me an hour or two to finish my training. I sleep around midnight and wake-up at 6am. I am fortunate that my wife is also supportive of my passion as she herself is an ultrarunner. And our daughter is also our number one cheerer. So far, everyone is in sync in the family.
Jun Bermudez @ Leadville 100-Mile Race (Photo From UltraSignUp)
8. Were you aware of the US Grand Slam of Ultrarunning? Since you missed the Western States 100 this year, do you intend to take a shot on the 2015 US Grand Slam of Ultrarunning?
I did not have my qualifier for Western States last year. I was already aware of the Grand Slam of Ultrarunning, so to get the feel of it, I tried to sign-up for six 100-mile races. I put my name in Massanutten Mountain Trail 100 and Wasatch Front 100 for lottery and fortunately, I was accepted. Since I have proven that I could finish multiple races in a gap of 3-5 weeks, I have more confidence now to challenge myself in GS in the future. There’s only a slim chance for me to get into Western States with one ticket but I will make sure I will apply every year to increase my chances. If not, I am planning to do more challenging 100-mile mountain races next year. It just sank-in that what I did was insane. Every time I finished, I cursed myself for signing-up and promised myself not to do 100’s anymore. But a couple of days after, I feel that I am ready to go again. Thus, if ever I am accepted in Western States in the future, I won’t hesitate to join the Grand Slam.
9. Knowing that you are a “lowlander”, how did you train for the 100-mile mountain races that you finished? How did you cope up with the possibility of encountering “high altitude” sickness in your latest two 100-milers?
My training was focused in strengthening my legs, ankles, and feet in battling the rigorous technical terrain. But 90% of my training was indoor because of my busy schedule, and I have a child to watch that I could not leave at home if my wife is working or training for her ultra events. I usually do stairs workout, climbing up and down, up to 250 floors without rest every two weeks, which is a great way to improve my VO2max and giving me more mountain legs. Most of the time, I abuse my incline trainer/treadmill, which goes to 40%. I use it for incline hike/run with 10-15 lbs of rucksack together with my 2.5 pounder ankle weights. Although I hated speed workout, I still do my 5k in treadmill and this keeps my pace honest. Sometimes I do my trail long runs in the weekends with my friends but most of the time, I am stuck on my treadmill. Treadmill running is boring but it gives me more mental conditioning to tackle the distance. Aside from that, it also preserves my feet from the hard pounding of the pavement. I don’t really track my weekly mileage because I don’t have a proper training plan that I follow. I just listen to my body and do whatever I feel I need to work on. And to avoid injury, I do strength and core workout twice a week.
In an attempt to combat altitude sickness, I was taking iron, B complex, and vitamin C supplements. But these didn’t really help much. I still got more vomitting in Leadville (12,600 ft highest altitude) after mile 60 and had some also after mile 70 in Wasatch.
10. How did you balance recovery and preparation in between those 100-milers for the 6-month duration of your ultra events?
I treat every race as my long run. After the race, I relax, stretch, and foam roll for 3-4 days to get rid of the pain. I also come back to work 2 days after the race. At work, I stand for 6 hours. I think standing at work and walking from home to train station and to work helps my fast recovery. At the end of the week, I start doing easy runs again. Then the next week, I go back to my usual training routine. My taper starts 2 weeks before the next race. I did this routine in my last four 100 milers. In fact, I was feeling fresh every time I start the next race and my spirit gets stronger. I was amazed that I was able to do sub 20 hours in 3 100 milers. Although I did not achieve my goal of finishing Leadville 100 in sub 25 and Wasatch Front 100 in sub 30, I am still ecstatic that I finished those races SOLO (no pacer, no crew) and without getting injured. When I finished Leadville 100, I focused more on recovery by just doing stretching, hiking and easy runs. It was in Leadville that I suffered much because of the altitude and my mistake of not hydrating properly. I had nausea and I threw up every time I ate and drank after mile 60, and I was also suffering from a bad stomach issue. Wasatch is harder than Leadville. But due to my proper hyrdation and nutrition, I felt better and stronger although I still had gastrointestinal issues around mile 70, but later I managed to cope with them by slowing down and taking my time at aid stations to recover.
11. What are your tips and advise to those who would venture to mountain ultra trail running events. What would be the things that you have to improve upon if ever you want to improve your performance in your previous 100-milers?
It takes a lot of discipline. Training involves time away from your family and it is important that no matter what, family comes first. It is helpful if your family is supportive, so that is paramount in your quest for ultrarunning and paramount in the list of things you have to make sure you obtain, foremost.
Never be afraid of the adventure. It is not always about the destination (aka finishing) but the journey. That is my advice to other runners.
Personally, I think I need to improve on certain strategies like hydration and nutrition. Also, not just to eliminate issues like GI problems that come with certain races, but— more importantly— how to perform well regardless of these problems because, lets face it, problems encountered during races MAY NOT ever go away. So it is a matter of pushing past these issues and finishing strong. Thats what I need to work on.
12. Aside from the 2015 US Grand Slam of Ultrarunning plan, what is in store for you in the coming ultra running years?
I want to venture into other Ultra races. The challenging ones, in particular. There are many races out there to explore with challenging course and beautiful sceneries. When they go hand in hand, they become priceless experiences, especially when you finish them. Like I said, mountain 100-milers are my favorite, but that is not to say I will not try to explore on distances beyond that. We’ll wait and see.
Jun could not stop wanting for more and he is now one of the few mountain ultra trail 200-mile single stage finishers entire the world. For the past two years, he has the following 100-miler mountain trail races with their corresponding finish time in his belt :
TARC 100-Miler in Westwood, Massachusetts (June 14, 2013) —-25:19:27 hours
New Jersey Ultra Trail Festival 100-Miler in Augusta, New Jersey (November 23, 2013)—-18:53:31 hours
Massanutten 100-Miler in Front Royal, Virginia (May 17, 2014)—-28:05:55 hours
Great New York City 100-Miler (June 21, 2014)—-19:33:14 hours
San Diego (California) 100-Miler (June 6, 2015)—-22:16:27 hours
After his sub-24 hour finish at the San Diego 100-Mile Endurance Race, I told him that he has to rest and recover in between his races to let his body free from injuries brought about by over racing or over training in ultra distances. I even told him that he has to prepare for the possibility of being selected in the lottery for the Western States 100-Mile Endurance Race if ever he registers to join the race. I emphasized that I am betting on him that he will be the FIRST Pinoy Ultra Runner to be awarded the “One Day-24 Hour” Silver Buckle in the said race and I am sure that it will take another generation of Pinoy Ultra Runners to surpass such accomplishment.
My prediction on his ultra running career brought not a single word from his mouth but instead responded to me with a smile. Jun is a silent type guy and does not openly brag about his ultra running finishes on the Social Media and he does not even have a blog or journal where he can relate and share his stories in his ultra races. However, my interview with him has a lot of tips and advise for those who would like to embark on mountain ultra trail running, most specially to those who are in the lowlands and for those who don’t have access to the mountains or simply lazy to be in the outdoors.
BR & Jun @ Lake Cuyamaca
Before we parted ways in Lake Cuyamaca in Mt Laguna, San Diego, California, he intimated to me that his ultra running career is not complete if he will not be able to finish the Grand Slam of the Bataan Death March 102/160 Ultra Marathon Race! Hopefully, that will be the day that Jun will be able to meet the whole Pinoy Ultra Running Community in his homeland.
This is what I said to Jun, “Get your Western States 100-Mile Silver Buckle first before coming home, Cavalier!”
(Note: Jun had been using HOKA ONE ONE Shoes in all his trail running races and training)
Speedgoat is the monicker of Karl Meltzer in the Ultra Running Community. He is an elite mountain trail ultrarunner and has the distinction of winning the most number of 100-Mile Ultra Running Events, a record of 36 Championship Awards and had been awarded the Ultrarunner of the Year. He is the Race Organizer and Director of the famous Speedgoat 50K Ultra Trail Run and other Vertical Trail Races in Snowbird, Utah. He also one of the most sought after Ultra Running Coaches. He is the first elite ultra runner in the USA who used and introduced the shoe brand HOKA ONE ONE and the rest is history. It is fitting that the shoe company honors him with a specific trail shoe model that speaks about the man. Thus, HOKA One One users around the world are excited to have a hand on the said shoes.
Attempts To Get The Shoes
As a one of his clients to his Coaching Services and having met him personally in last year’s edition of the Speedgoat 50K Trail Run (which I didn’t finish due to strict cut-off time at Mile 20), I sent him a request if I could buy directly to the shoe company of the earlier production of the shoes on the later part of May this year as I could see and read shoe reviews on the Internet about the shoes. I think my request was relayed by him to the company but I did not hear any response from them. So, I waited for the announced release to the distributors and sports stores on the first week of July but only to get the news that the release date will be sometime in August.
On the last week of July, I monitored almost everyday the availability of the shoes by visiting the Website of the HOKA ONE ONE (HOO). The availability of the shoes at Running Warehouse for my particular shoe size was scheduled on the 3rd week of August and then to September and lately to October this year. My patience bear fruit on the last few days of July when I got a “green light” with the advise that my shoe size and model is “On Stock” on the On Line Sales of Hoka One One. I immediately ordered one pair and the shoes was delivered after two days. I paid $140 + $12 (Sales Tax), with a total amount of $152.00 with Free Shipping Fee.
Finally, I was able to realize what I posted in our Facebook’s HOO Philippine Club Group Page three months ago, “I will be the first one to have this kind of shoes in this Club”.
Finally, The Box Arrived
Actual Review & Observations
Color Combination——The first thing that will attract ones attention is the combination of colors of the shoes. Yes, they are the colors of Red Bull (silver, red, and blue), one of the Sponsors of Karl’s Runs and Races and the usual colors of the Shoe Brand HOKA ONE ONE—-blue & yellow. The other Speedgoat model has the colors, red, black and blue! If you are not attracted with the name of the shoe model, then for sure, you will be attracted with the striking color-combination of the shoes. Most of the runners that I know have the impulse to buy any kind of running shoes due to the striking color combination.
Shoe Laces Holes——Obviously, these are the holes where one has to insert the shoe laces. As compared to the other HOO Shoes, this is the only model that has 5 holes, all the rest have 6 holes in one shoe. If you are not using the last uppermost hole of the Speedgoat (where it is used to lock the shoes with the foot), the shoes has only 4 holes! It means that it is easier and faster to tighten and tie the shoes and also to untie and remove the shoes from the foot. If you have the habit of changing your wet socks with dry ones in the Aid Stations in an ultra running event, the time on untying and tying your shoes would mean a lot if you are trying to catch up with those tight intermediate cut-off times in the different Checkpoints along the race route. Since I am always on the back of the pack in every race, this is a big advantage and useful for me!
First Model/Prototype To Shoe Reviewers & HOO Elites With 6 Holes & Flat Laces
From Flat to Round & Light Shoe Laces——Earlier model of this shoes have those flat shoe laces, the same shoe laces on my HOO Challenger ATR and I was surprised to see that my shoes have those rounded shoe laces which are smaller/thinner in size as compared to those rounded shoe laces of my old HOO Stinson EVO. I have observed that the rounded shoe laces have an average length as compared to the longer flat shoe laces of the Challenger ATR. Those flat shoe laces have the tendency to get longer and longer as the shoe is being used for more mileages. It appears that Speedgoat’s shoe laces will remain with their present length and size.
Observation about 1/2 size Bigger——In almost all those blogs and reviews that I’ve read from their sponsored elite athletes, they stated that the shoes is 1/2 size bigger. However, when I used them with my slightly thicker Drymax Trail Socks, I am surprised that they fit exactly with my feet with a little allowance (1/2 inch) from the tip of my big toes. This is exactly the same fit that I’ve experienced with my HOO Stinson Evo which I consider as my best road racing and training shoes so far. With the use of the regular Drymax socks, I have observed that there is more room for my forefoot and toes to splay on the toe box area of the shoes. It felt like I was using my Altra shoes! If it is too roomy for my feet if I use the ultra thin & light Drymax socks, I might try to use the additional insole of my HOO Challenger ATR (The Challenger ATR has two inserts/insole in each shoe). With my experience in using the HOO, I simply tighten the shoe laces more to prevent my feet and toes to be moving unnecessarily while I am running or hiking. After running with them for almost 100 kilometers (62 miles), I could feel that the shoes had stretched a little for more space for my toes and forefoot.
Thickness of Sole——All the shoe models of HOO have thick soles that is why they are fondly called as maximalist running shoes. However, this model is an exact copy of their Rapa-Nui 2 model which is also designed as a trail shoes. The Rapa-Nui has a stack height of 33 mm on the Heel portion and 28 mm on the Forefoot section. The 5mm difference, popularly known as “heel-to-toe drop”, gives a feeling of “rockered forefoot” which according to the HOO designers and engineers provide a more efficient gait, better running form and faster “heel-to-toe” transition of the foot during running. Whatever that statement means, I assume that it will make a runner faster by some milliseconds! The Speedgoat’s sole thickness has a stacked height of 34 mm on the heel and 29 mm, maintaining a difference of 5 mm, that looks to be deceivingly thicker than the Rapa-Nui 2 model. The bottom-line is that this shoe, just like the other HOO models, the thick soles will give you the best comfort to your feet on your runs on the road, as well as, along the trails whether they are technical or not. And to be more specific, I find more efficiency in running with all the HOO models when I land my foot deliberately with the heel first and letting it roll towards the forefoot. With the Speedgoat, I feel more cushion and comfort most specially in the downhill running as the “rocker” effect in ones gait is more pronounced and experienced. In ultra running distances, such comfort will give an edge to the runner for more sustained strength on the legs during the day and night running. And did I tell you that you have faster recovery after an ultra race if you used a Hoka One One Shoes? Well, it’s true!
Vibram’s Metagrip Outsole & Figure “8”
Metagrip VIBRAM Outsole——From the HOO Bondi B, Bondi Speed, Stinson EVO, Huaka, and Challenger ATR (the shoe models that I’ve used for the past 5 years of running), the common denominator as a weakness of these models is the durability of their outsoles. After running for the first 100 kilometers of each of these models, you can already see a significant “wear and tear” on their outsoles which I never experienced from the other trail shoes in my arsenal. But the Speedgoat is some sort of a Redemption Shoe for all HOO “addicts” and loyal customers as they are fitted with the Metagrip VIBRAM Outsole. After running on single track trails, rocky trails, and fire roads for almost 100 kilometers, I could not see any signs of “wear and tear” from the Vibram outsole which is a big improvement from my old and ‘soon-to-be” retired other HOO models in my arsenal. This is the MOST significant feature and advantage of this model from the other trail shoes of HOO——the durability of the outsoles of the shoes!
Cushioned Tongue——Not only for being cushioned but they are also a little longer but does not affect ones efficiency in running and would not cause any abrasion on the front part of the ankle. One would notice that there are TWO slots on the tongue where the shoe laces coming from holes #2 and #3 would pass. I have observed that these slots would maintain the position of the tongue while on the run giving more comfort on the top part of the foot. Most of my trail shoes have only one slot on their tongues and after every run, I would observe that the tongue have the tendency to slide towards the outer side of the foot/shoes and this movement allows the tendency for the debris from the trail to get inside the shoes. I was even more surprised when I did not experience any small particles from the trail getting inside these shoes. I guess, it is time for me not to use gaiters for this shoes!
Cushioned Upper Part of Heel Counter——This is the yellow-colored portion at the heel counter of the shoes. I’ve noticed a big difference of this part of the shoes when compared to my HOO Challenger ATR as the Speedgoat has a more pronounced cushion that would be flashed closer and tight to the Achilles tendon and both sides of the ankles. I’ve observed that my Achilles tendon sits comfortably on the shoes even if I have the shoe laces tighten to the max.
Cushioned Heel Counter
Light and Porous Material On Its Uppers——Have I told you that this is one of the lightest shoes of HOO? Actually, it is the third lightest HOO model in my arsenal being the Challenger as the lightest and the Huaka as the 2nd lightest. The shoes has a weight of 9.7 ounces despite the fact that it has a Vibram outsole and more cushioned tongue. The light and porous material on its Uppers contributed to the lighter weight of the shoes. It also gives more breathability to the feet where air would enter in these porous holes during the run most especially in hot and humid conditions. However, in water/stream crossings, water would easily get inside making the the socks and lining of the shoes wet and damp but with the continuous pounding of the feet, these water would easily exit through these porous holes! Through my past experiences in running in the lahar areas and rivers in the Mt Pinatubo 50K Trail Run and Clark-Miyamit 50-Mile and Marathon Trail Races, these shoes would not prevent those abrasive lahar from entering the shoes. Did I say dust entering the shoes? Yes, the dust would enter through these porous holes and it is advisable not to use white socks in them. Surprisingly, there is also a Drymax “Speedgoat” Trail Socks available in the market that would match the goods looks and functional capability of the shoes and they come in black/gray color!
Another View Of The Lug Pattern Of The Outsole
Thickness of the Lugs and Lug Pattern——Yes, the lugs on the outsole are thicker than any of the HOO trail shoes that I have and they are 5 mm thick! This is almost the same thickness of the outsole lugs of my Salomon Sense 3 (Soft Ground) and Inov-8 Roclites (but, they are NOT Vibram outsoles!). However, most significant improvement and advantage of the HOO Speedgoat from these other shoes is the pattern on how they are positioned on the outsole. The pattern of lugs on the sole would show a figure of number 8, as seen from the top view. The figure 8 is the space in-between the array of lugs and it looks like a loop course where the heel portion has a cave or depression on it. According to the designers and engineers at HOO, such pattern would result to a feeling of running with a “fully independent suspension system” (like a 4 X 4 truck) on the different parts of the outsole when running in a technical terrain or trail. It means that if you stepped on a root or rock, the specific part of outsole that contacts with the object will be the only one that compresses while the rest of the outsole remains without any deformation. I suspect that the “cave” or significant depression on the heel would allow better ride and cushioned feeling for those “supinator and pronator” runners.
Having been a HOO user for the past five years, I would say that this particular model will be my racing and training shoes for my ultra trail running events in the future. Everything is almost perfect with regards to its Comfort, Speed, Security of Fit, Durability, Agility and Responsiveness and Protection to the Feet. I could not see any major flaw or anything to be corrected or improved on the shoes without compromising its light weight and perfect fit on my feet.
After mentioning those significant changes and improvements on the shoes plus the fact that I have logged almost 100 kilometers (62 miles) with these shoes (to include 10+ miles on the paved road), the question is, “Will I highly recommend these shoes to everybody for them to buy as their trail running shoes?” Yes, of course! I am now in the process of ordering my 2nd pair of the Speedgoat (Red & Black Model) through the Running Warehouse website! So far, this is the best HOO trail shoes model in the market right now.
As Karl Meltzer would say, “100 Miles Is Not That Far”, and I would add to say, “100 Miles Is Not That Far With The Speedgoat Shoes On Your Feet!”
In Mountain Trail Running, everything is about the Total Vertical Distance or Total Gain In Elevation for the whole course or distance that should be the main considering factor to be able to train and prepare in order to finish a certain ultra trail race.
Starting this year, I’ve been particularly interested on the total vertical distance or total gain in elevation in most of my training runs. This interest of mine had been based from an advise or suggestion from ultra trail internet resources and from two different bloggers who are also ultra trail runners and coaches. According to such advise, if the total trail distance of the course is 100K and the total elevation distance or total vertical gain is 15,000 feet, you have to divide the total gain distance by 10 in order to find out the total elevation gain for every 10K distance. By applying the formula from the said 100K course, your total elevation gain for a 10K distance should be 1,500 feet.
Simply put, if you intend to run a distance of 10K in your training, your total elevation gain should be 1,500 feet or 500 meters! If you want to have a LSD trail run for 20 kilometers, obviously, your total elevation gain should be doubled to 3,000 feet or 1,000 meters.
If you are not distance conscious and you record your runs by the time you spent on your runs or training, you can also consider your time in relation to the total gain of elevation you have covered. For example, if a 100K trail course has a cut-off time of 15 hours with a course total elevation gain of 15,000 feet, you have to divide 15 from the total elevation gain for you to have the minimum elevation gain that you should have covered for a period of one hour. Applying it on the example, you must be able to cover a vertical distance of 1,000 feet for every hour of your training run.
Because of this advise, I looked for a place where I could train for the Trans Lantau 100K Trail Run in Hongkong which has a total elevation gain of 18,000+ feet. I must have a trail running course that satisfies a total elevation gain of 1,800+ feet for every 10K distance! My Playgrounds “Alpha & Bravo” barely passed the test but I wanted a steeper trail to force my knees and gluteus muscles to be engaged more during the run. The once neglected “Brown Mountain” came into my mind and I asked my training partner, Dannin, to clean the trails with the help of the locals living thereat. In a “test run and hike” after the trail was established, I was happy about the results! At 4 miles (6.4 kilometers), my GPS watch registered 2,000 feet in total elevation gain and I have not reached the peak of the mountain yet! This is great!
The peak of the mountain is almost 1,800 feet or almost 600 meters with a distance of almost 5 miles (8 kilometers) from the point where I usually start my run. The total elevation gain once I reach the peak is almost 2,500 feet! I said to myself, this place is more than what I’ve been looking for. My runs in the “Brown Mountain” started as a Run & Hike To The Peak & Back and for a short period of time until my legs had been accustomed to the elevation. Dannin and I would take a break on the last one-third of the ascent until we were able to have a non-stop ascent to the peak of the mountain.
Our longer runs would be to traverse the mountain and have our turn-around at the other side of the mountain. I call this particular course as our “Yo-Yo” course where we have to reach the peak again once we go back from our turn-around point on the other side of the mountain and back to the place where we started. The “Yo-Yo” course would give us a total distance of 14 miles (22.4 kilometers) and a total elevation gain of 4,200+ feet or almost 1,400 meters. Our average finish time is 5.5 hours!
I may not be faster on my speed runs but my endurance in tackling more challenging and steeper slopes of mountains had improved tremendously. Finishing the TransLantau 100K Trail Run without any pain, “issues” or injury would proved that such advise on considering the Total Elevation Gain as one of the most important factors in trail running’s successful finish is a very valid and effective training tool.
As a Race Director of Running Events, it is also advisable that in order to plan for a trail running event and have it offered to the running public, the total elevation gain should also be considered. As a suggestion, if one has the intention of coming up with a trail running event, make sure that the minimum total elevation gain in a 10k distance should be at least, 1,200 feet or 400 meters. Anything that is less than the said numbers are good for the “newbies” in trail running. However, if the vertical distance of a certain course is more than the suggested 1,200 feet or 400 meters in every 10K distance, then it would be best if you have it considered as a trail running course which could earn some points for the finishers to join the UTMB or in other international trail running events.
Since the time I started running and buying running shoes, I always think and have the impression that “cheap shoes are low in quality and it is a waste of money spending on them”. This is the reason why I concentrated on using ASICS Shoes (Made In Japan, then) and New Balance (Made In USA, then, too!) during my early days as a road runner/marathon runner. Obviously, these brands then were the most expensive ones.
Since I started blogging, I’ve used different brands of running shoes and it was Joe Matias of “A Runners Circle” (ARC) Specialty Running Store in Los Angeles, California that gave me the ONLY Complimentary Shoes in my entire running career when the HOKA ONE ONE was initially introduced in the market. I am proud to say that I was the FIRST Local Runner in the Philippines to have used the said shoes 4-5 years ago. I was able to try their first models of their Bondi B and Stinson EVO. I never had a chance to review these shoes as I found them to be perfect shoes in my LSD on the paved roads due to its maximal cushioning. Up to this time, I always use these shoes in my training on paved roads.
Out of curiosity, I started to browse on the website of Merrell Shoes and I found their models very interesting and was able to read feedbacks/reviews of each model from its users which is a mixture of pros and cons on the on its fit, comfort, and durability. My interest in this brand of shoes led me to visit their distribution stores in Metro Manila. I am surprised that their stores have stocks on those shoes and models that I’ve seen in their website. In short, I bought my first Merrell Shoes which is the “All Out Rush”.
Fresh Look From The Box
The All Out Rush (AOR) is categorized as a Cushioned Trail Shoes and I got the red one. I am not particularly interested with its specifications and material components because I just wanted an alternate training shoes for my trail running workouts.
I immediately used it in my trail running workouts. For the past one month & half and for almost 100 miles of trails in my “playground”, I am satisfied with it. The fit was perfect whether I use a thin or thick running socks or whether I tie the shoe laces tightly or loosely. But I prefer them (shoe laces) to be tied tightly so that the shoes is tightly snugged on my feet.
I have observed that these shoes don’t have any insole but I still find them to be comfortable. At first, I could feel the lugs of the sole of the shoes on my feet during my downhill running but as I used them, my feet became accustomed to the feeling as if there is a “massaging” feeling on my sole. But when I use a thicker pair of trail running socks, the feeling is completely gone. Actually, I have the same experience on the first few miles while using my Salomon S-Lab Sense 3 (SG) Shoes with its more aggressive studs on its sole.
I’ve been using it in my daily trail runs and have it sun-dried every time I removed them from my feet after my runs. I have never washed them and I am excited to wear them with the dirt and dust on their uppers every time I go for my trail running workout. I don’t smell any “nasty” odor from the shoes due to its “Breathable mesh lining treated with M-Select™ FRESH odor control”, whatever that description means but it is really true!
I find the shoes weight lighter than my Hoka One One Shoes which is 9.3 ounces per shoe, a standard weight for a cushioned trail shoes. I find the weight of a trail shoe and its cushioning as the two most important factors to consider in selecting a trail shoes for ultras and shorter distances.
Circular Studs On Its Outsole
I wonder what material the outsole is made of but it is not Vibram. I find it surprising that I don’t see any “wear & tear” signs on them after using them for almost 100 miles in the mountains over hardened trails, rocks, sandy lahar-like soil, and paved roads. The sole studs don’t have any signs of being deformed or shaved-off from its original appearance. As compared with my other trail shoes, like Hoka One One, Salomon, New Balance, ASICS, Adidas, and Altra, with almost 100 miles of usage, I could already see some signs of shaving-off of their outer soles (usually on the outer side portions) due to “wear and tear”. The outsole studs are not pointed or look aggressive as they are in circular forms but I find them very effective in my downhill running over loose soil and steep hardened trails.
You can buy two pairs of these shoes for the price of a “high-end” trail shoes being used by European elite mountain trail runners. But surprisingly, if you buy the shoes in the local market or in local Merrell Stores, they are much cheaper than what is posted as their price in their website.
Trail Shoes Are Meant To Be DIRTY
Bottomline? Will I highly recommend these pair of trail shoes for you? Of course! You will get your money’s worth with this pair of shoes. If you are a compulsive runner-shopper, there is no need for you to order On Line/through Internet and wait for the delivery of your order. You simply go to the Malls and most likely, all the Sports Stores have Merrell Shoes in them. However, if you want more choices on their different models, the best way is to visit one of the Merrell Stores which are located in all the big malls in Metro Manila. (Note: The Staff/Sales Personnel in these stores are NOT trail runners or mountaineers, so be patient to just hear their usual “sales talk” while you are trying to walk or fit with the shoes!)
On my part, in a span of six weeks, I’ve already bought three (3) pairs of MERRELL Shoes to include the “All Out Rush”. Simply said, this is to inform my readers that I am NOT an Ambassador or Sponsored Runner/Blogger of this Shoe Company.
More “User’s Report” on other Merrell Shoes to follow.
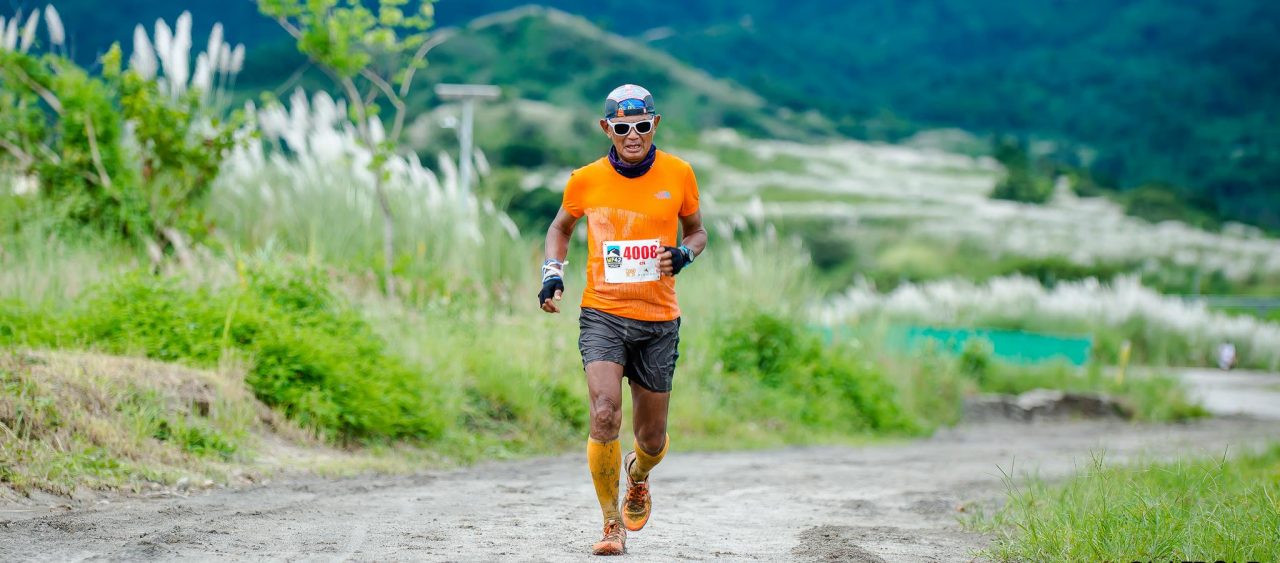


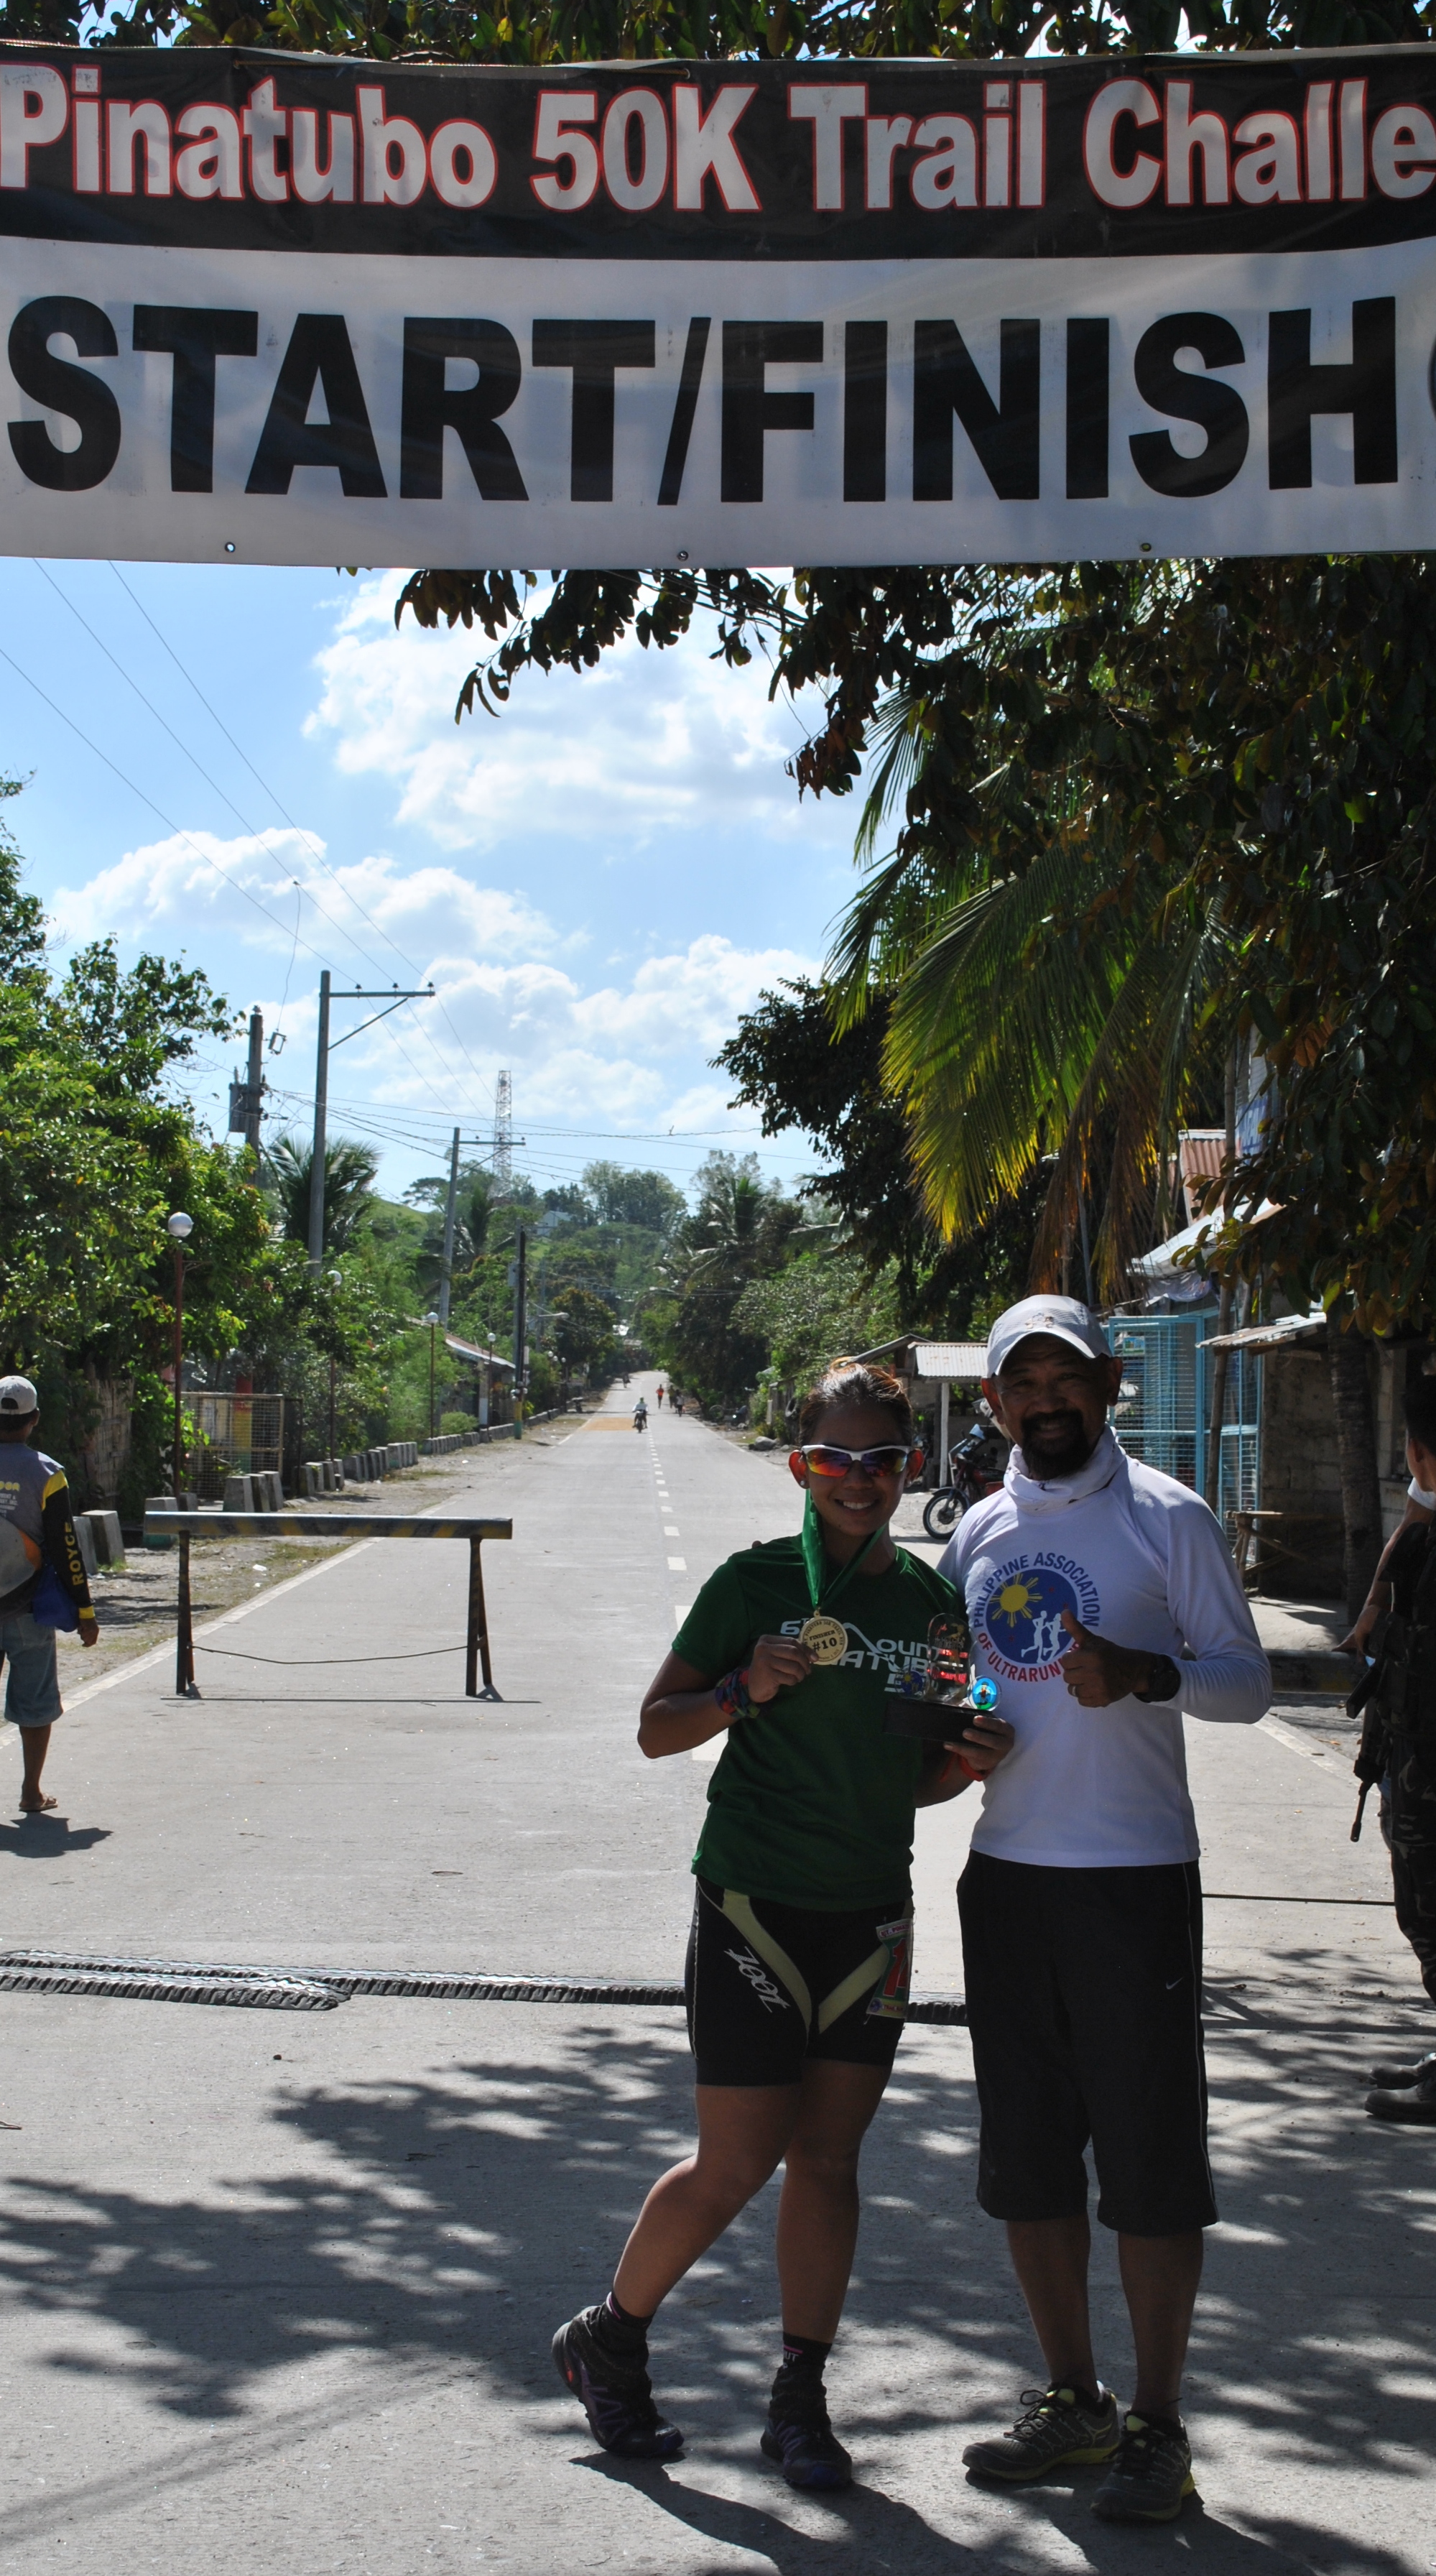
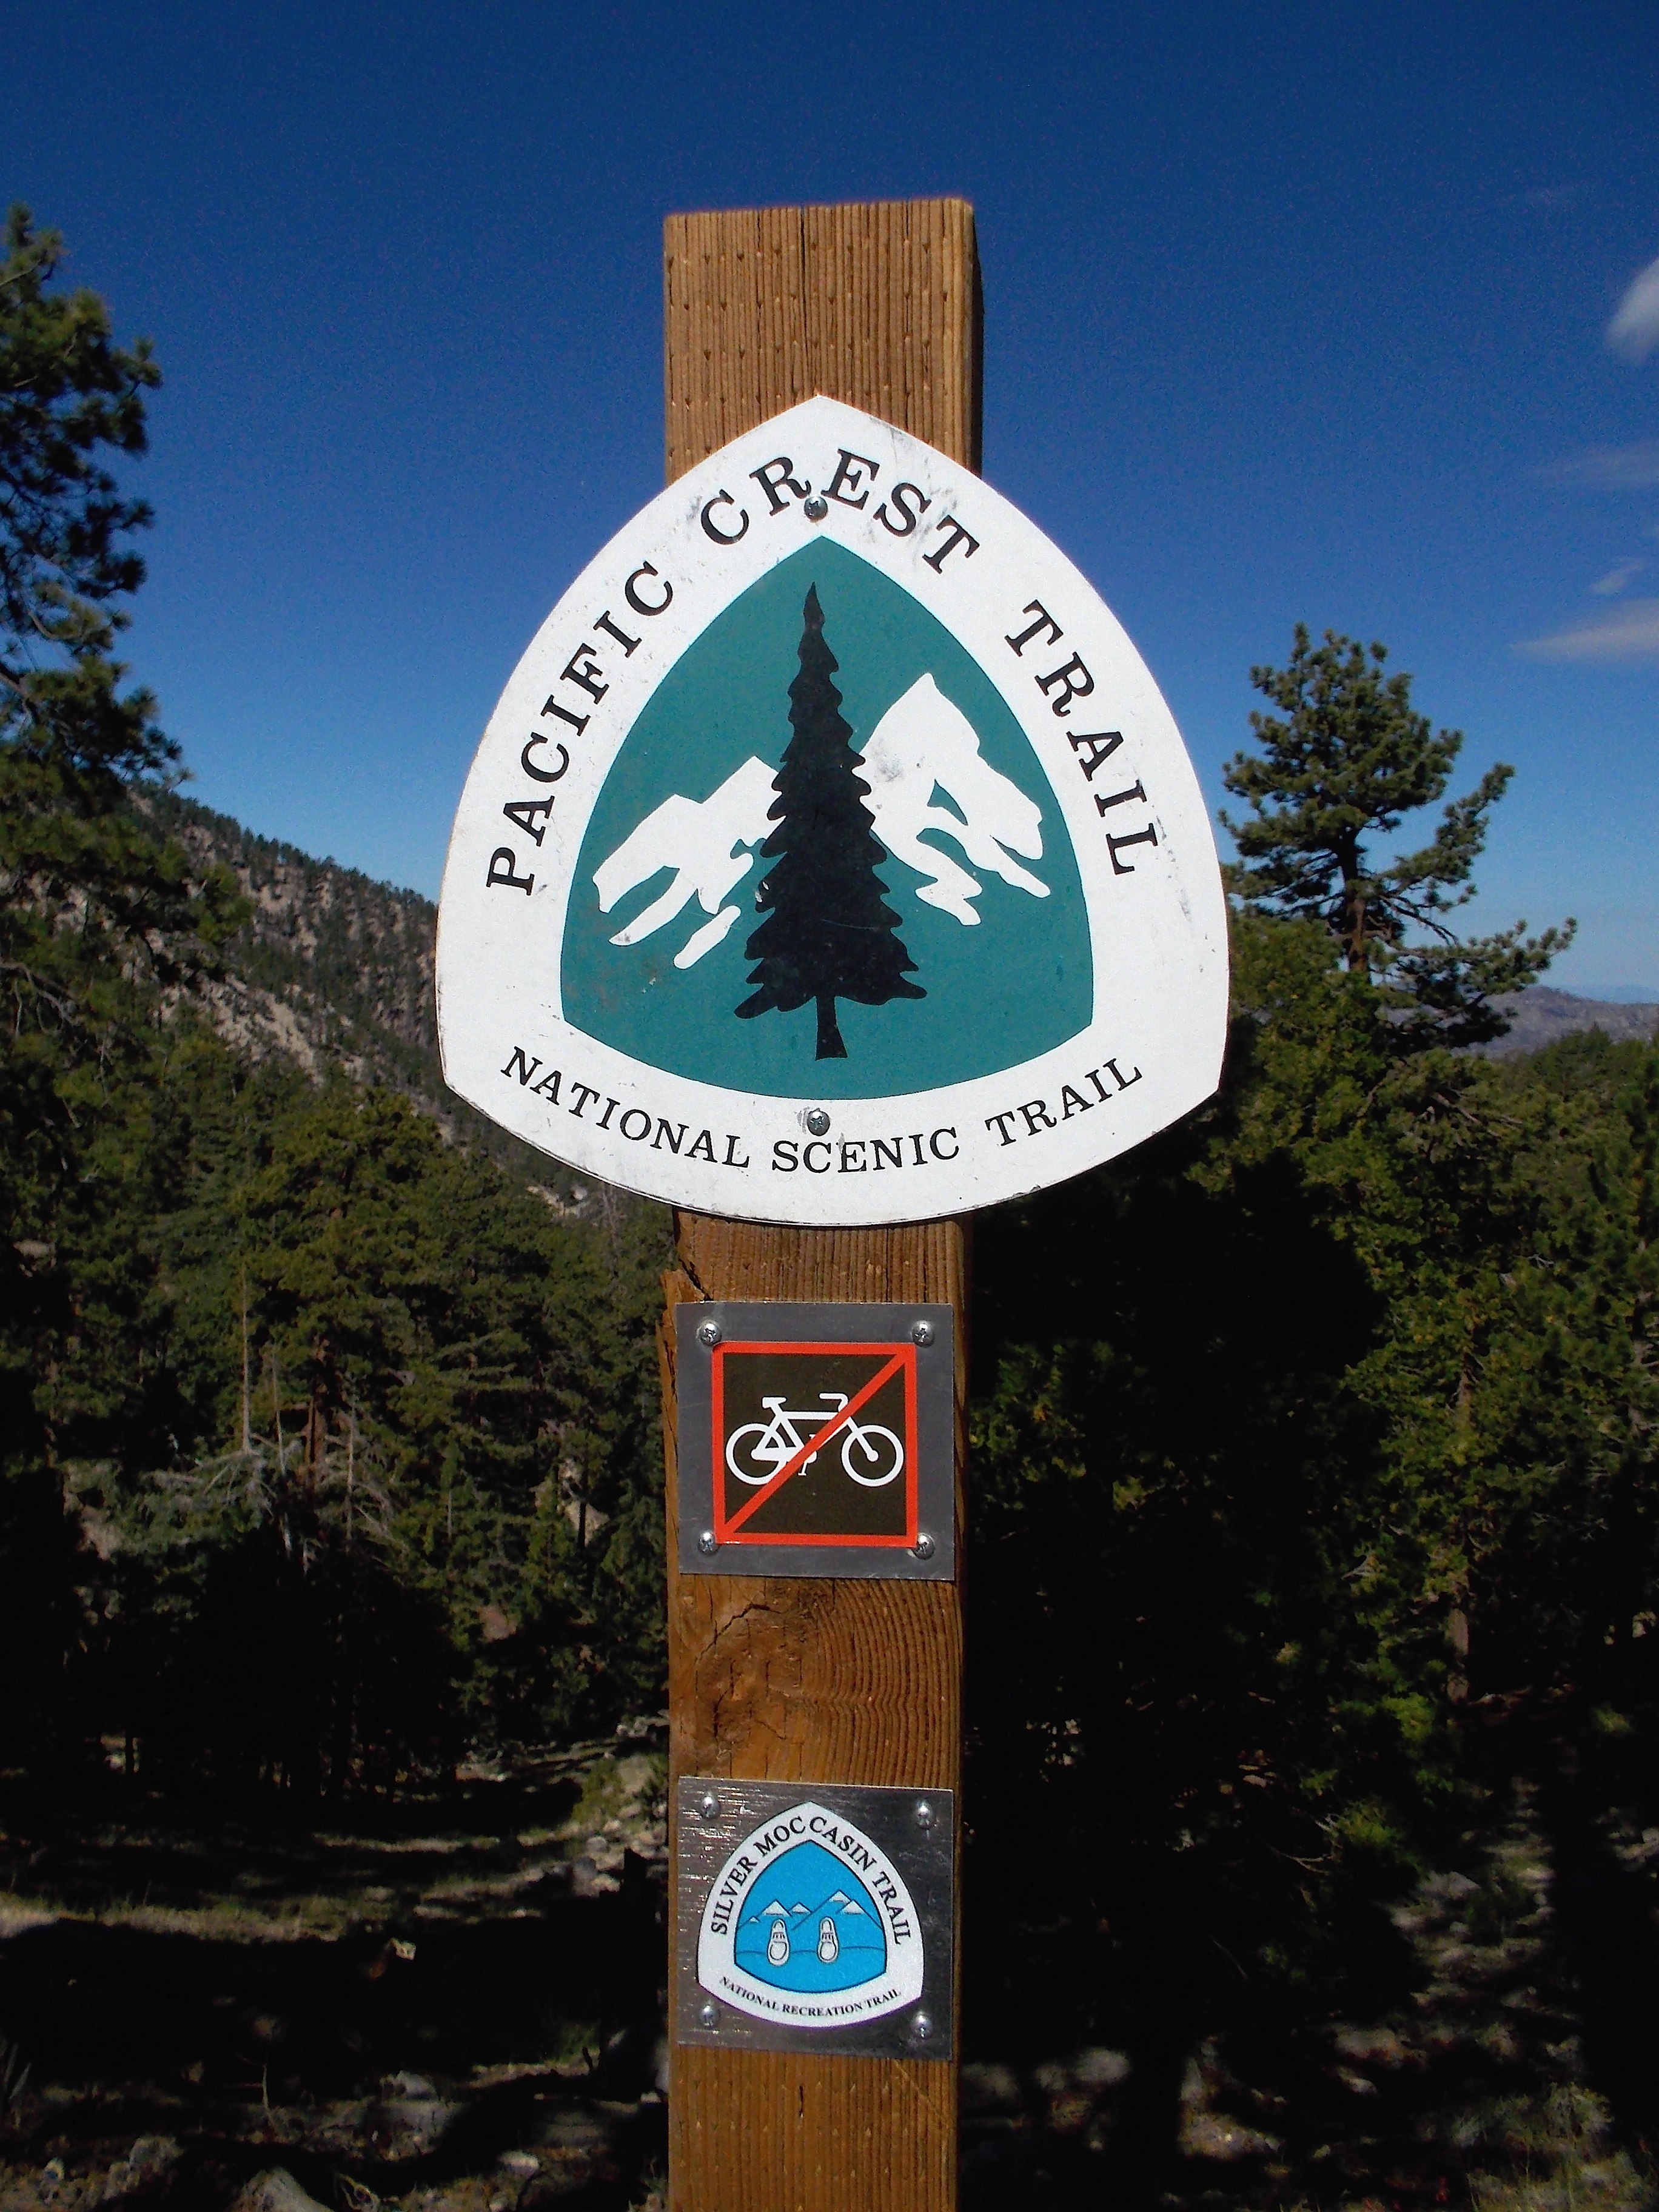
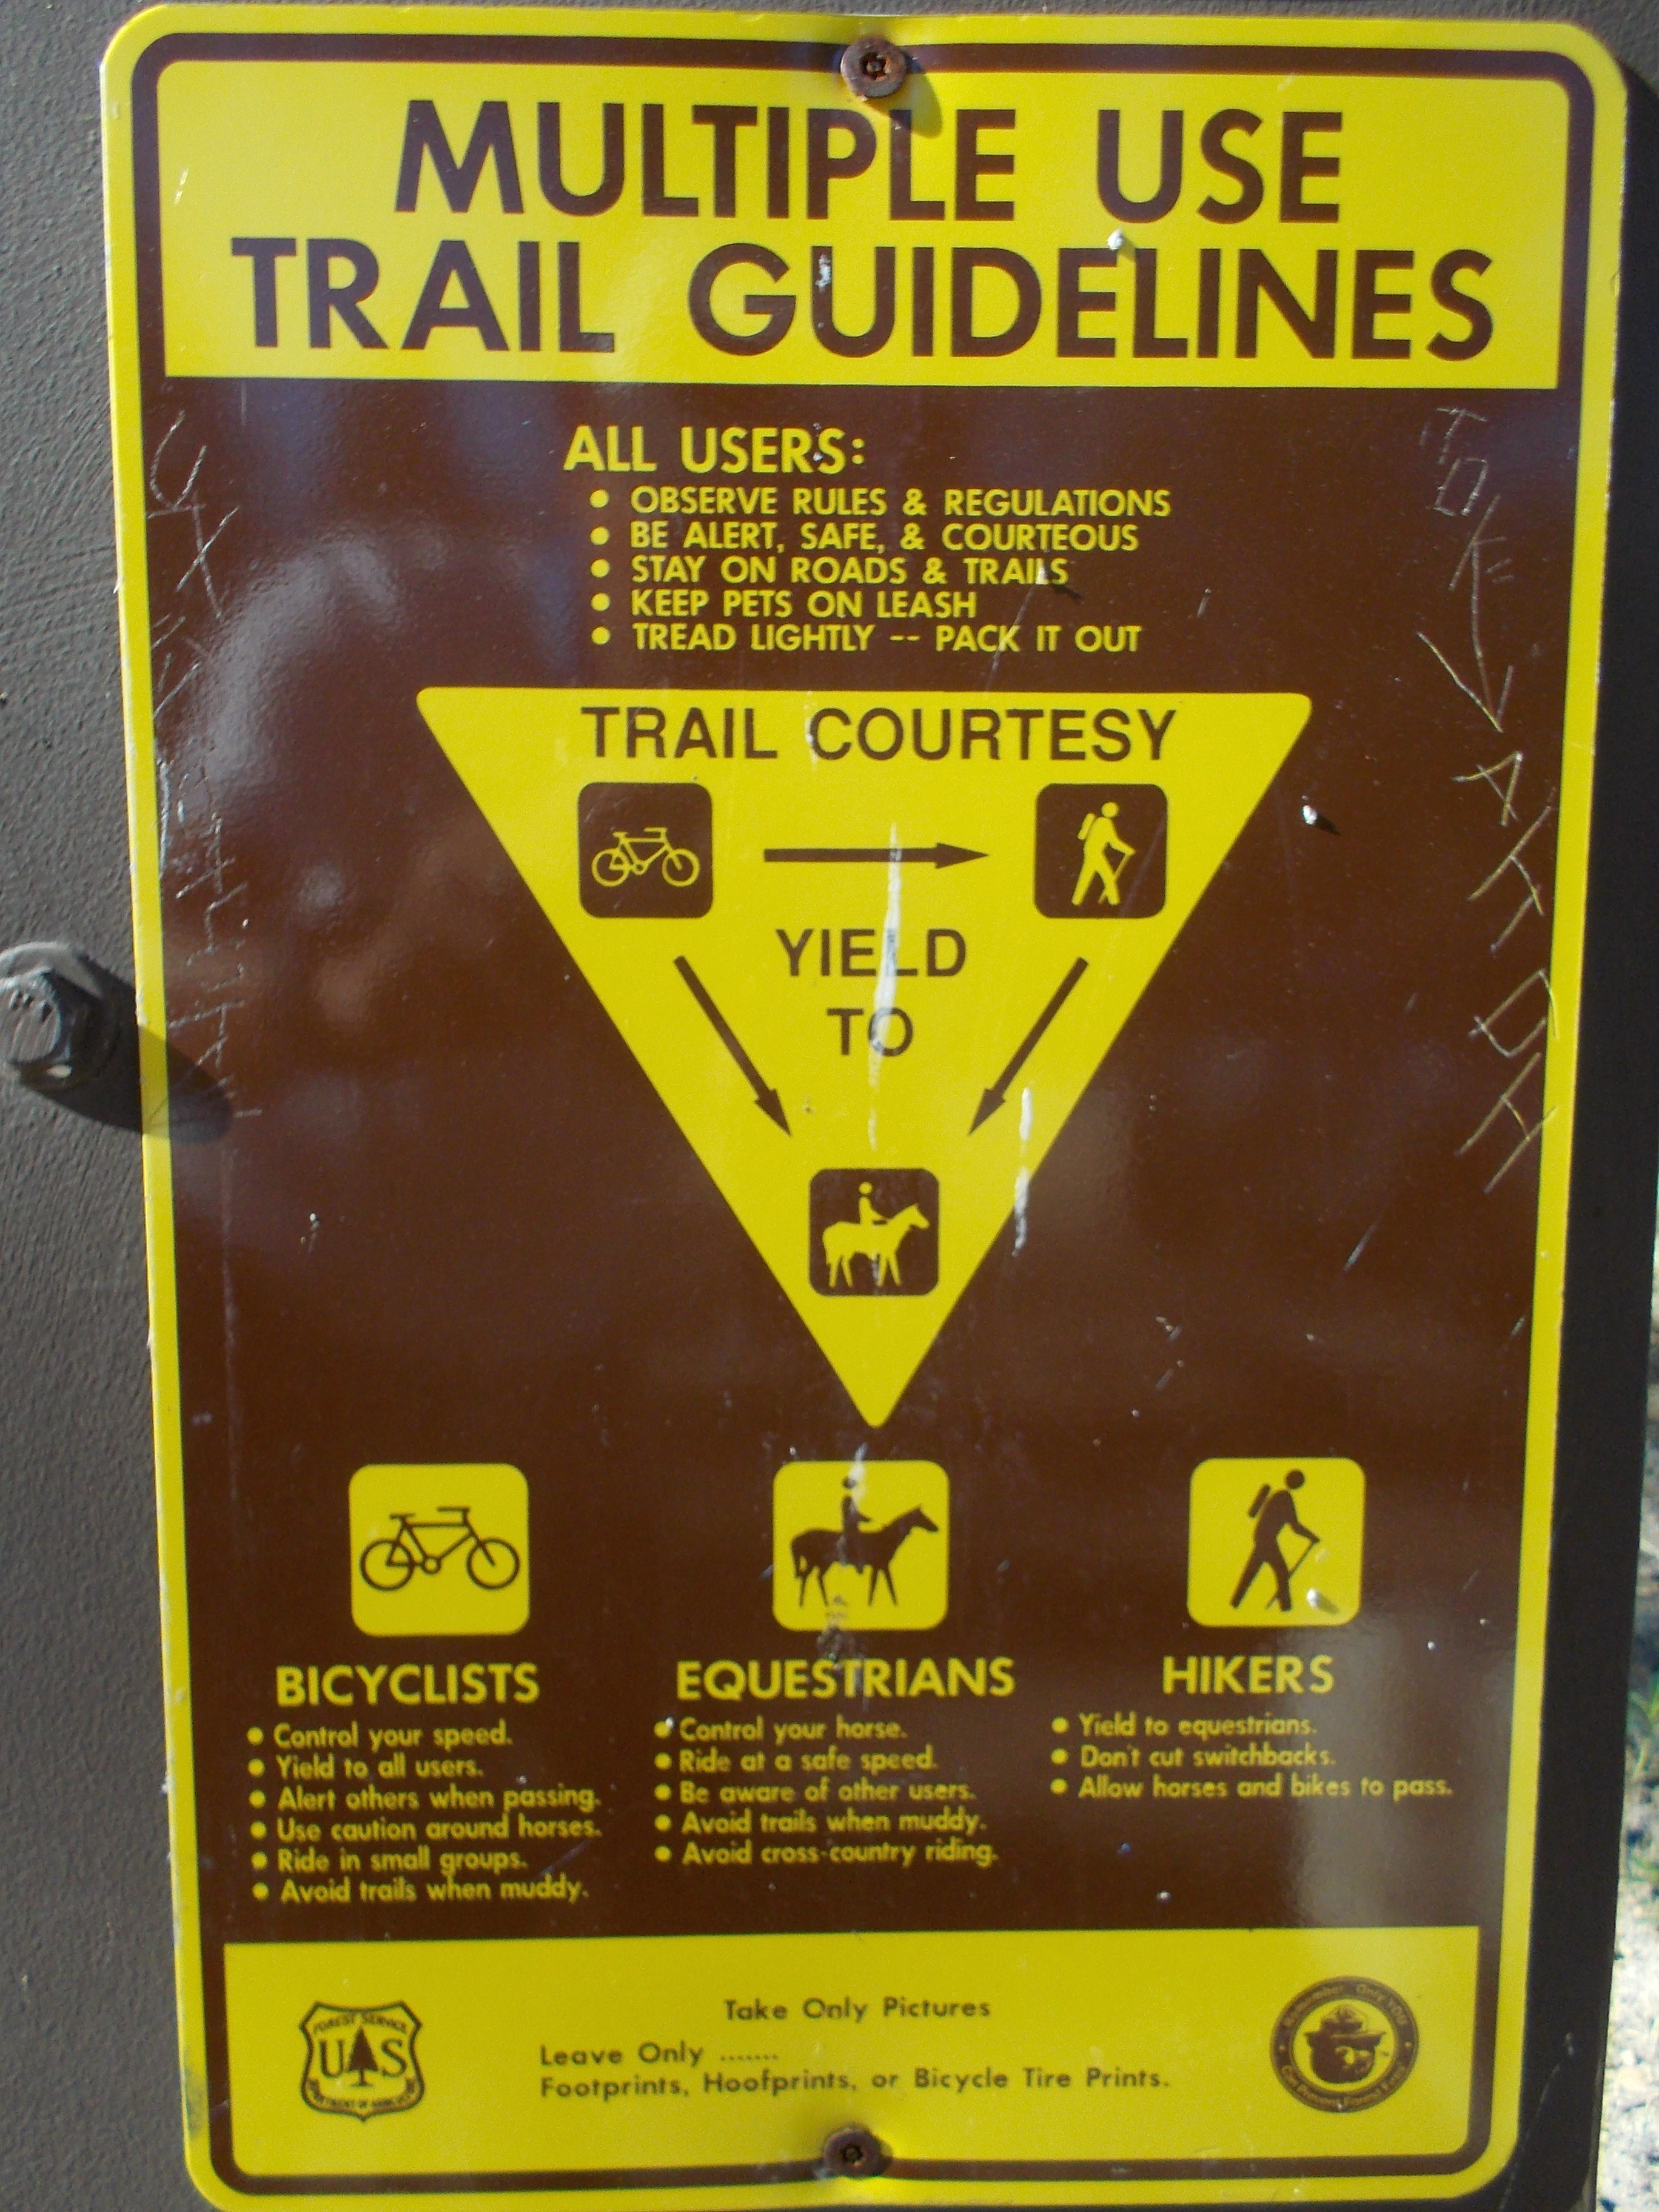
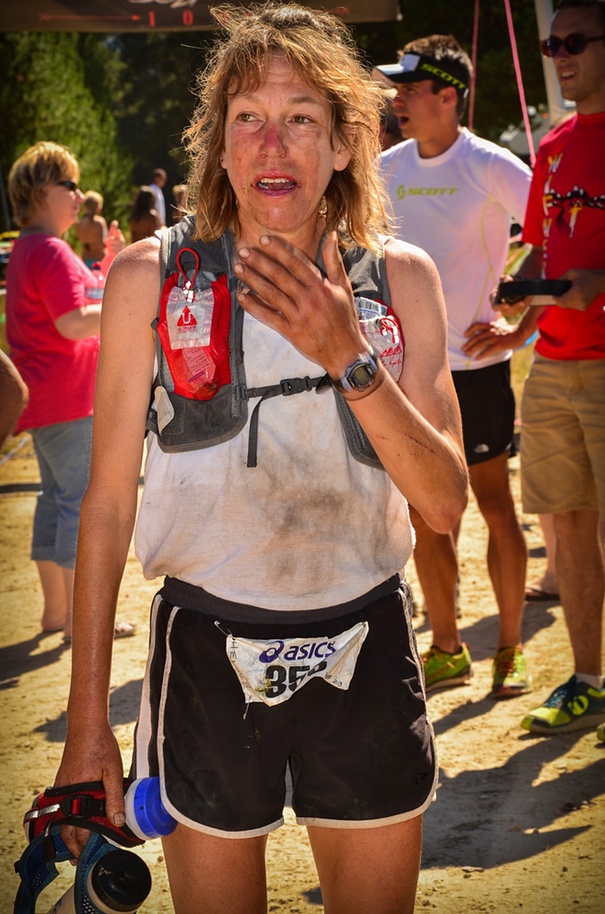
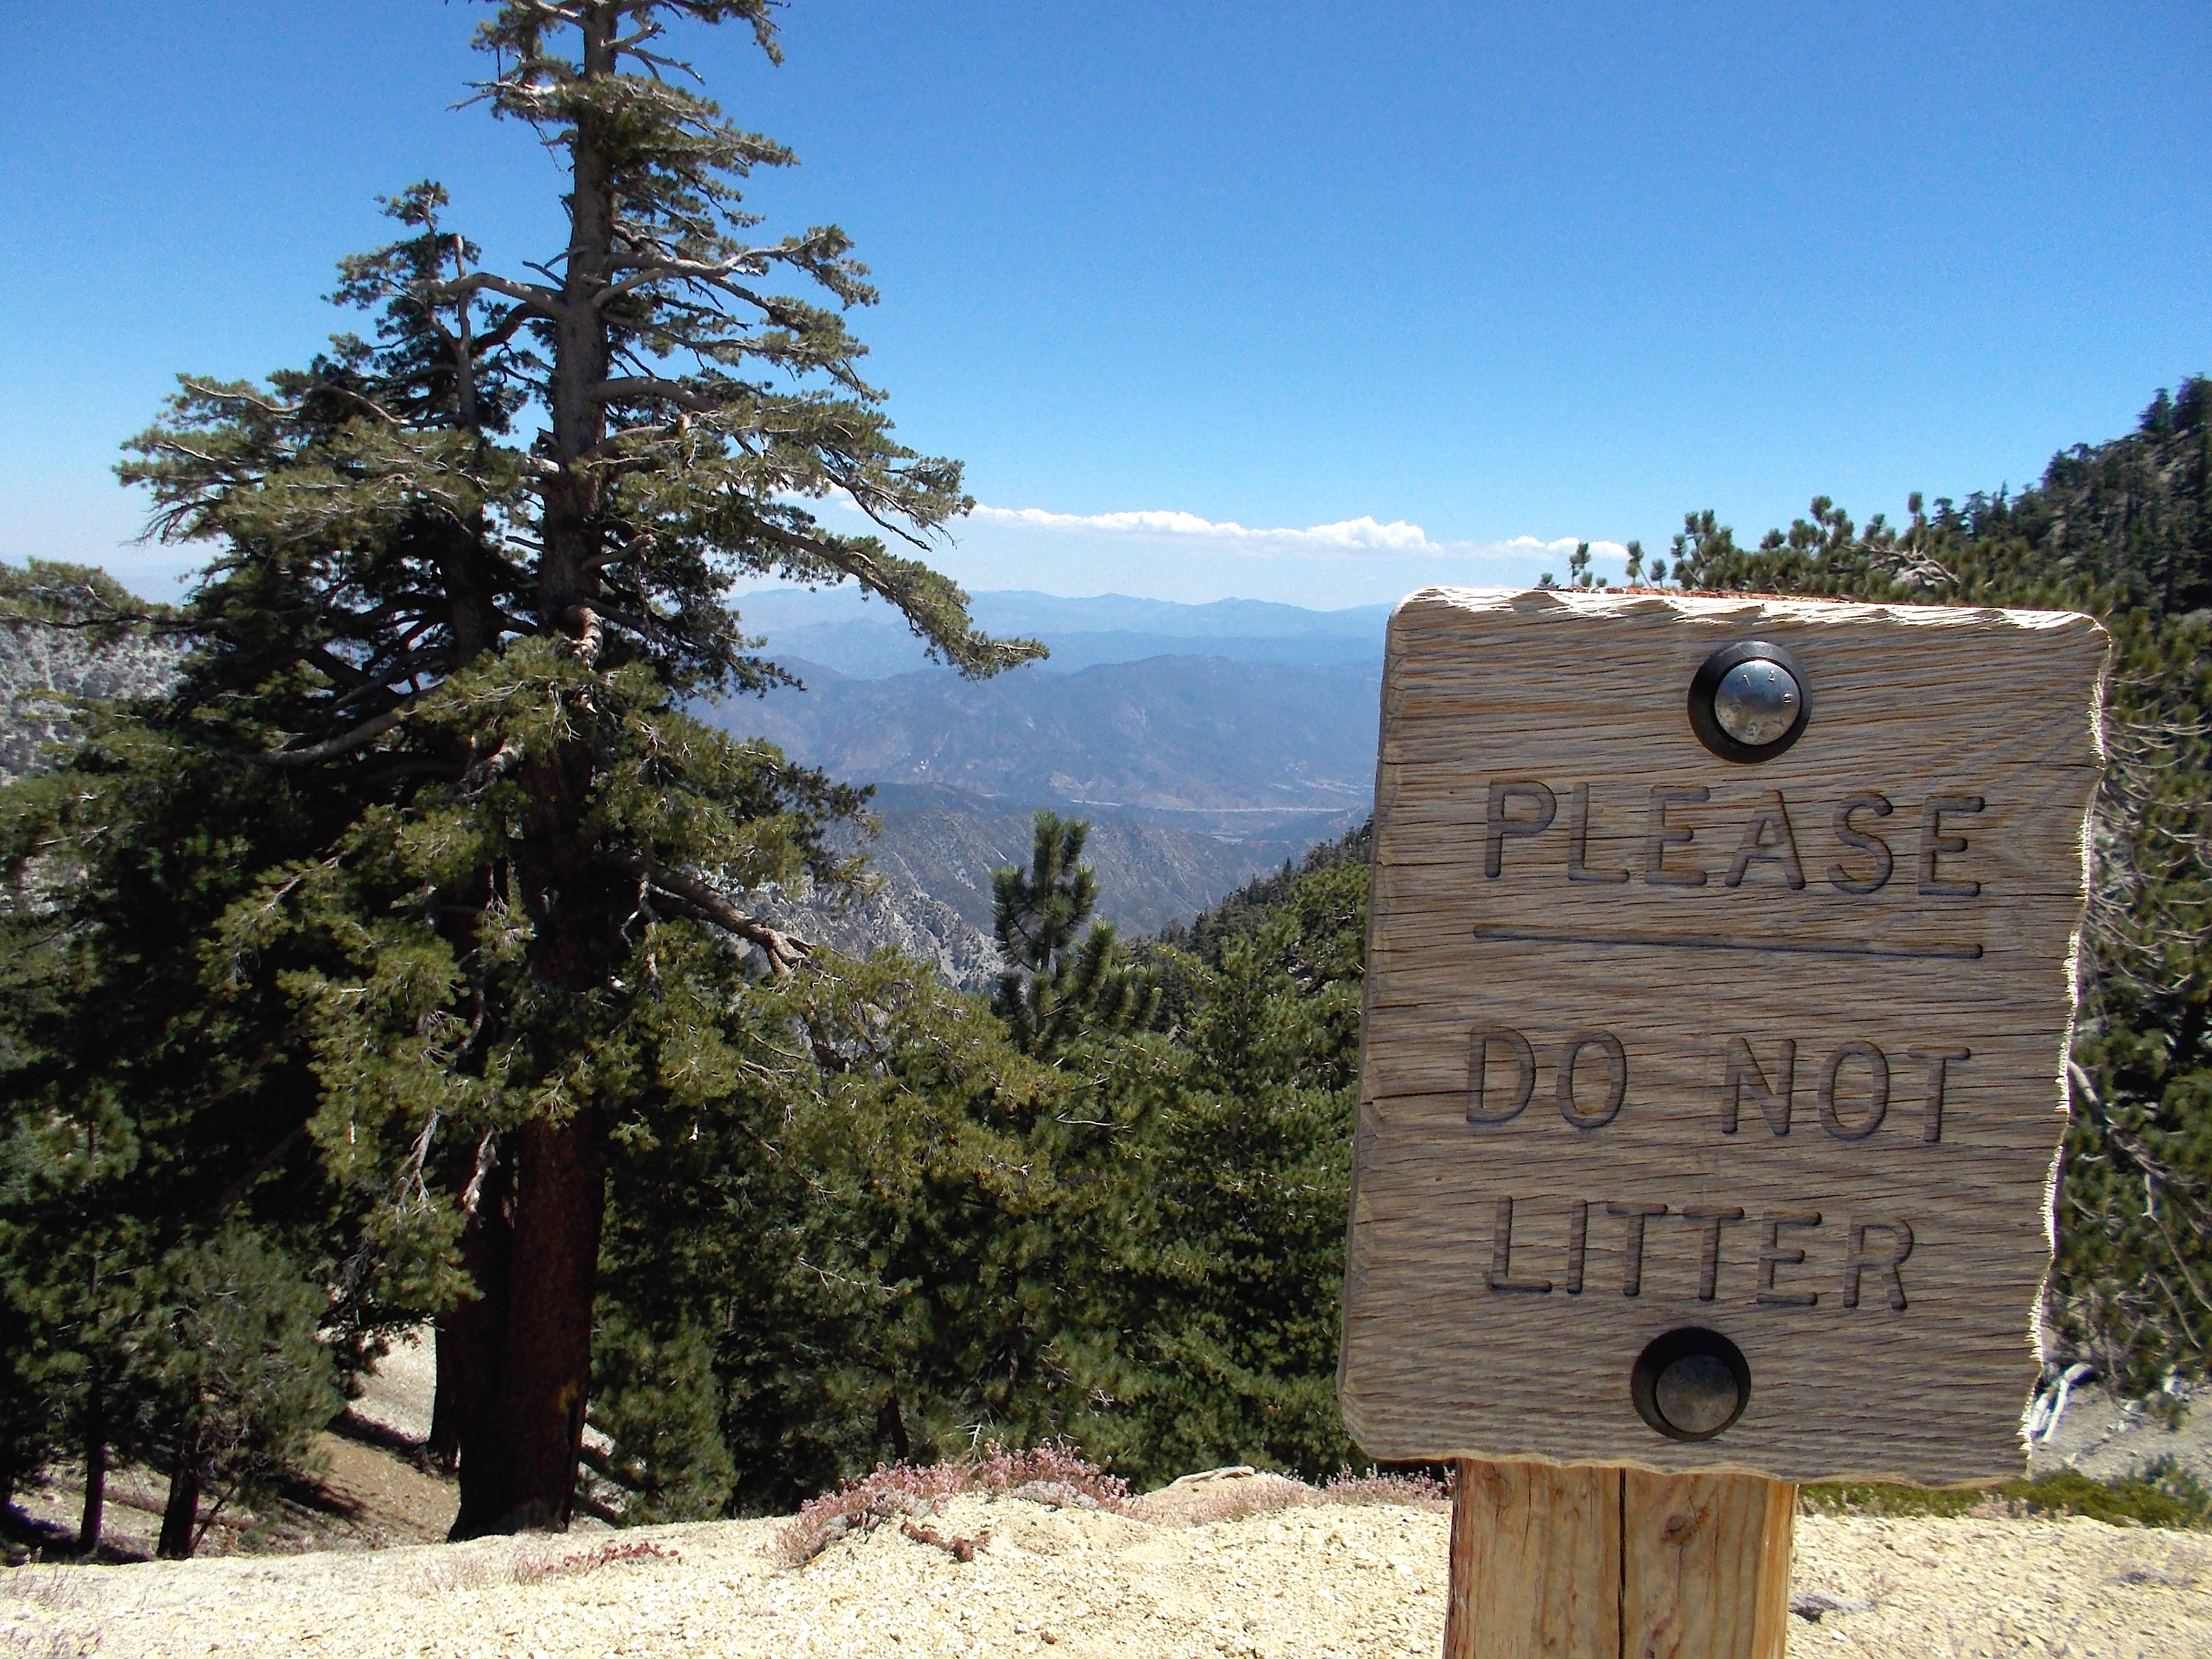

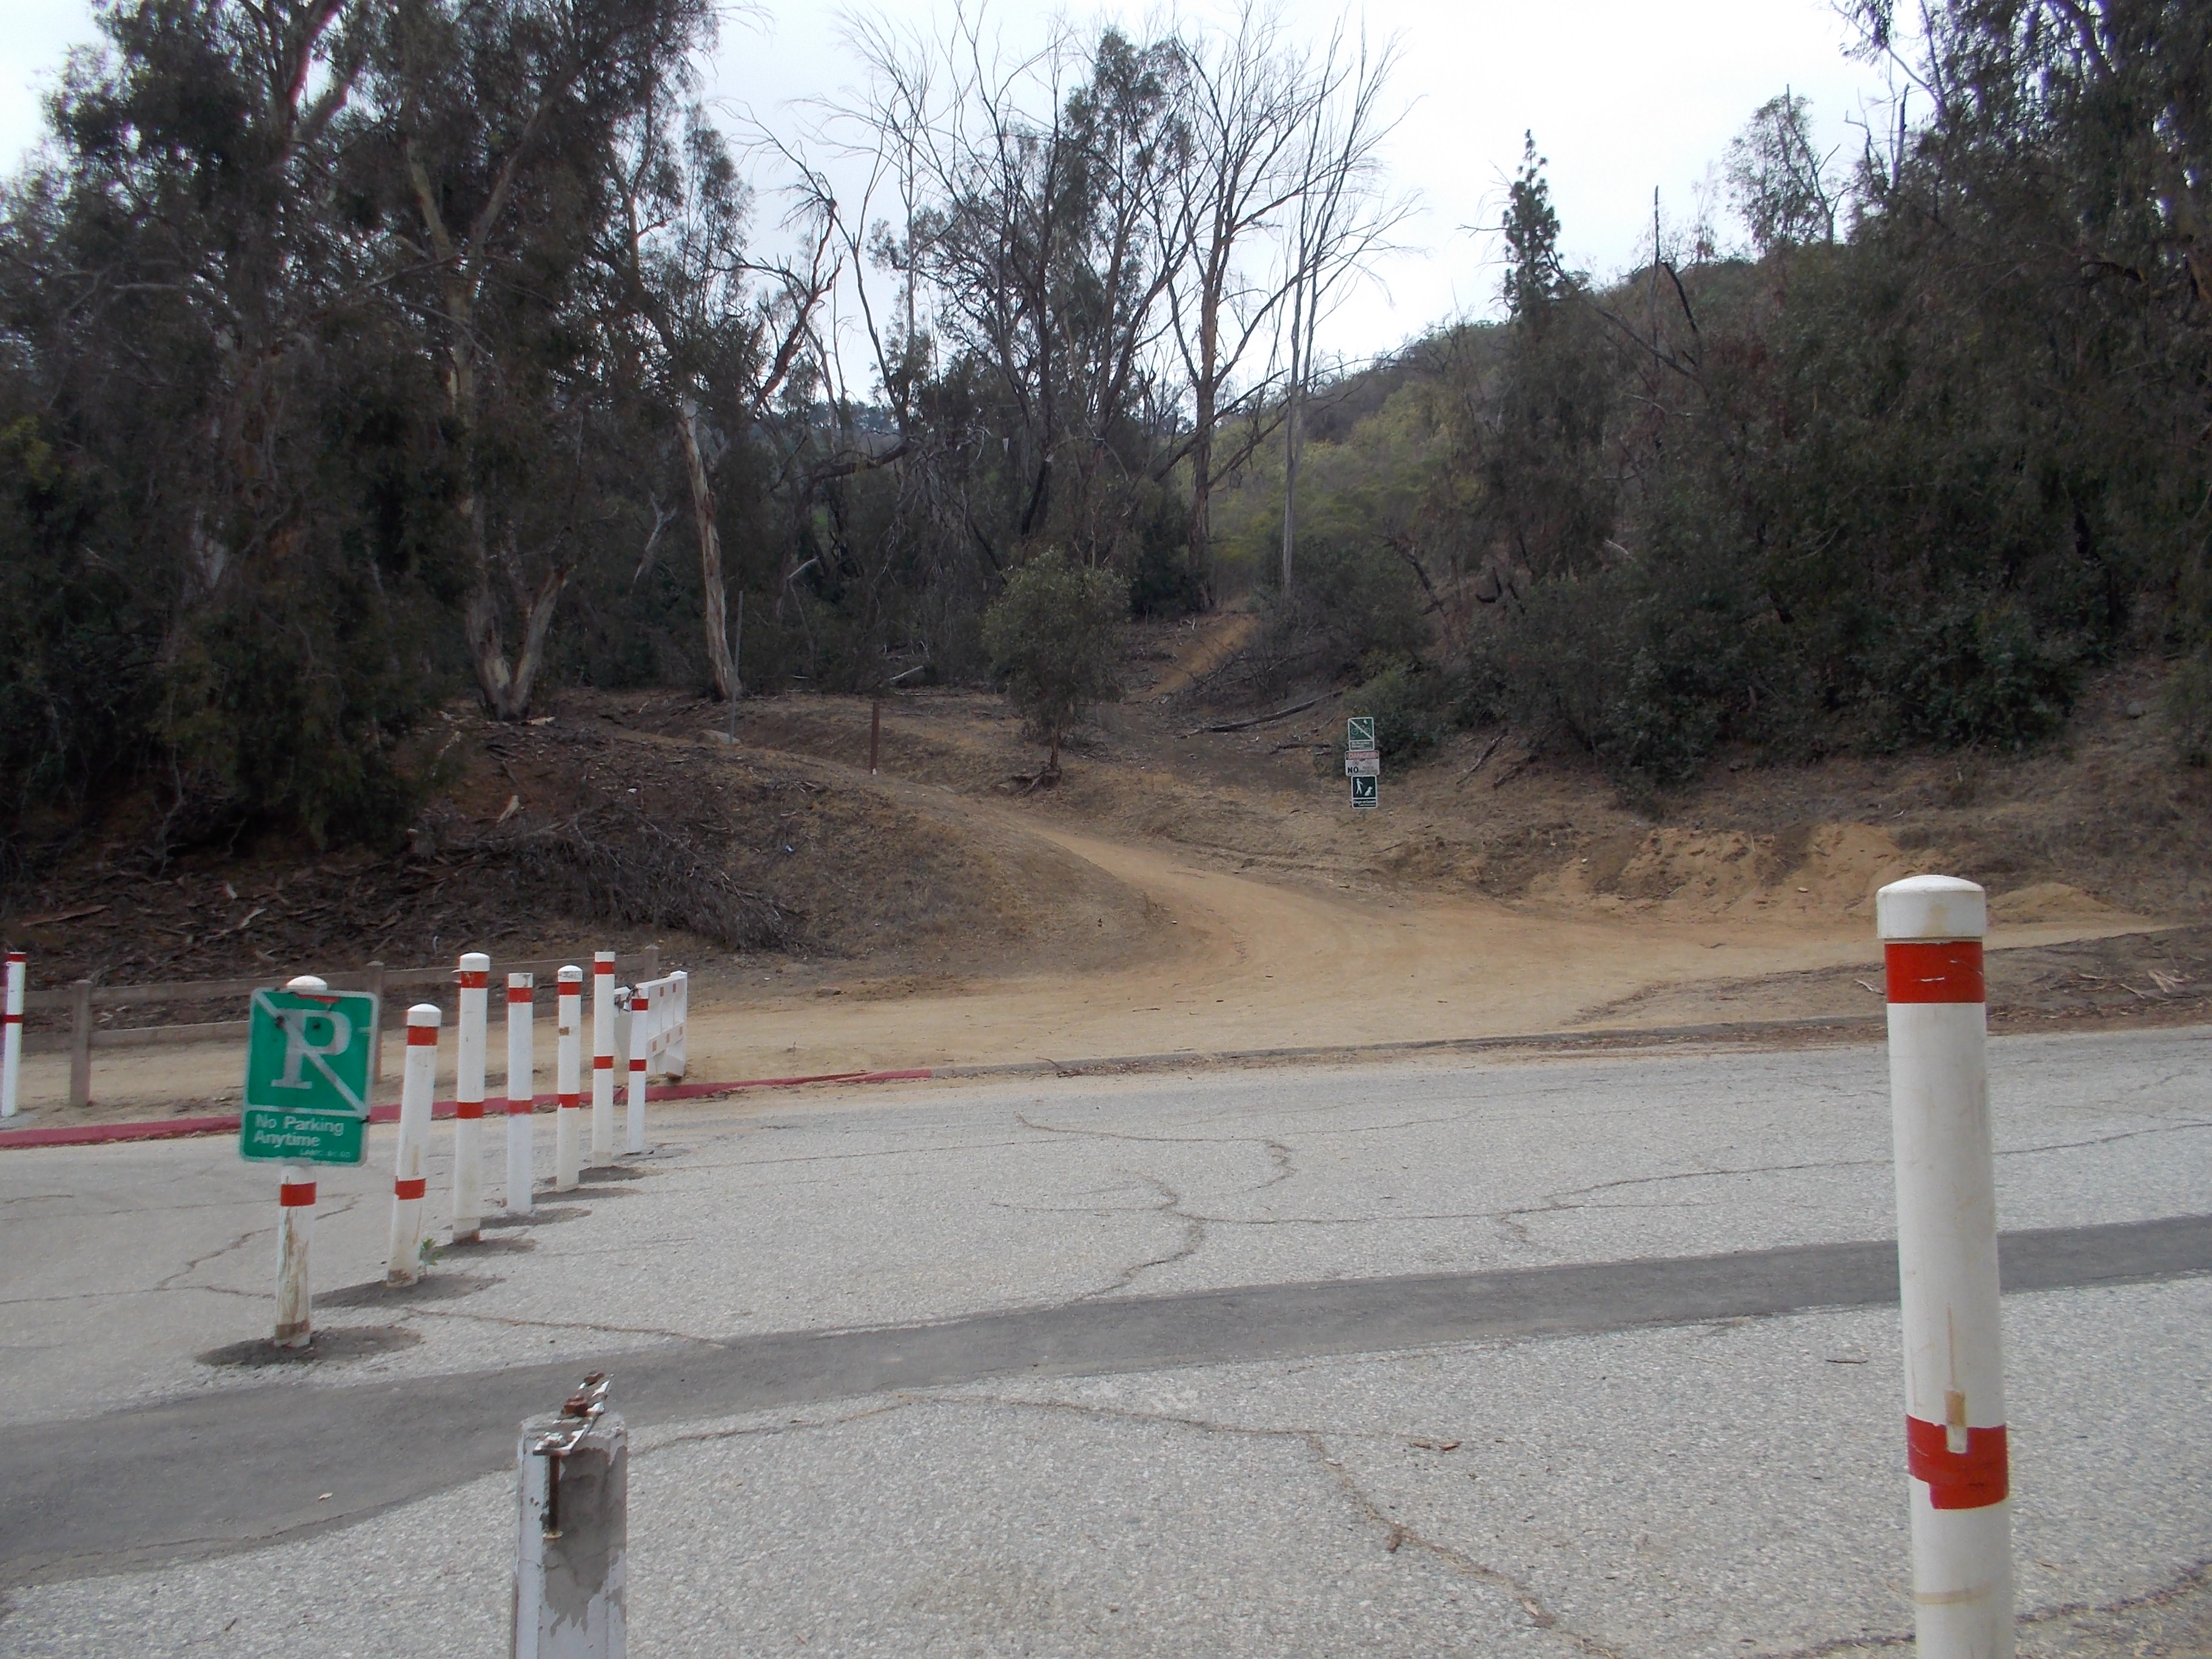
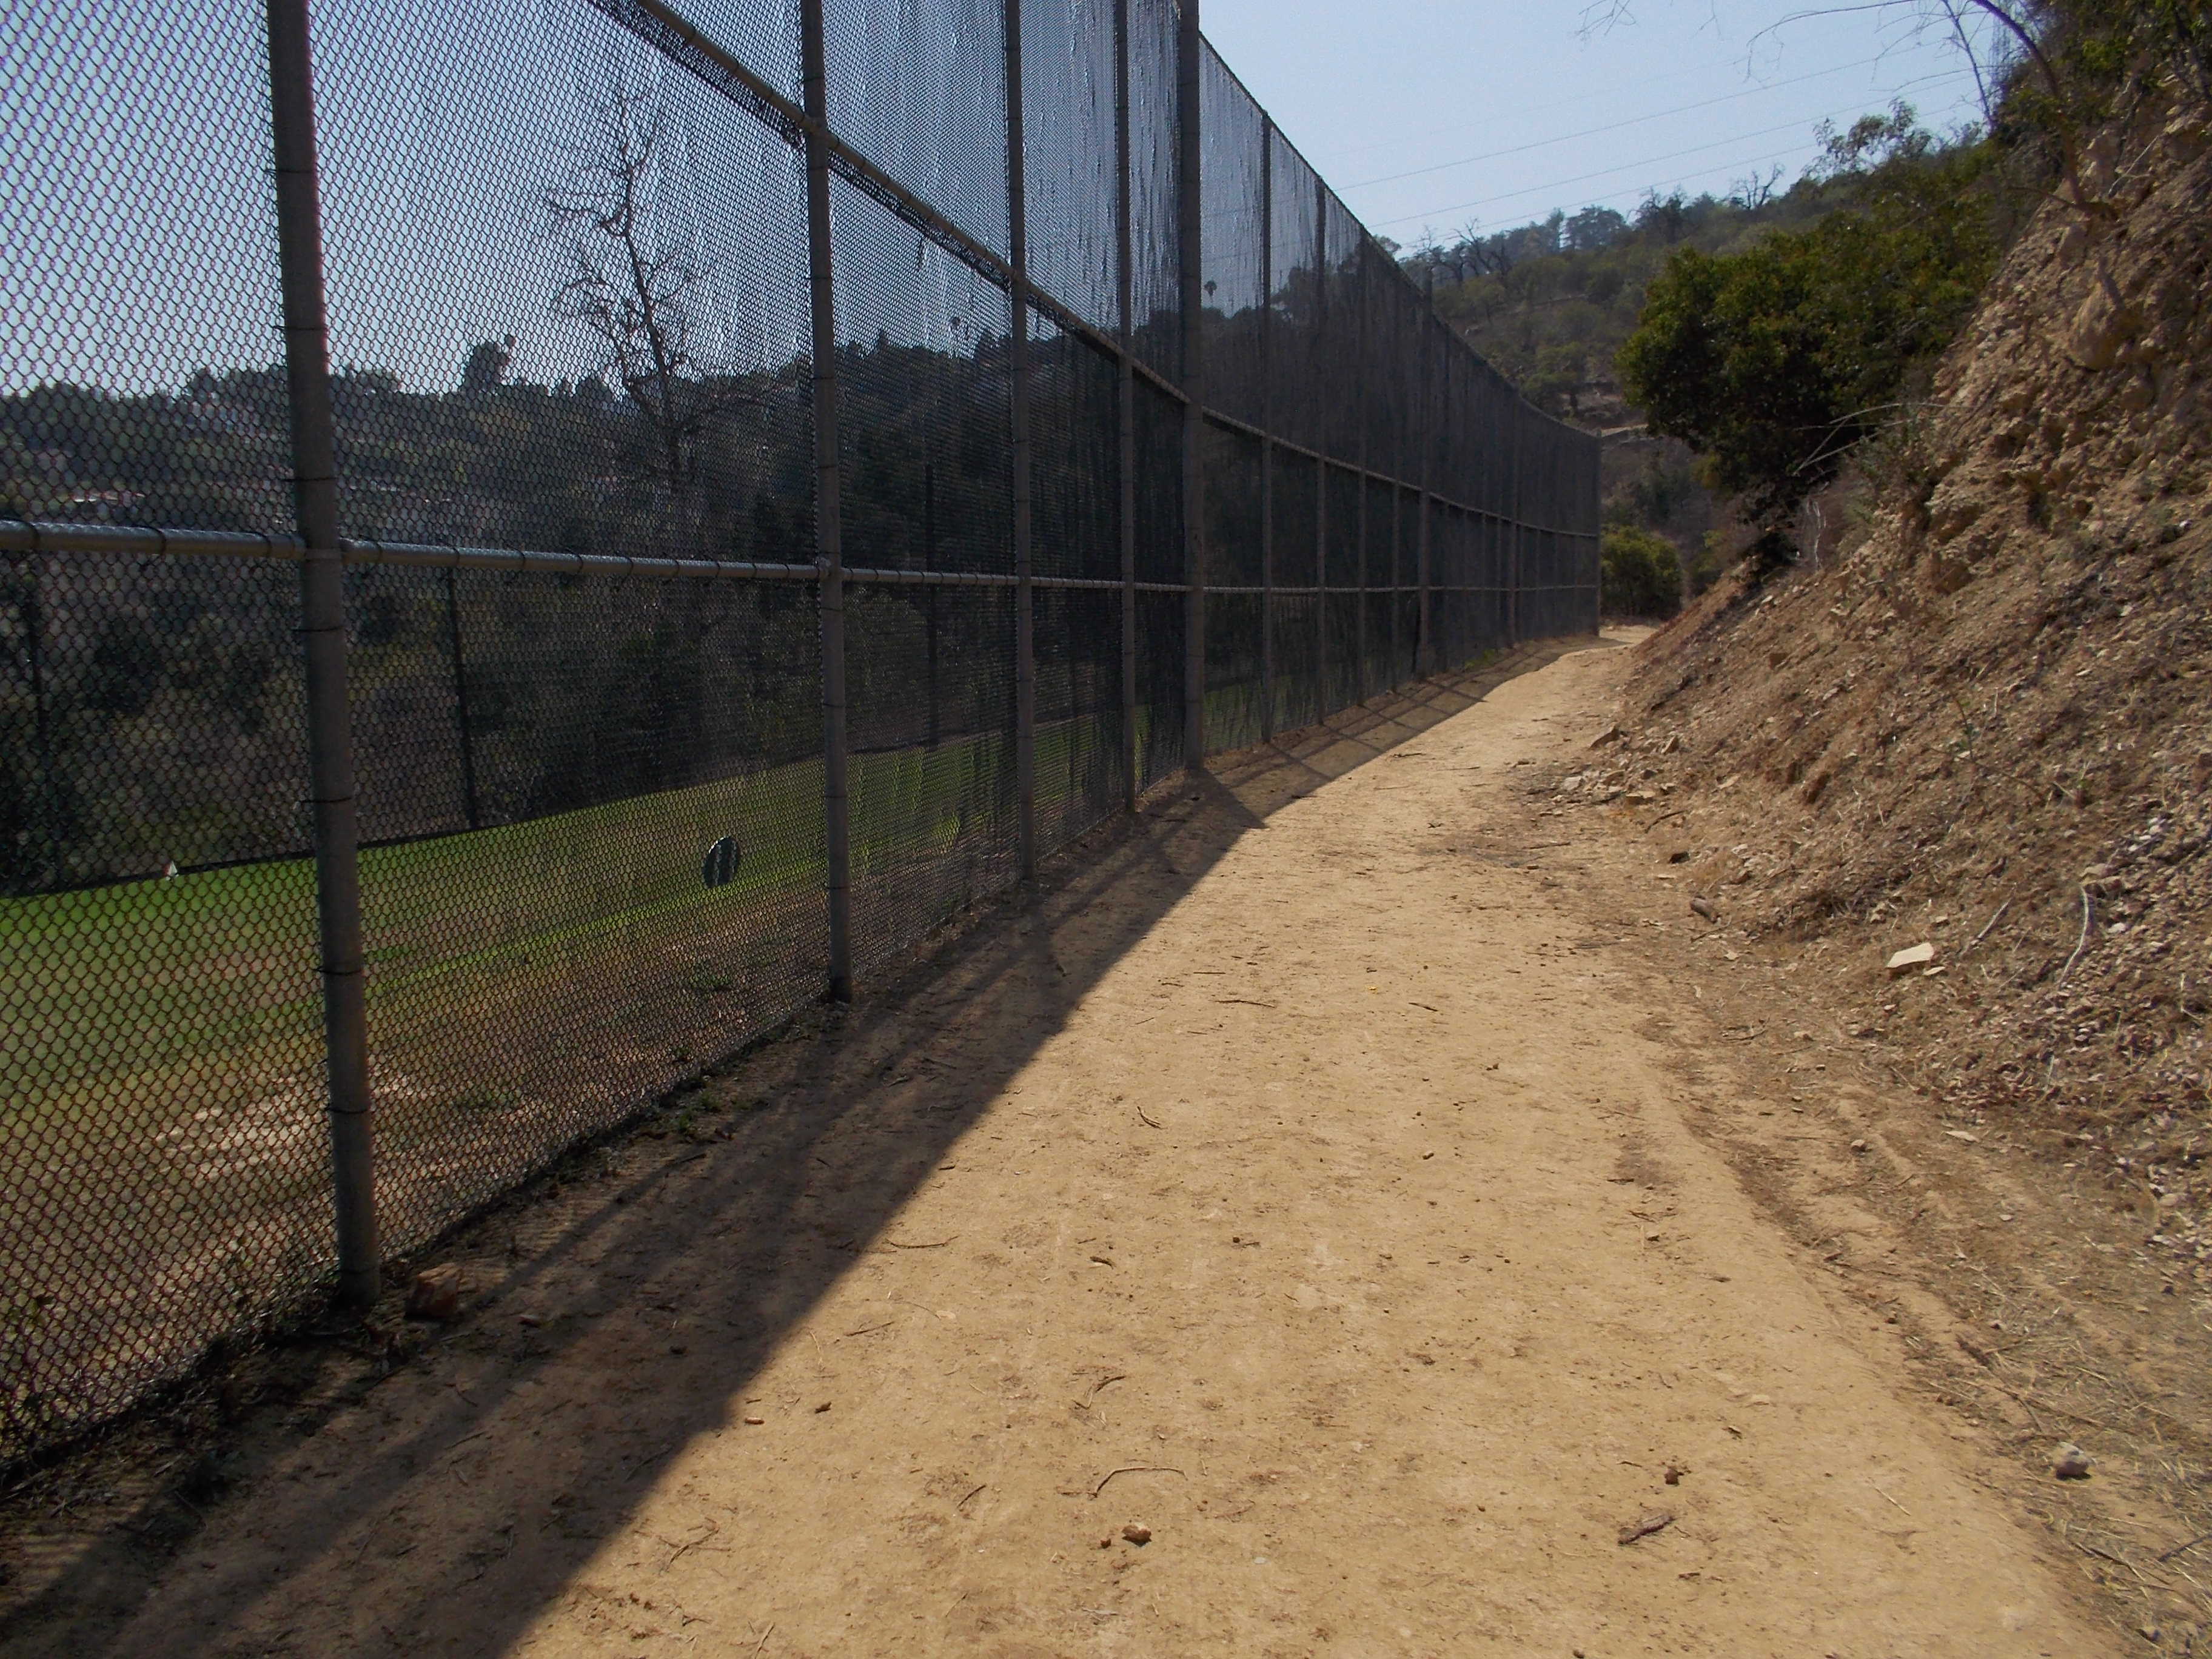
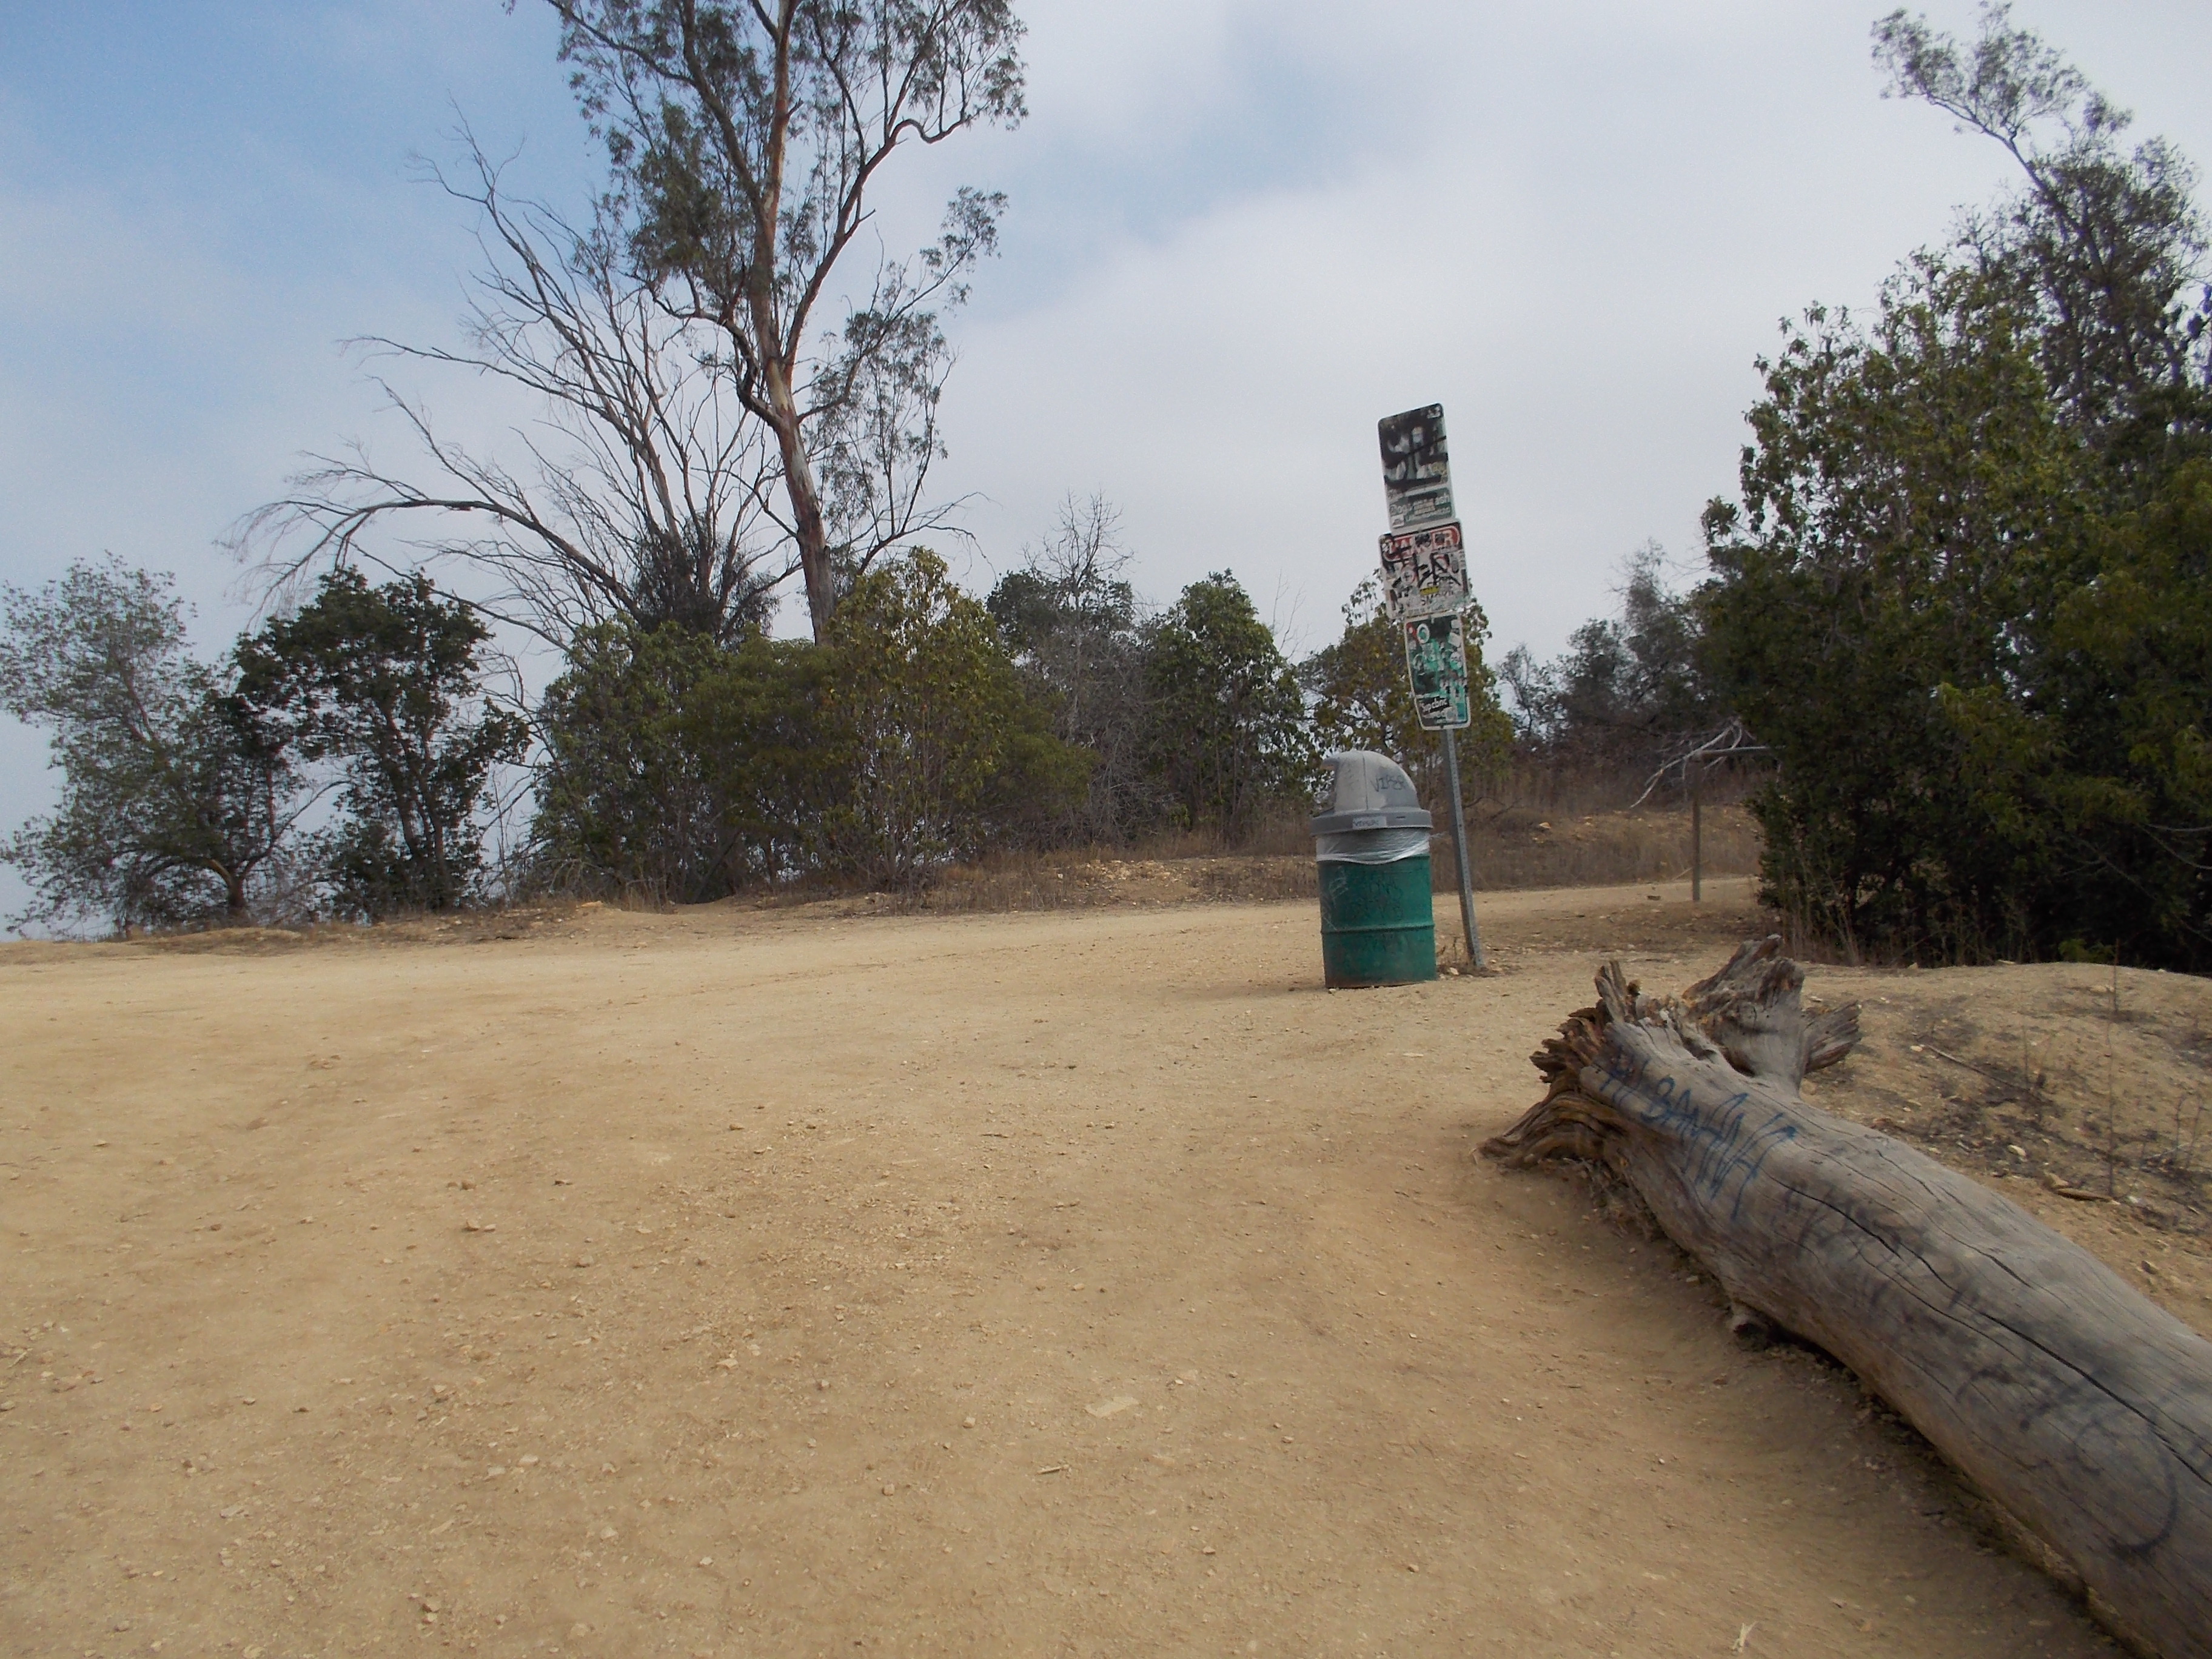
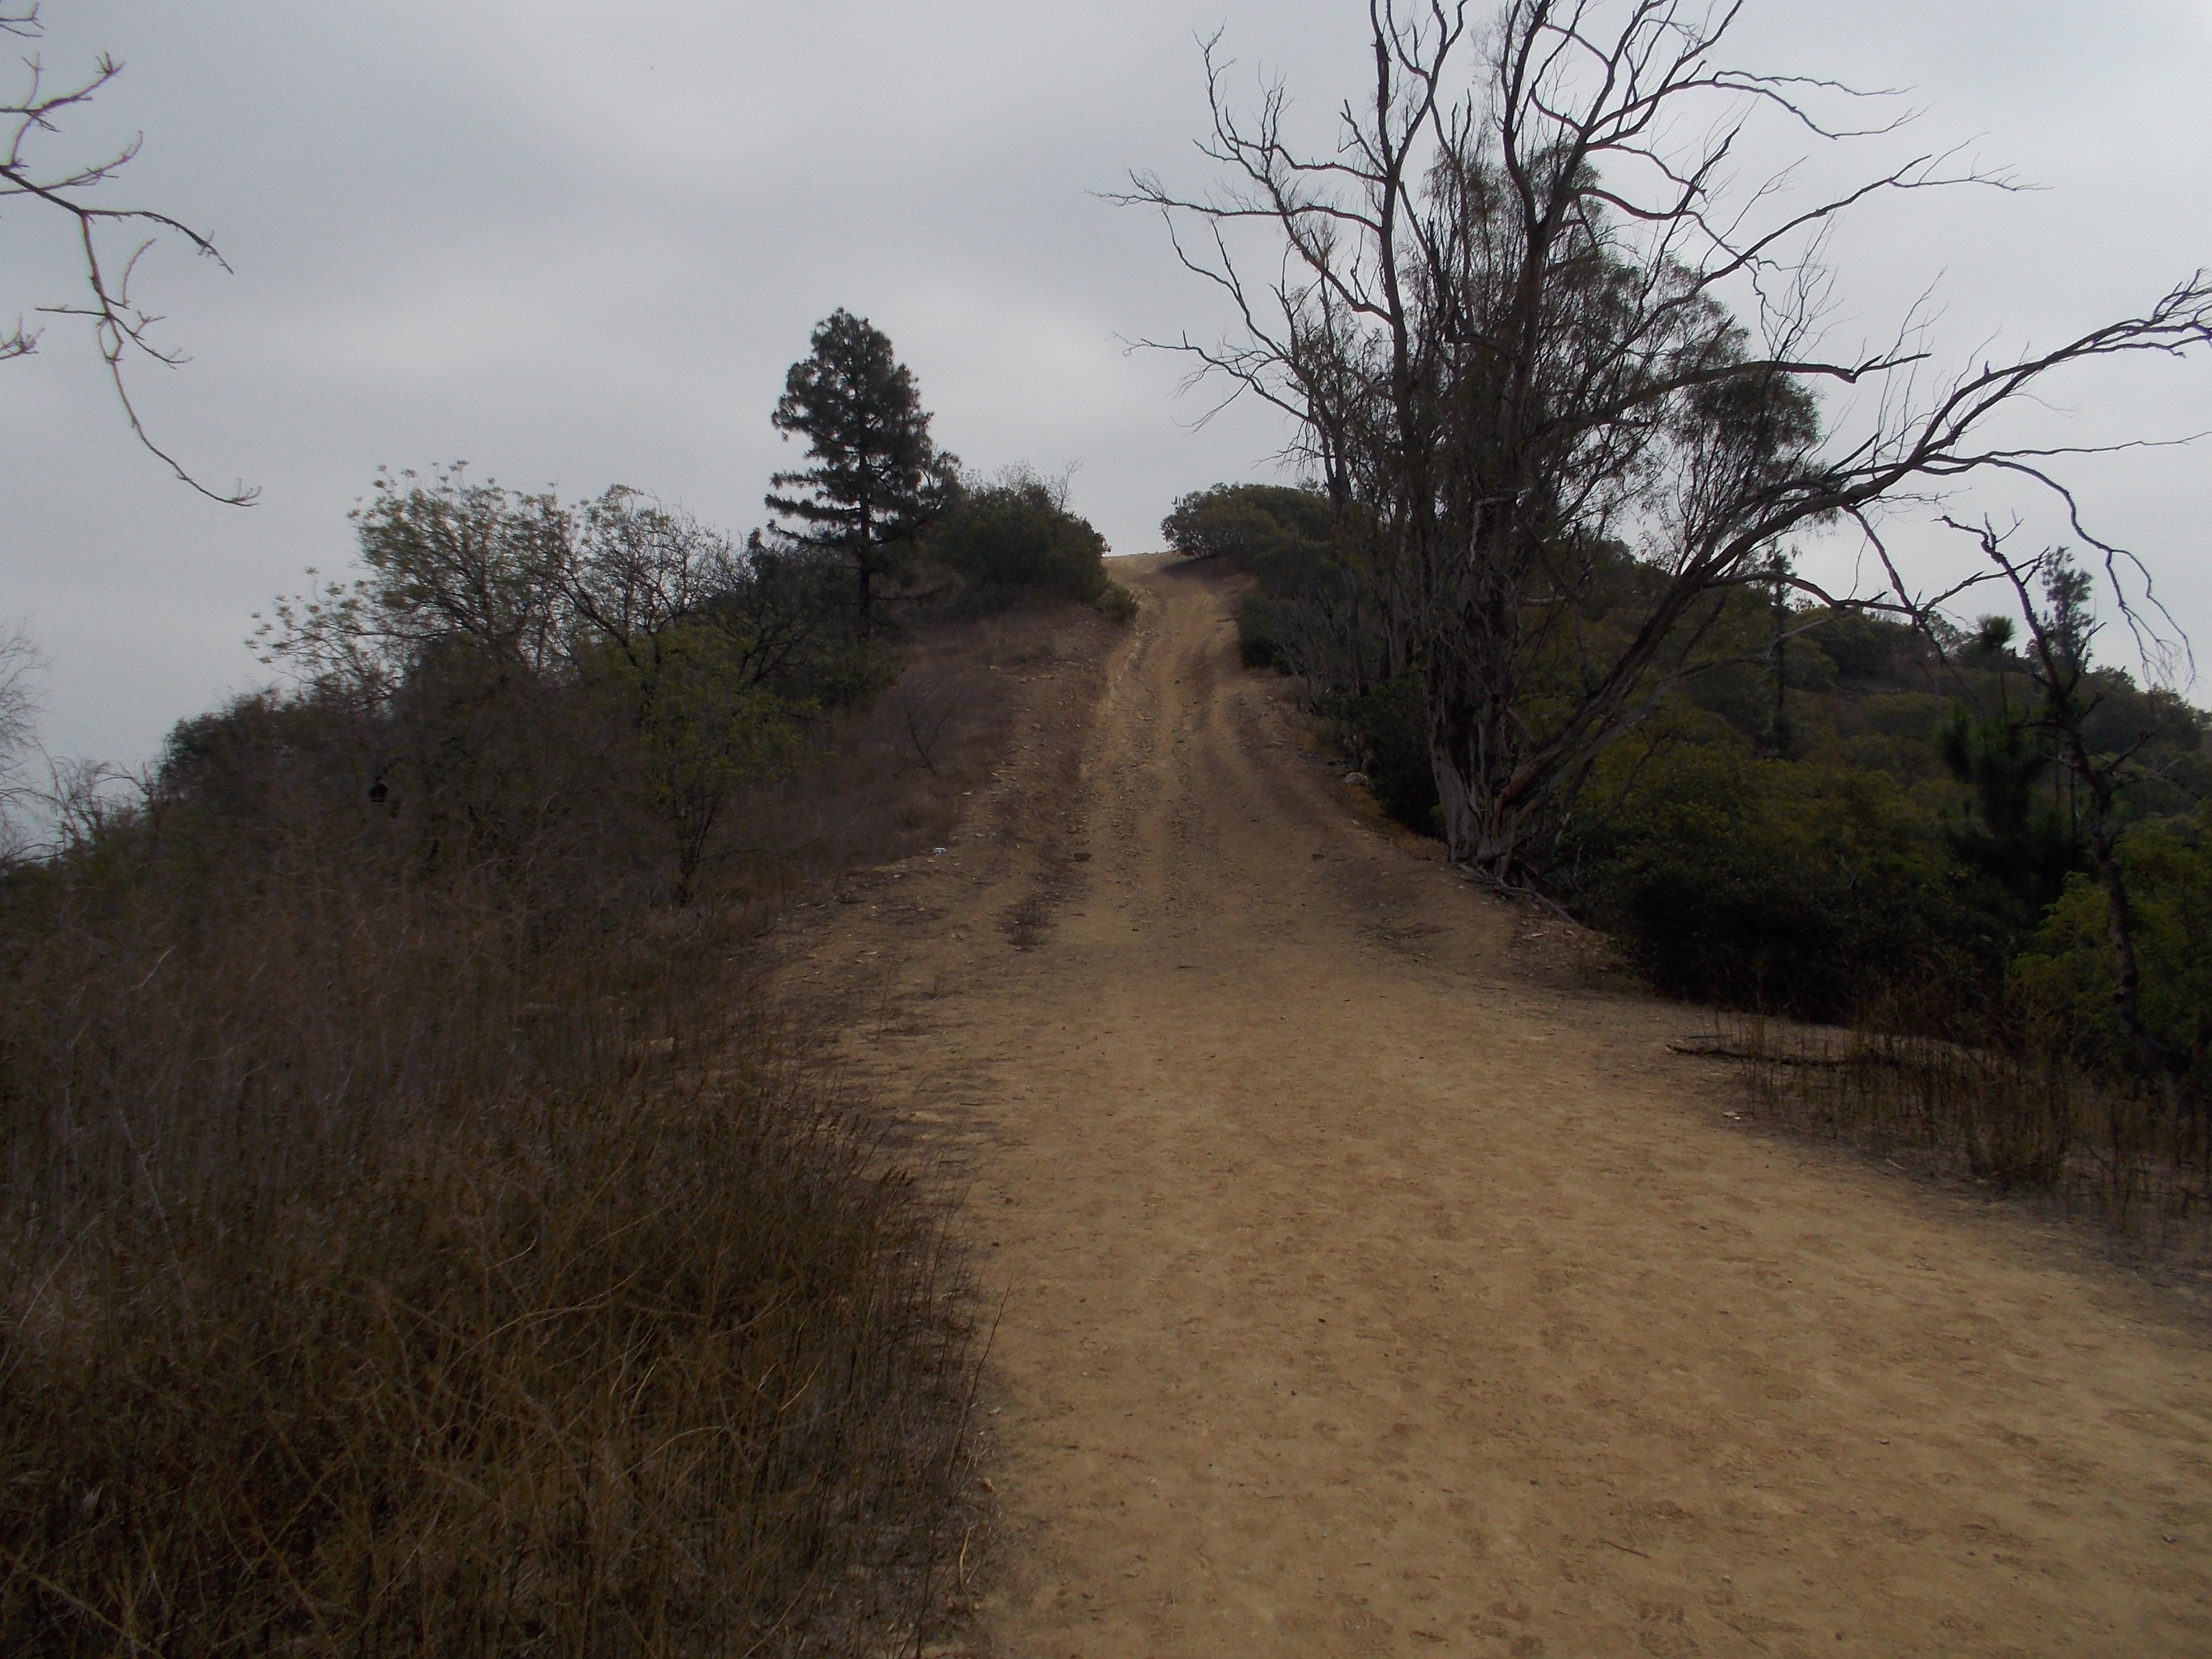
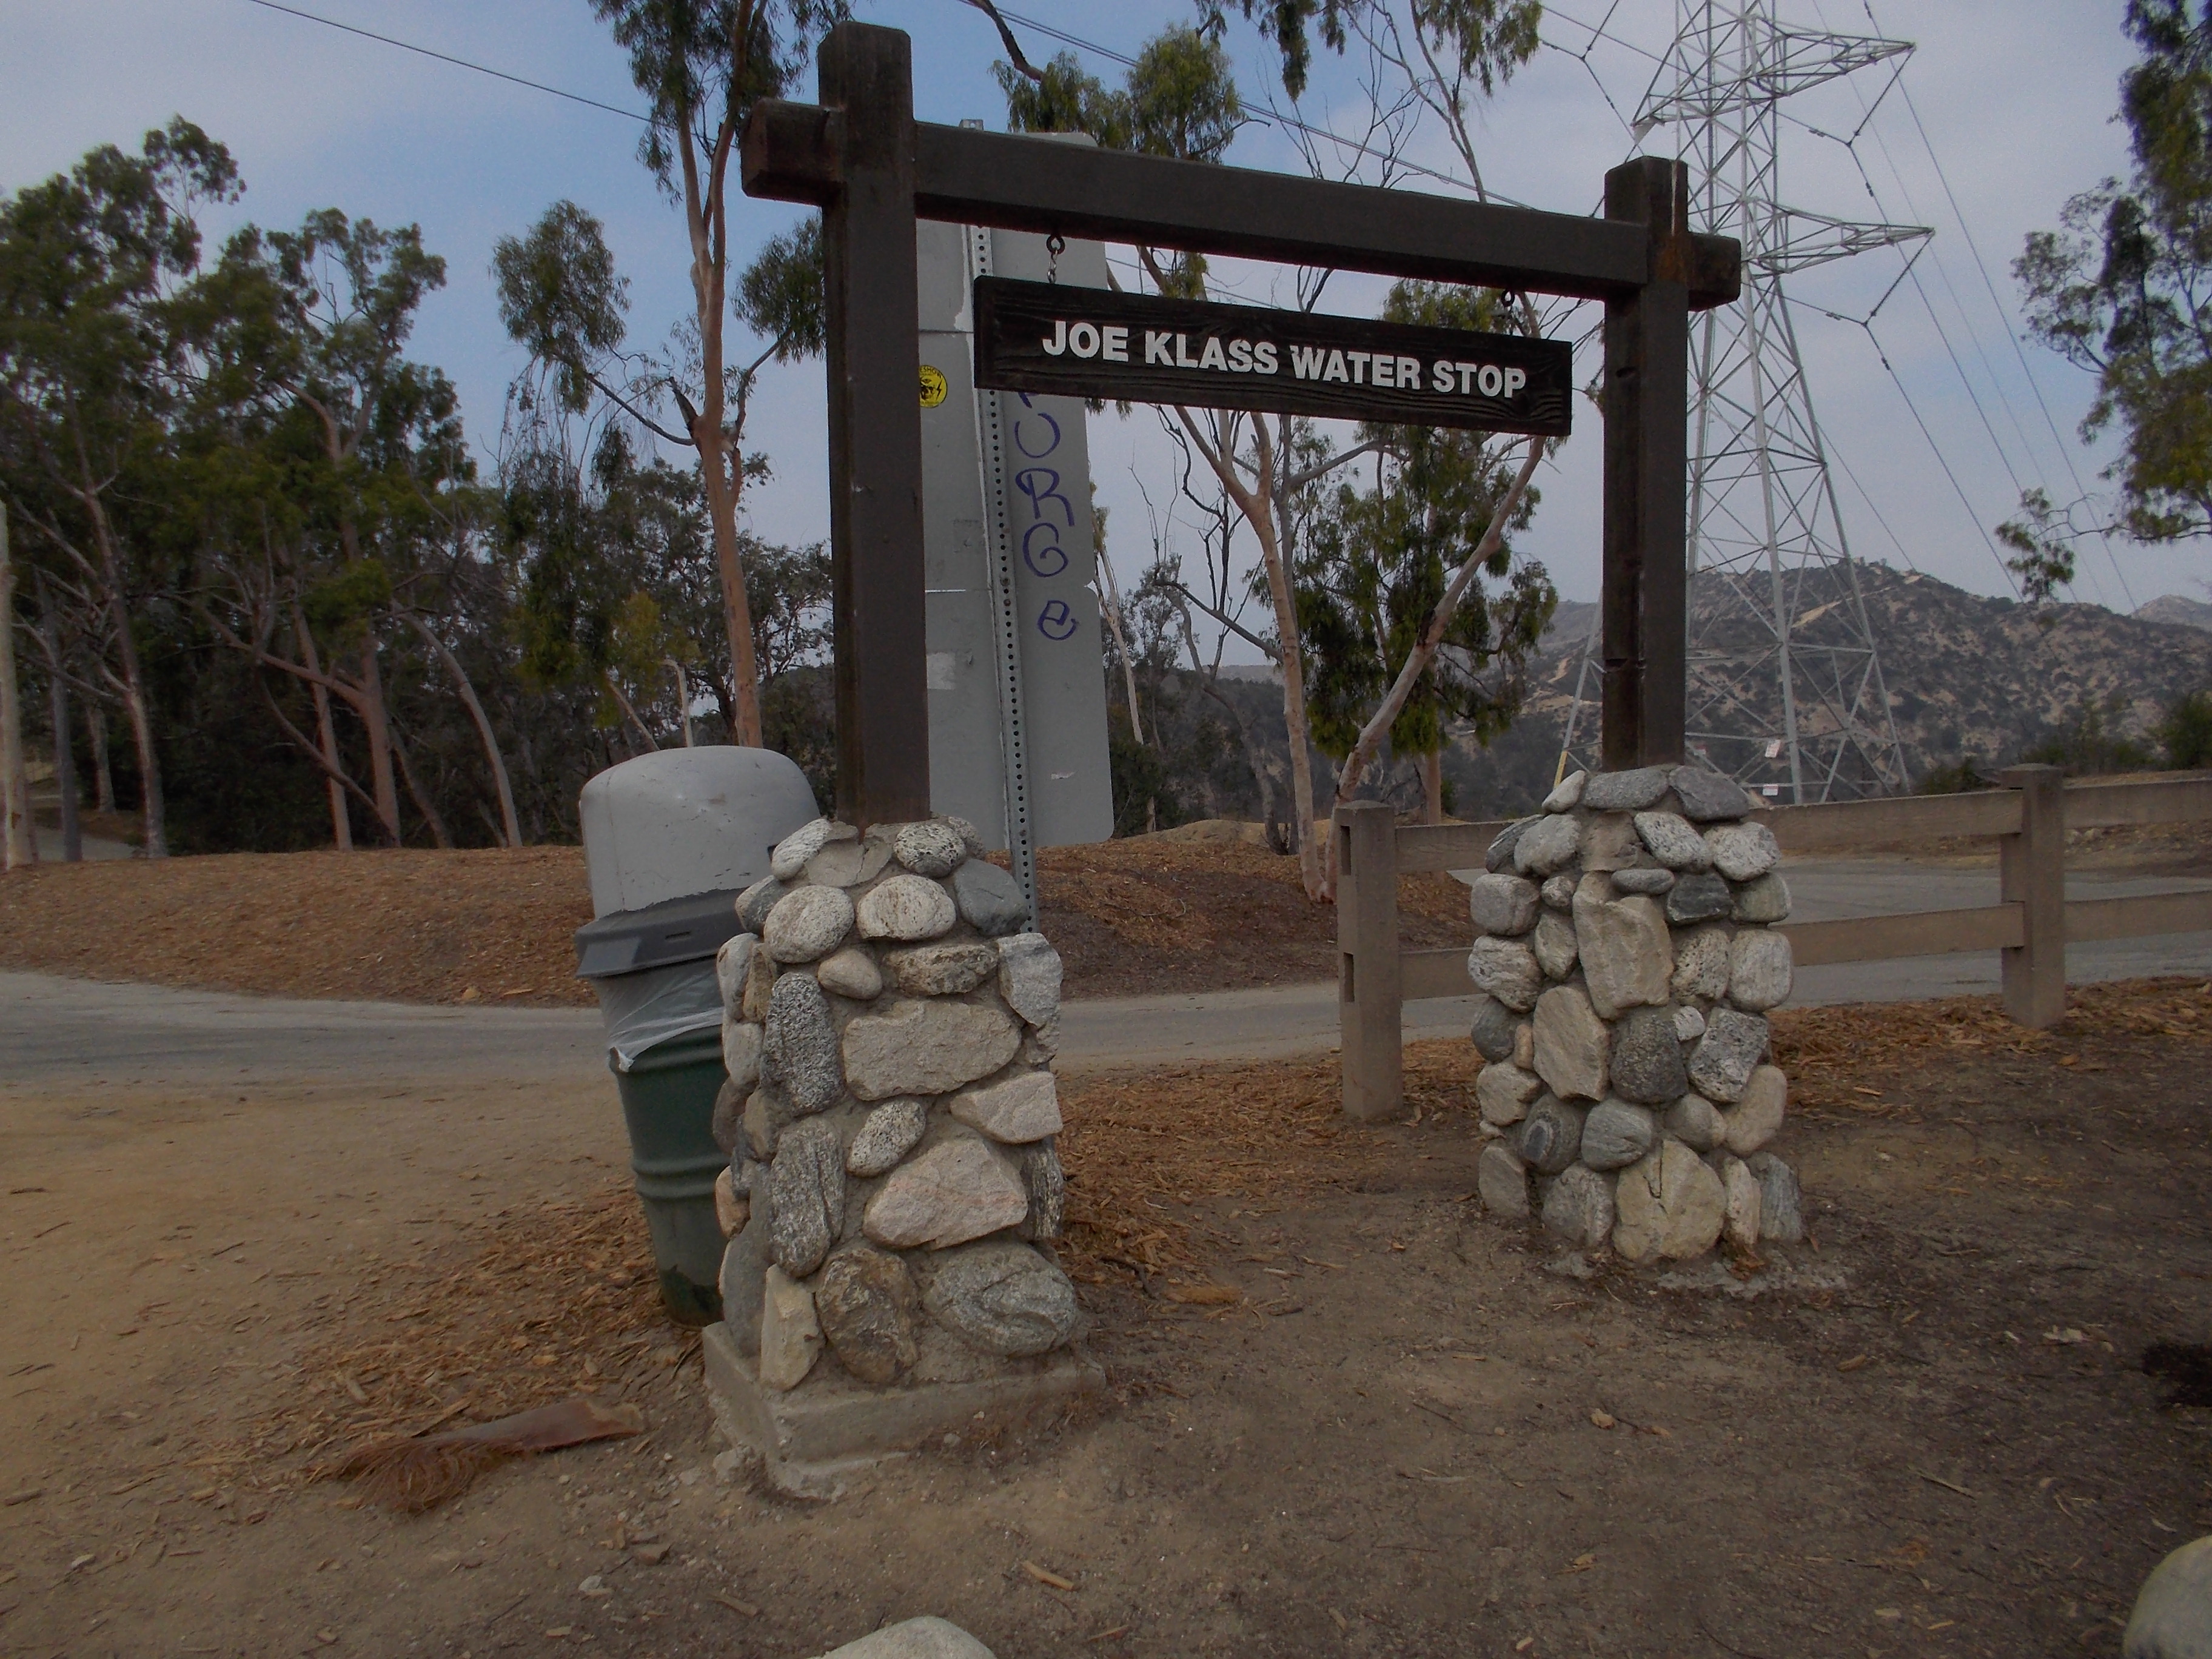
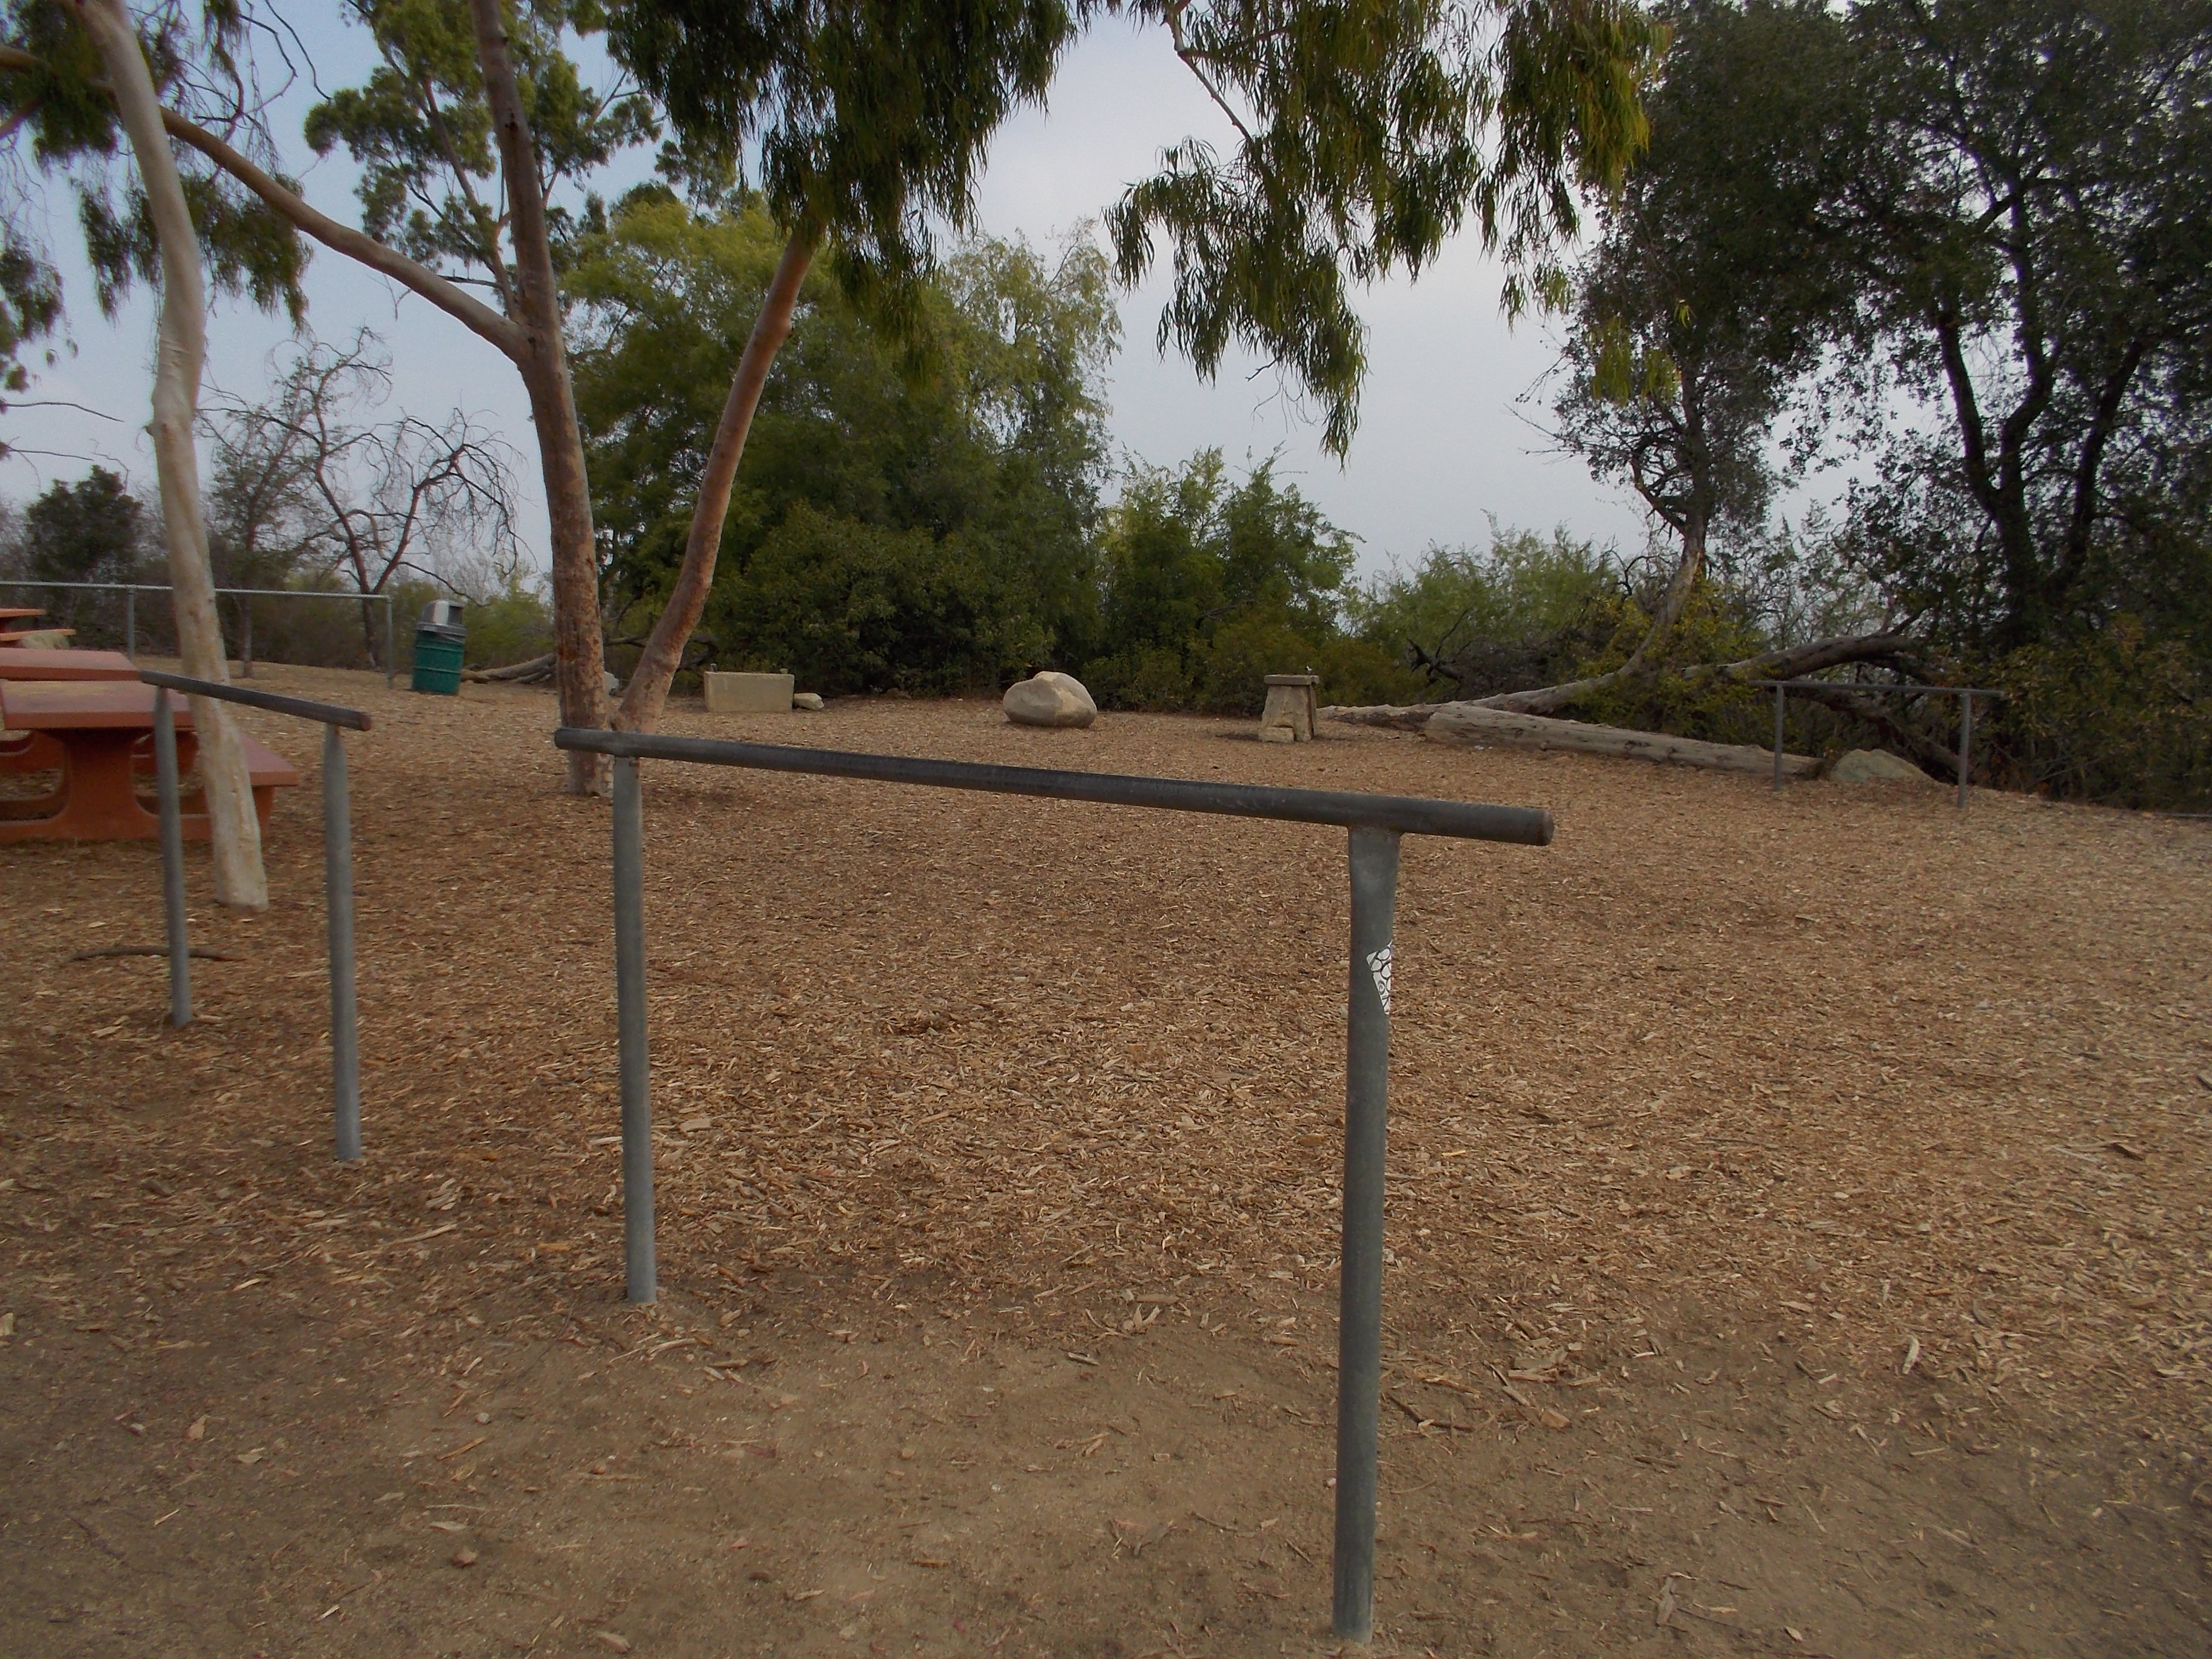
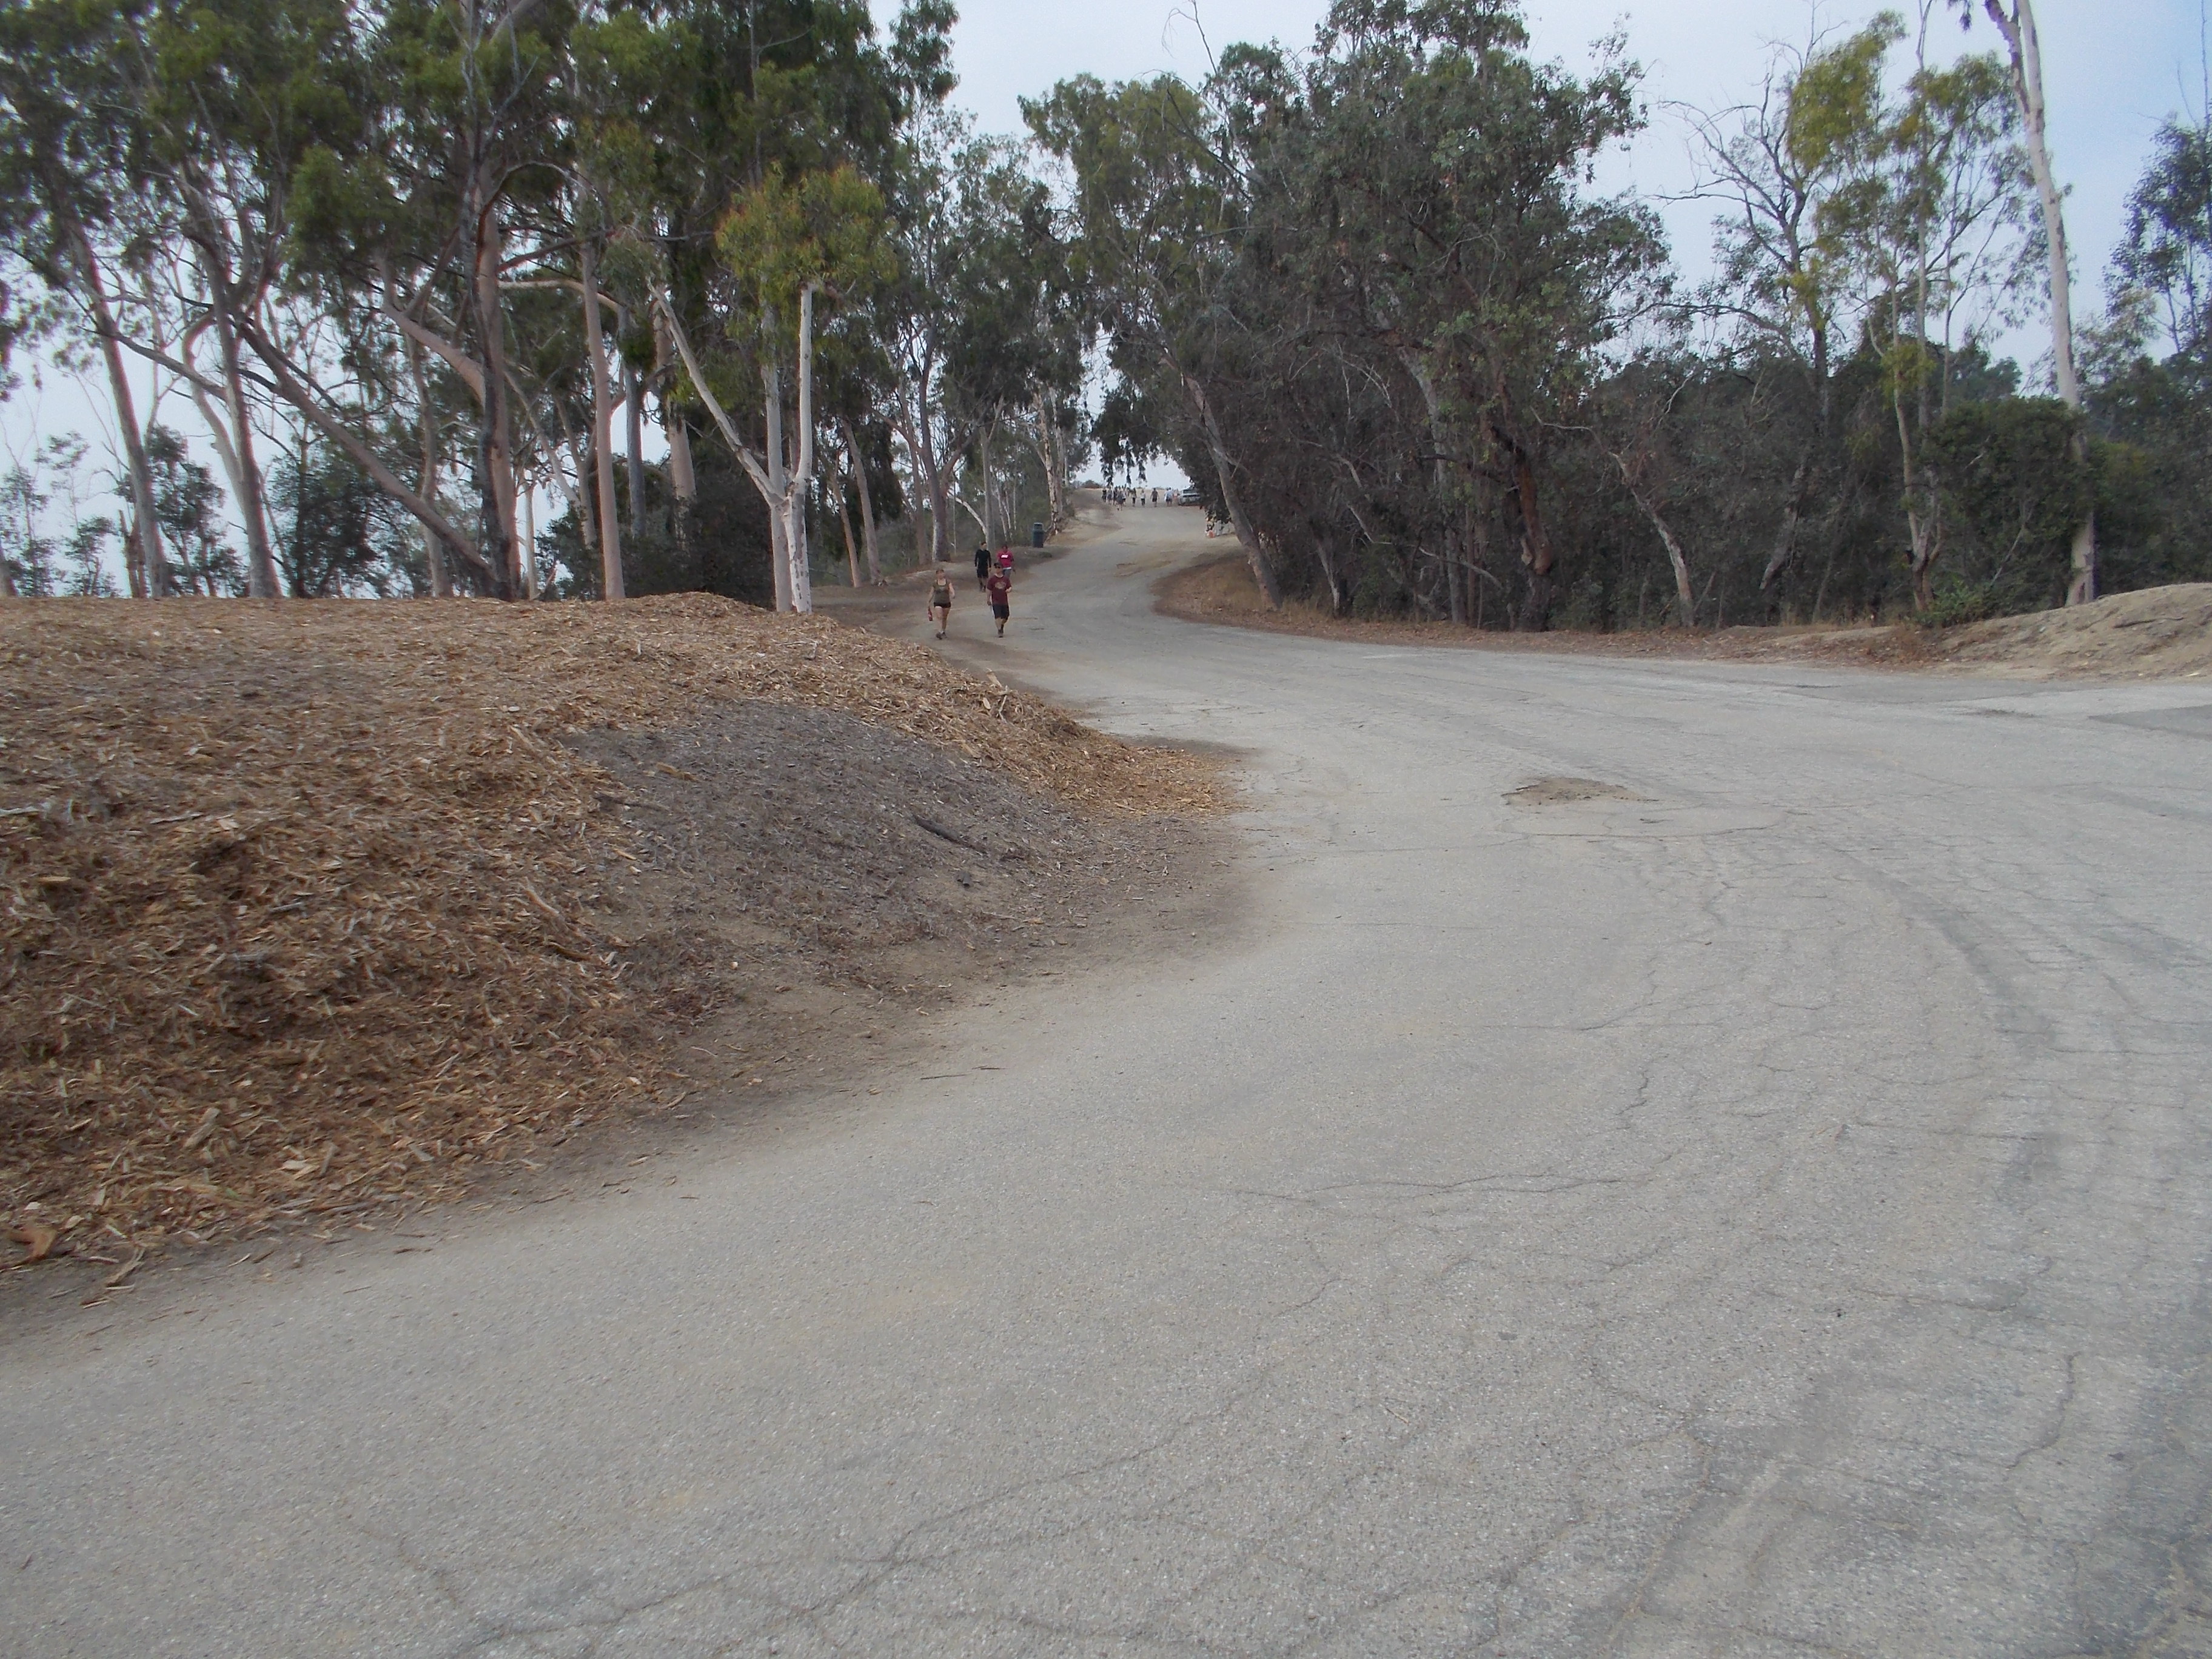
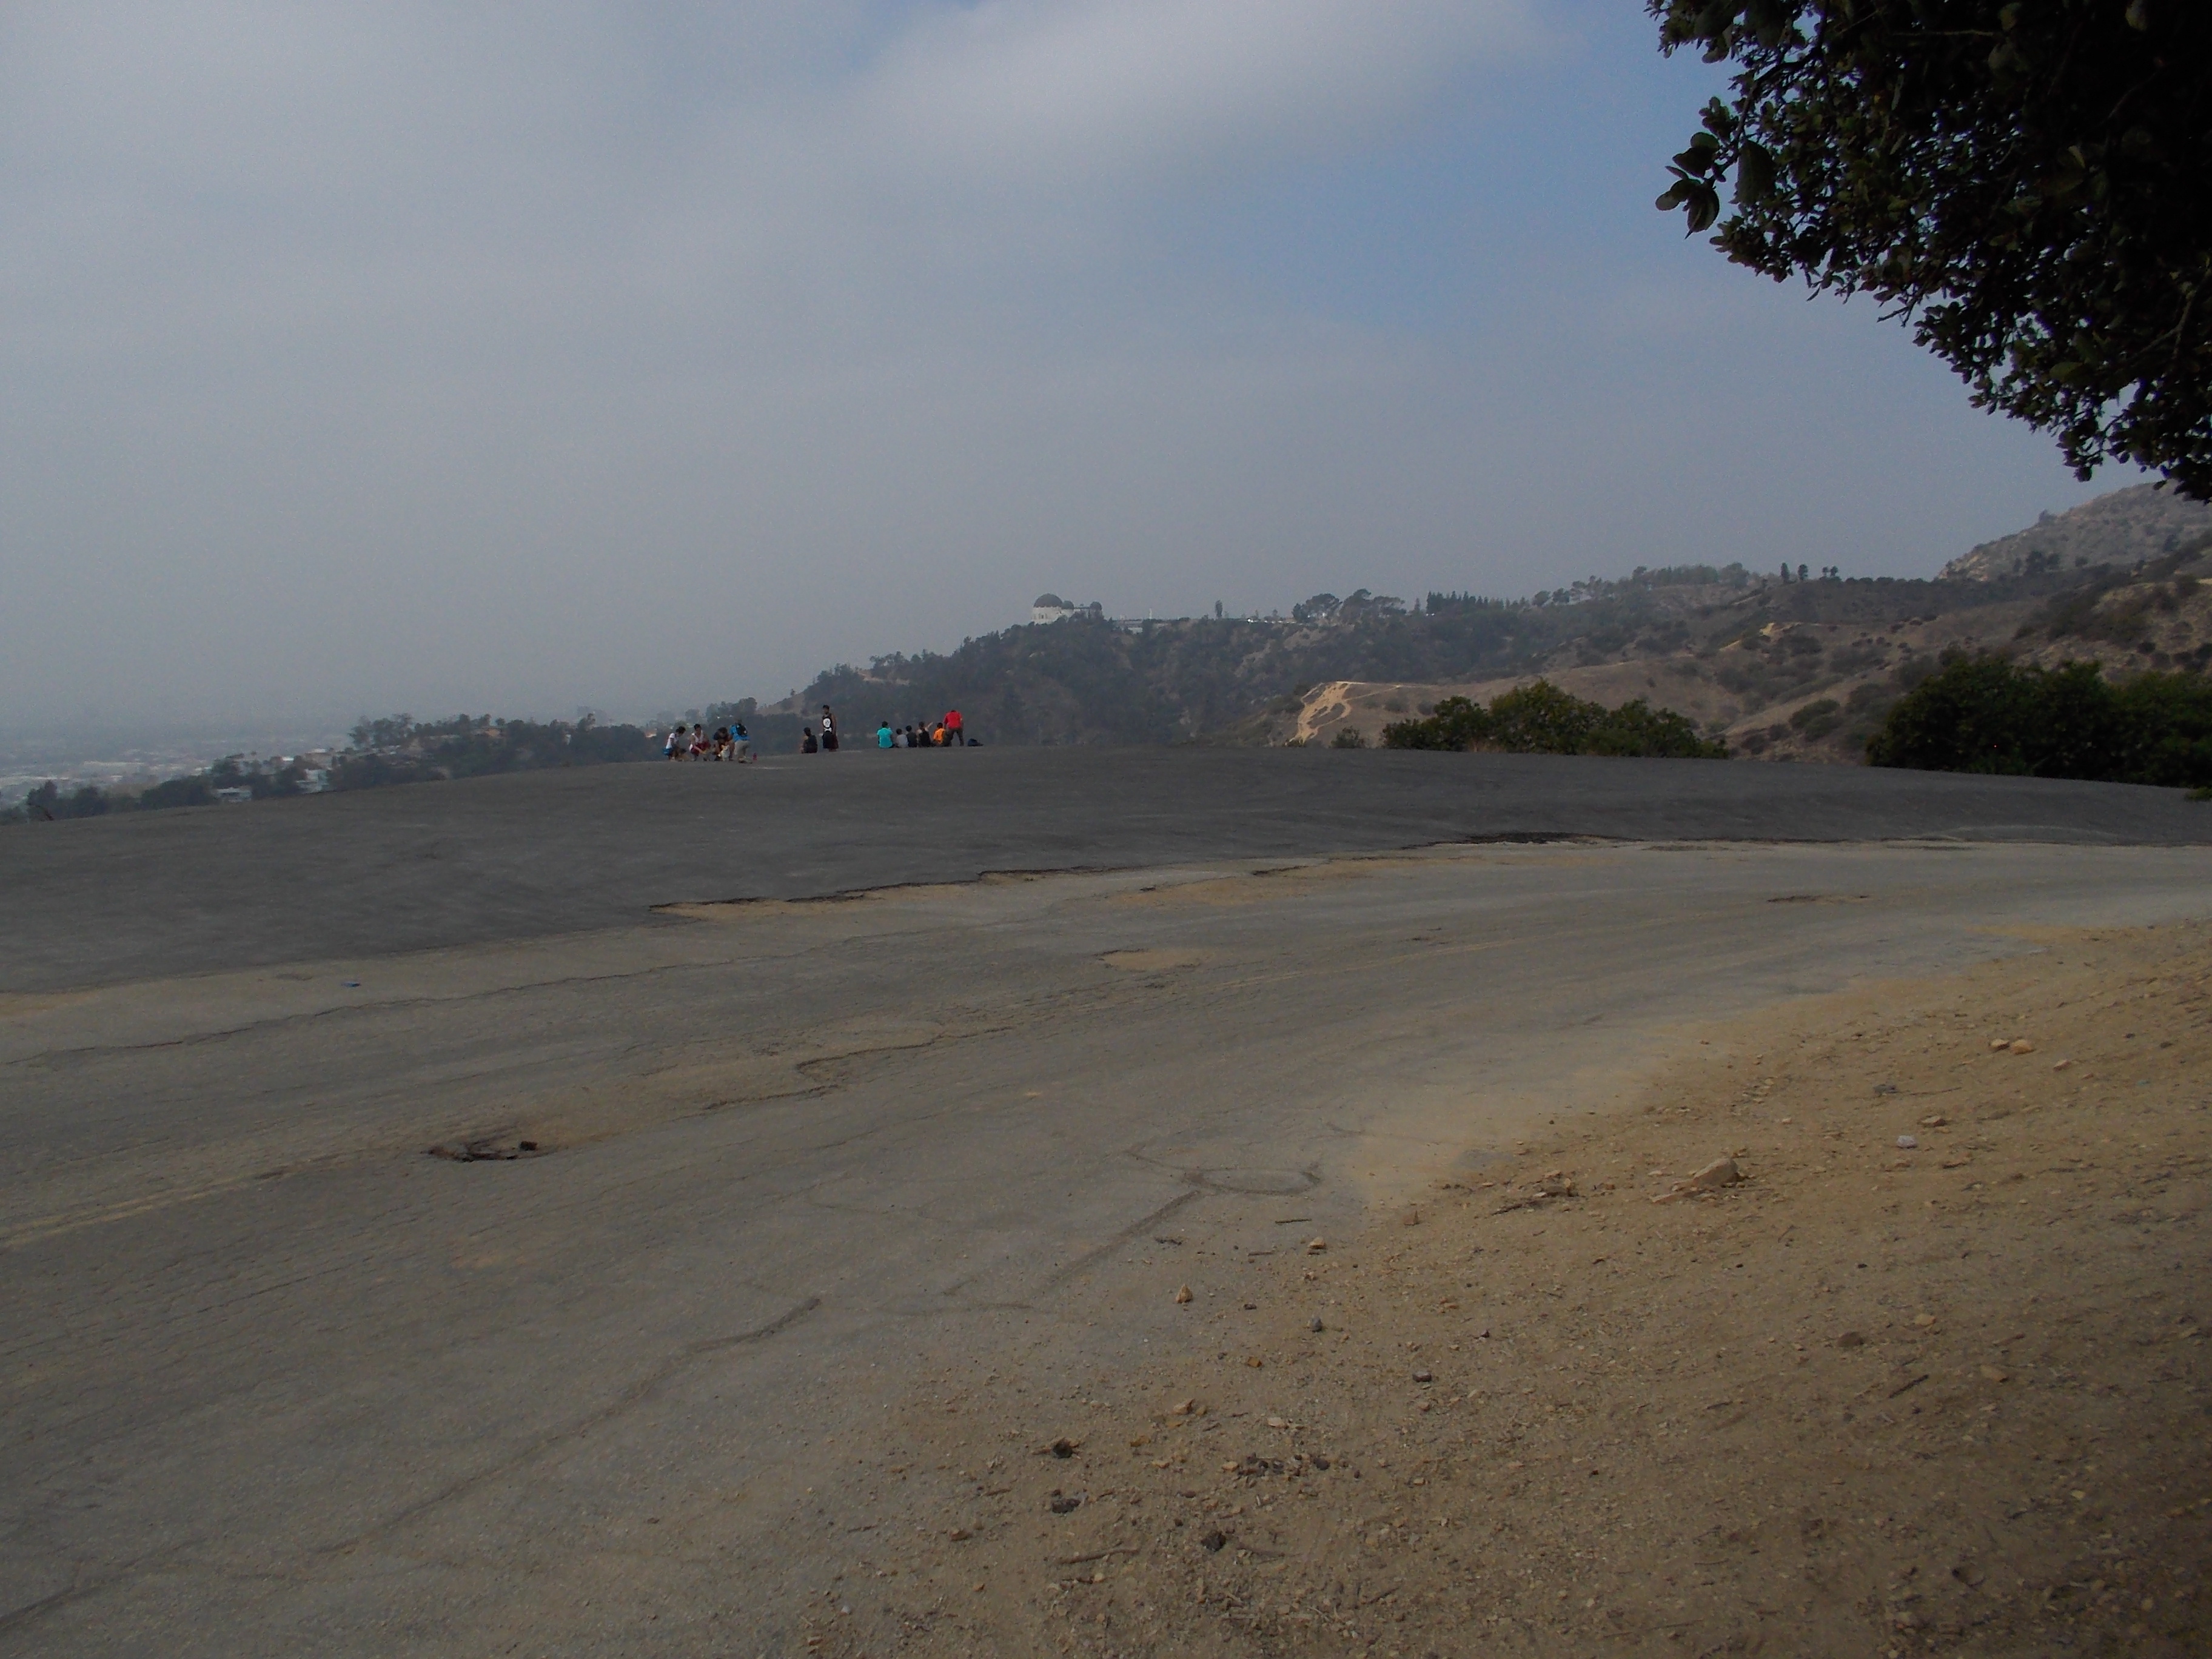


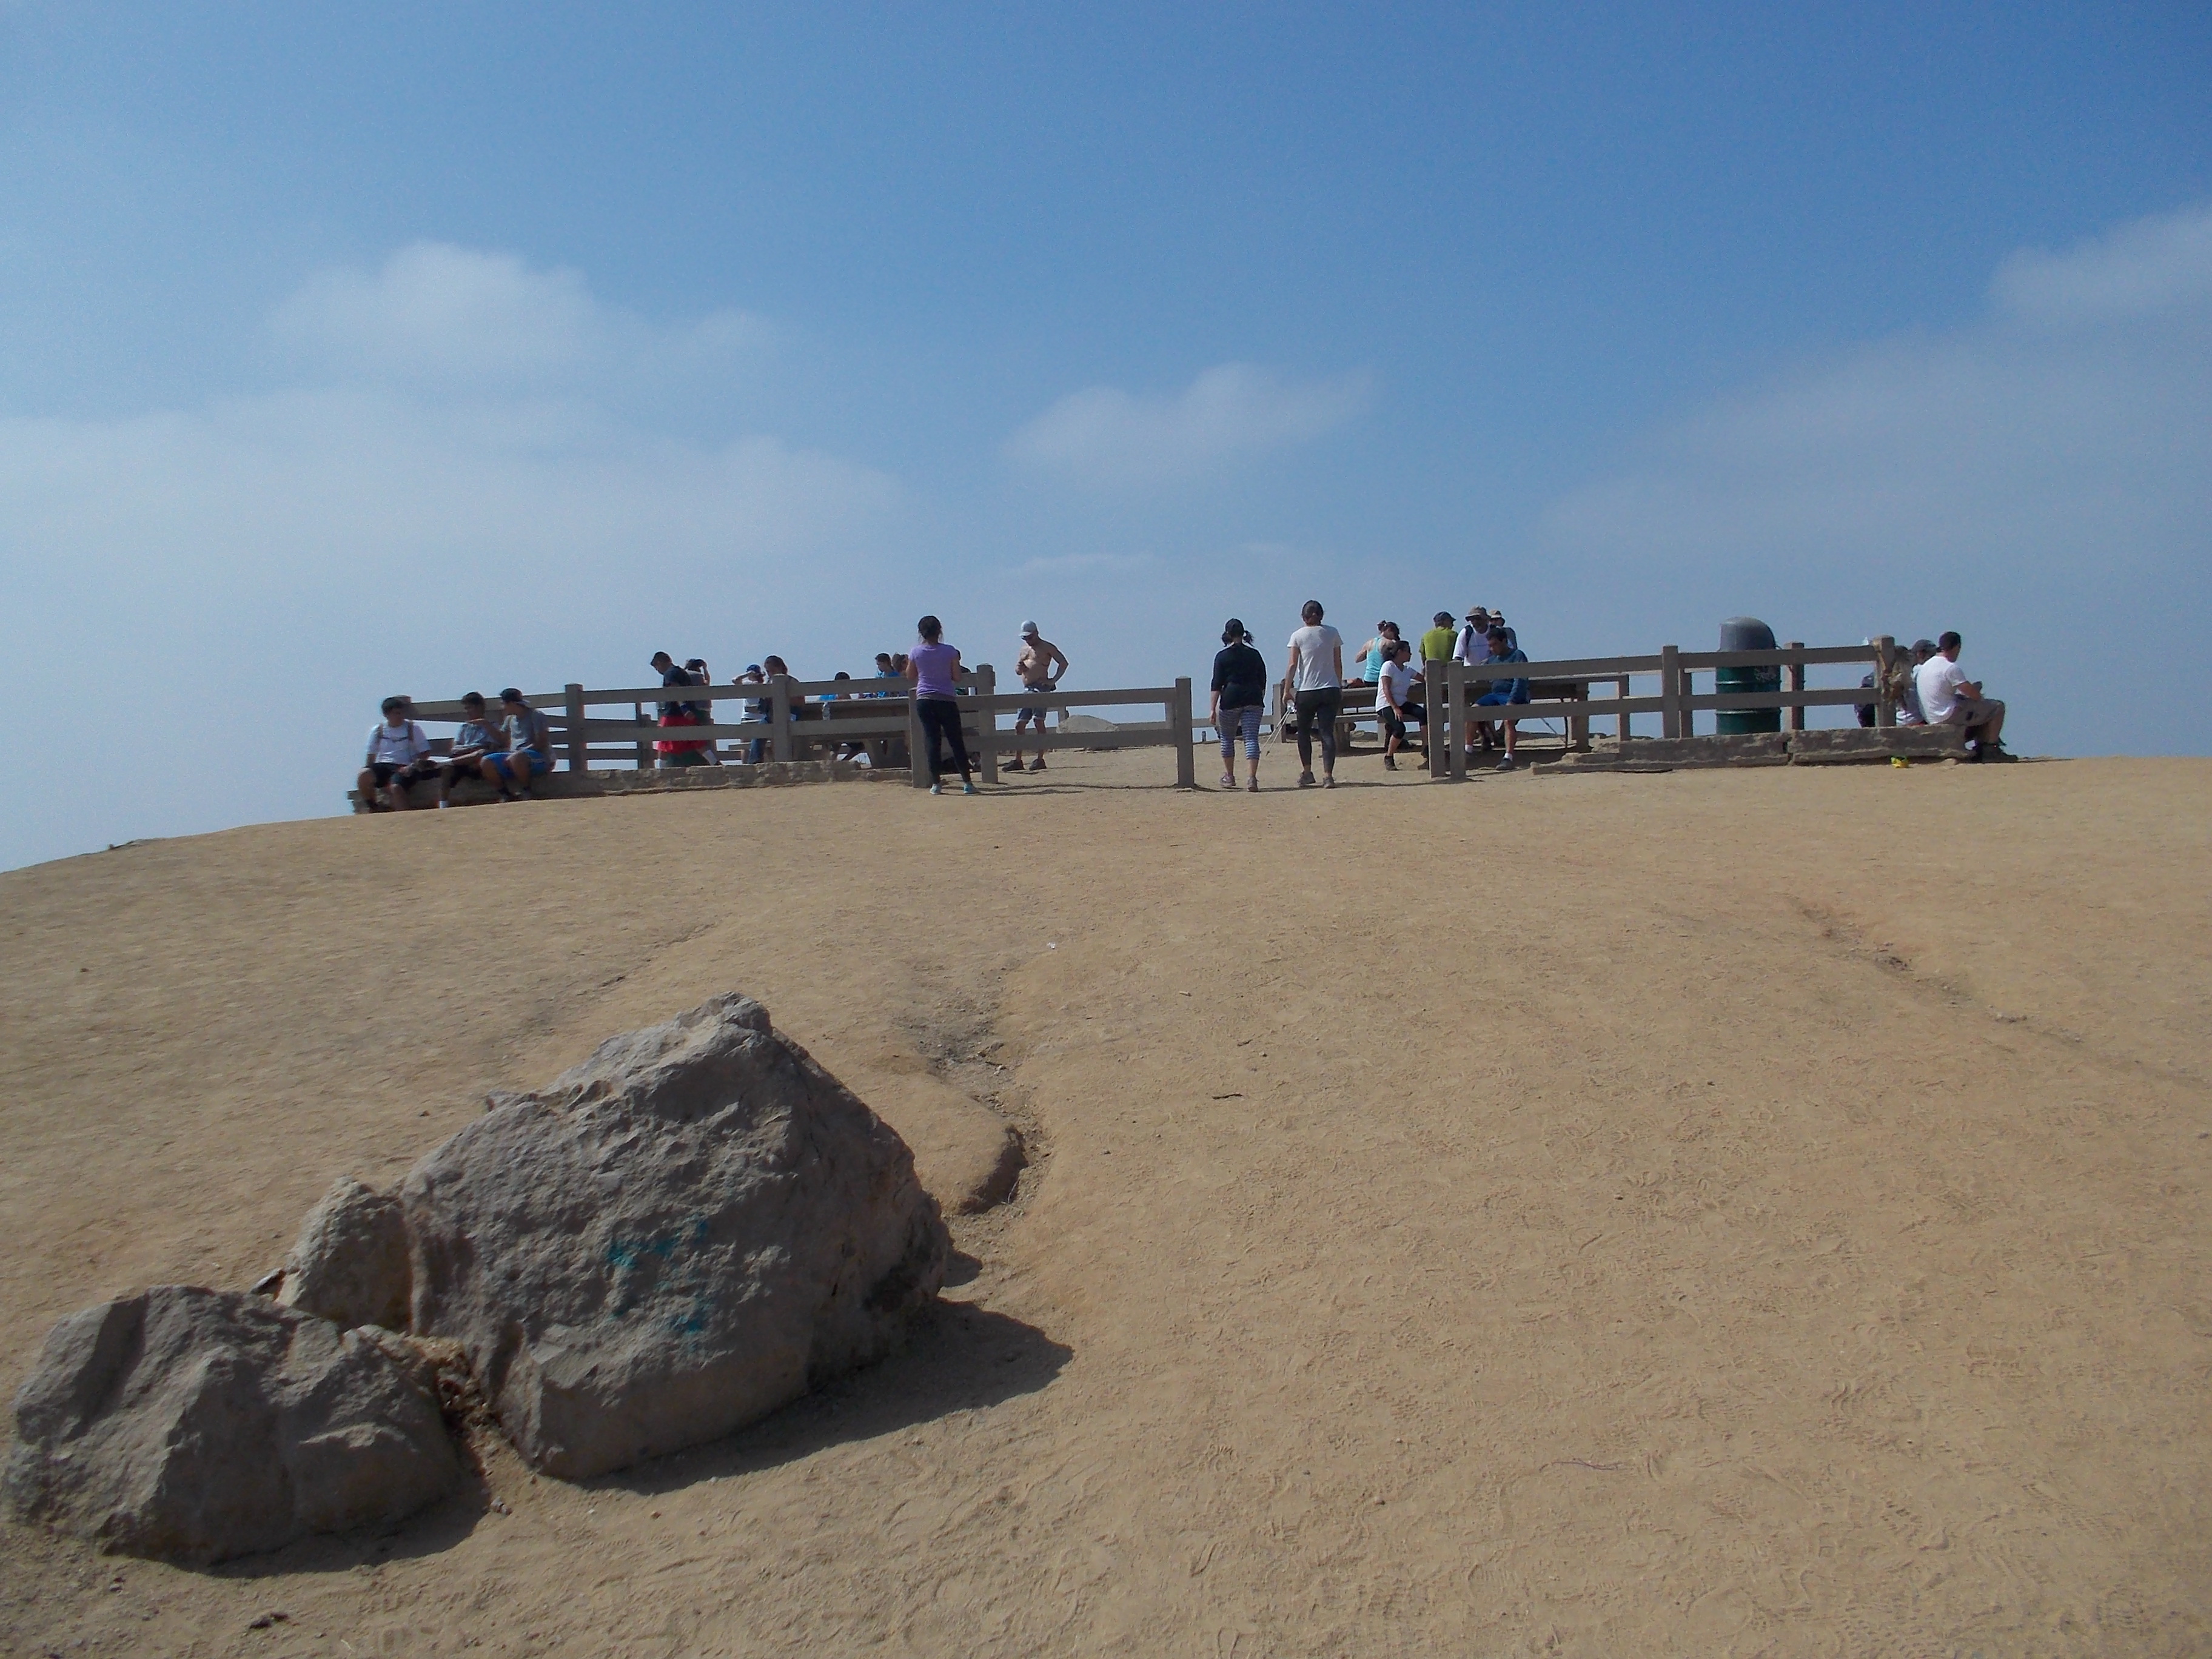
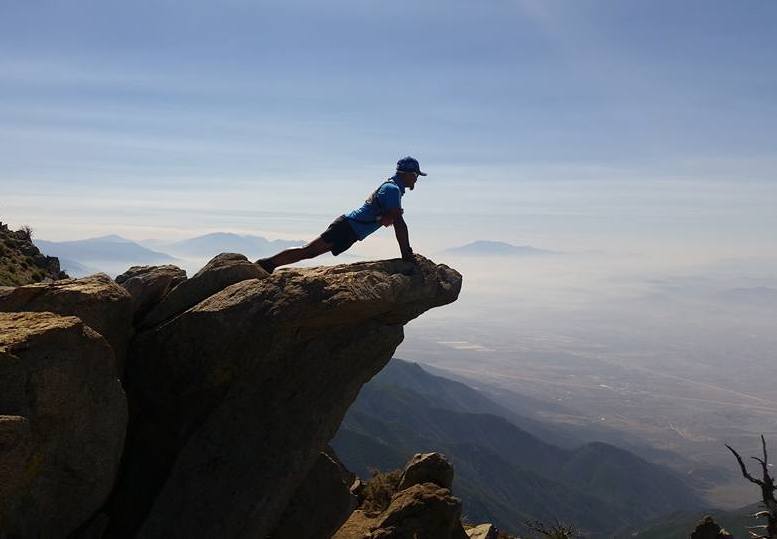
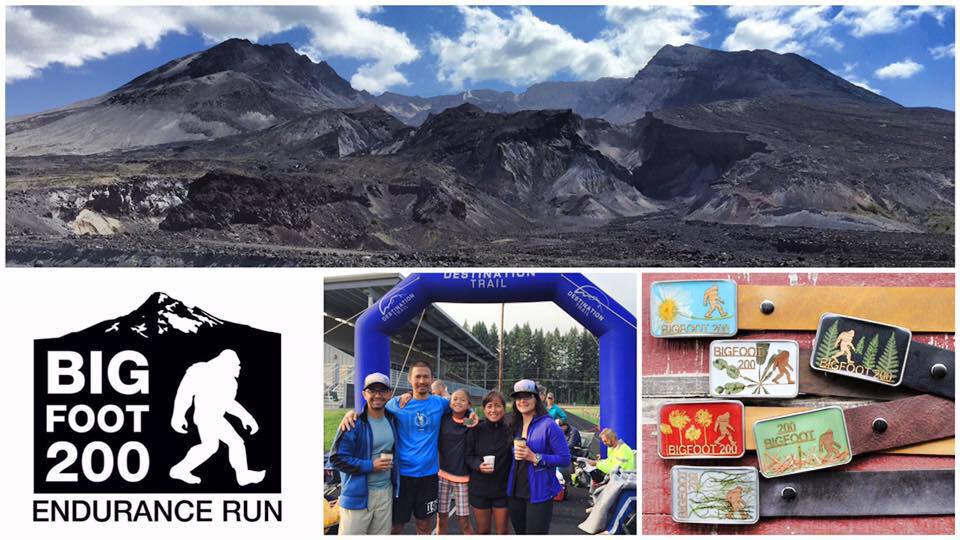
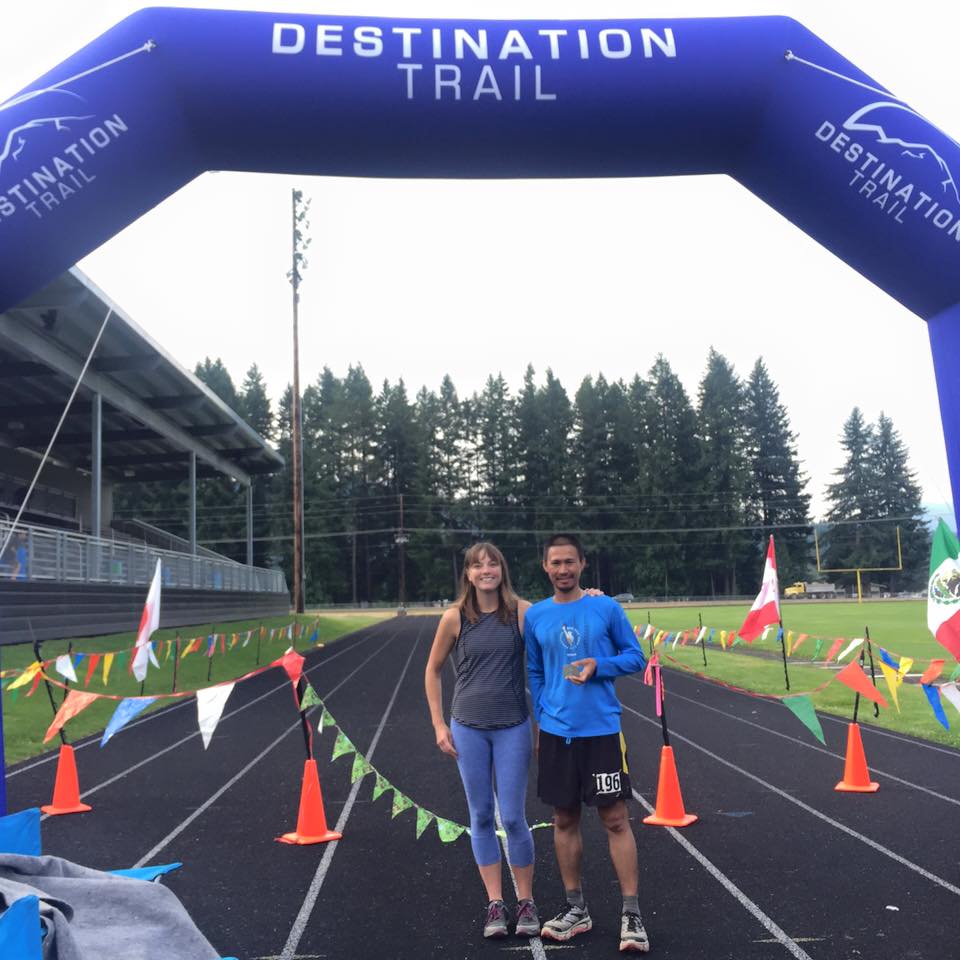
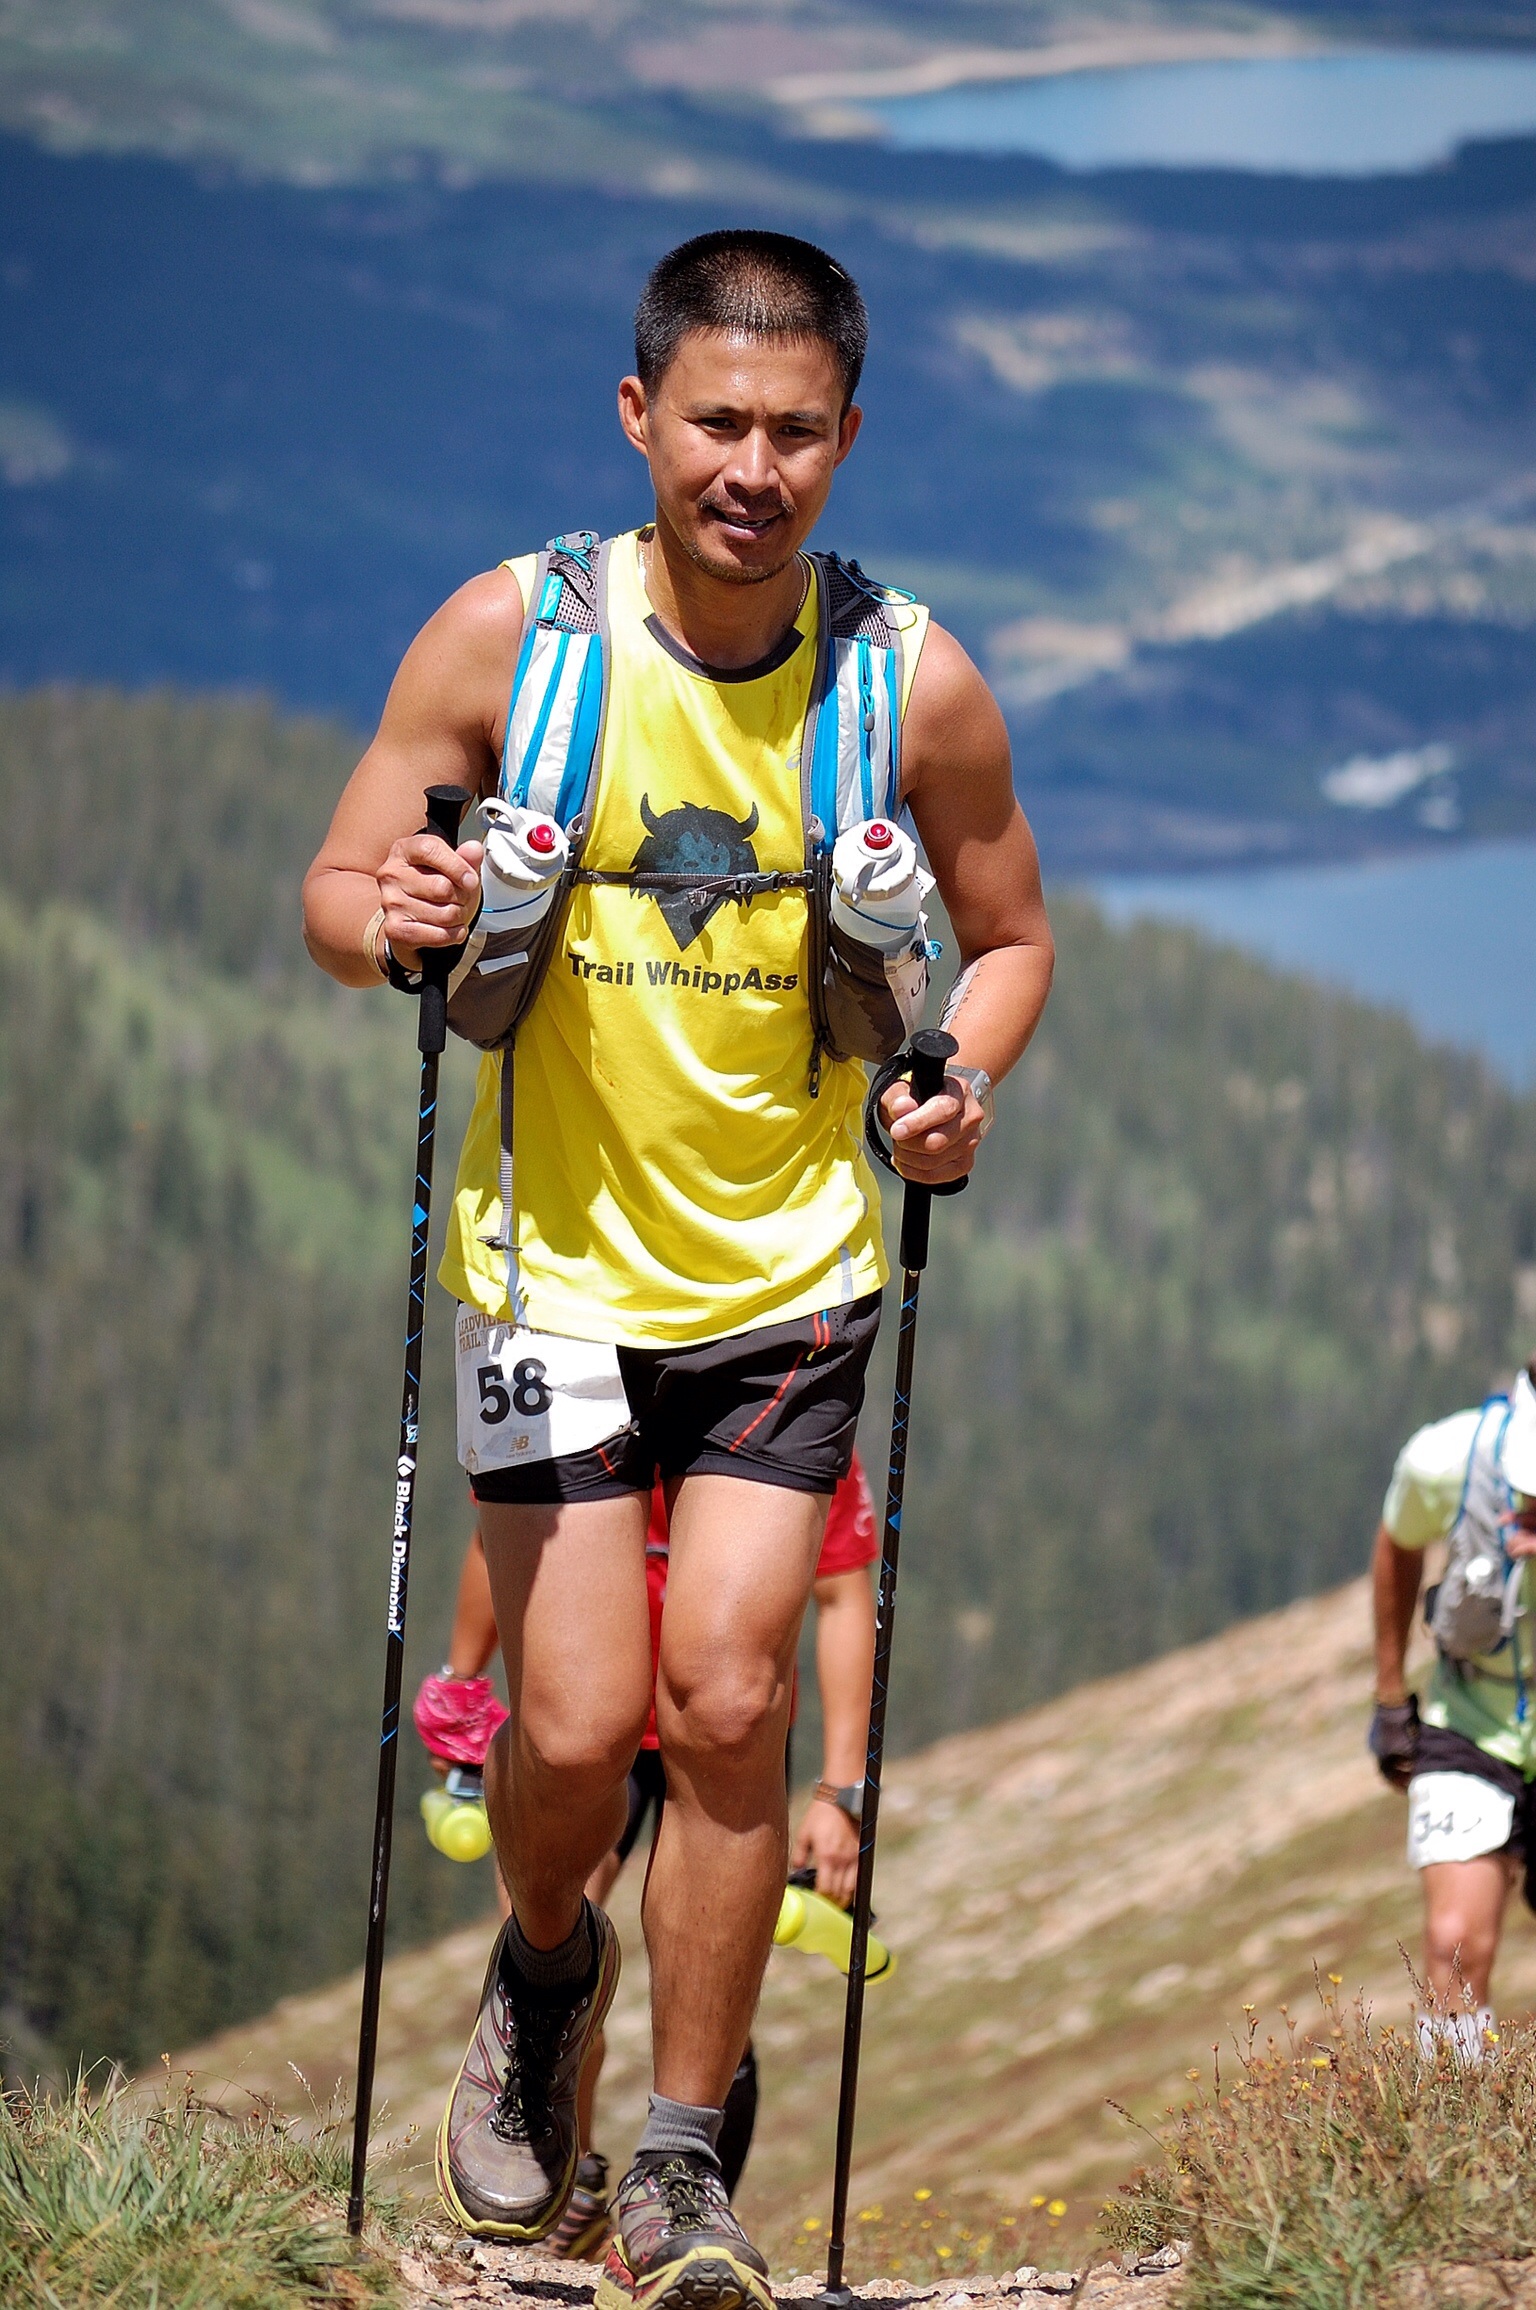
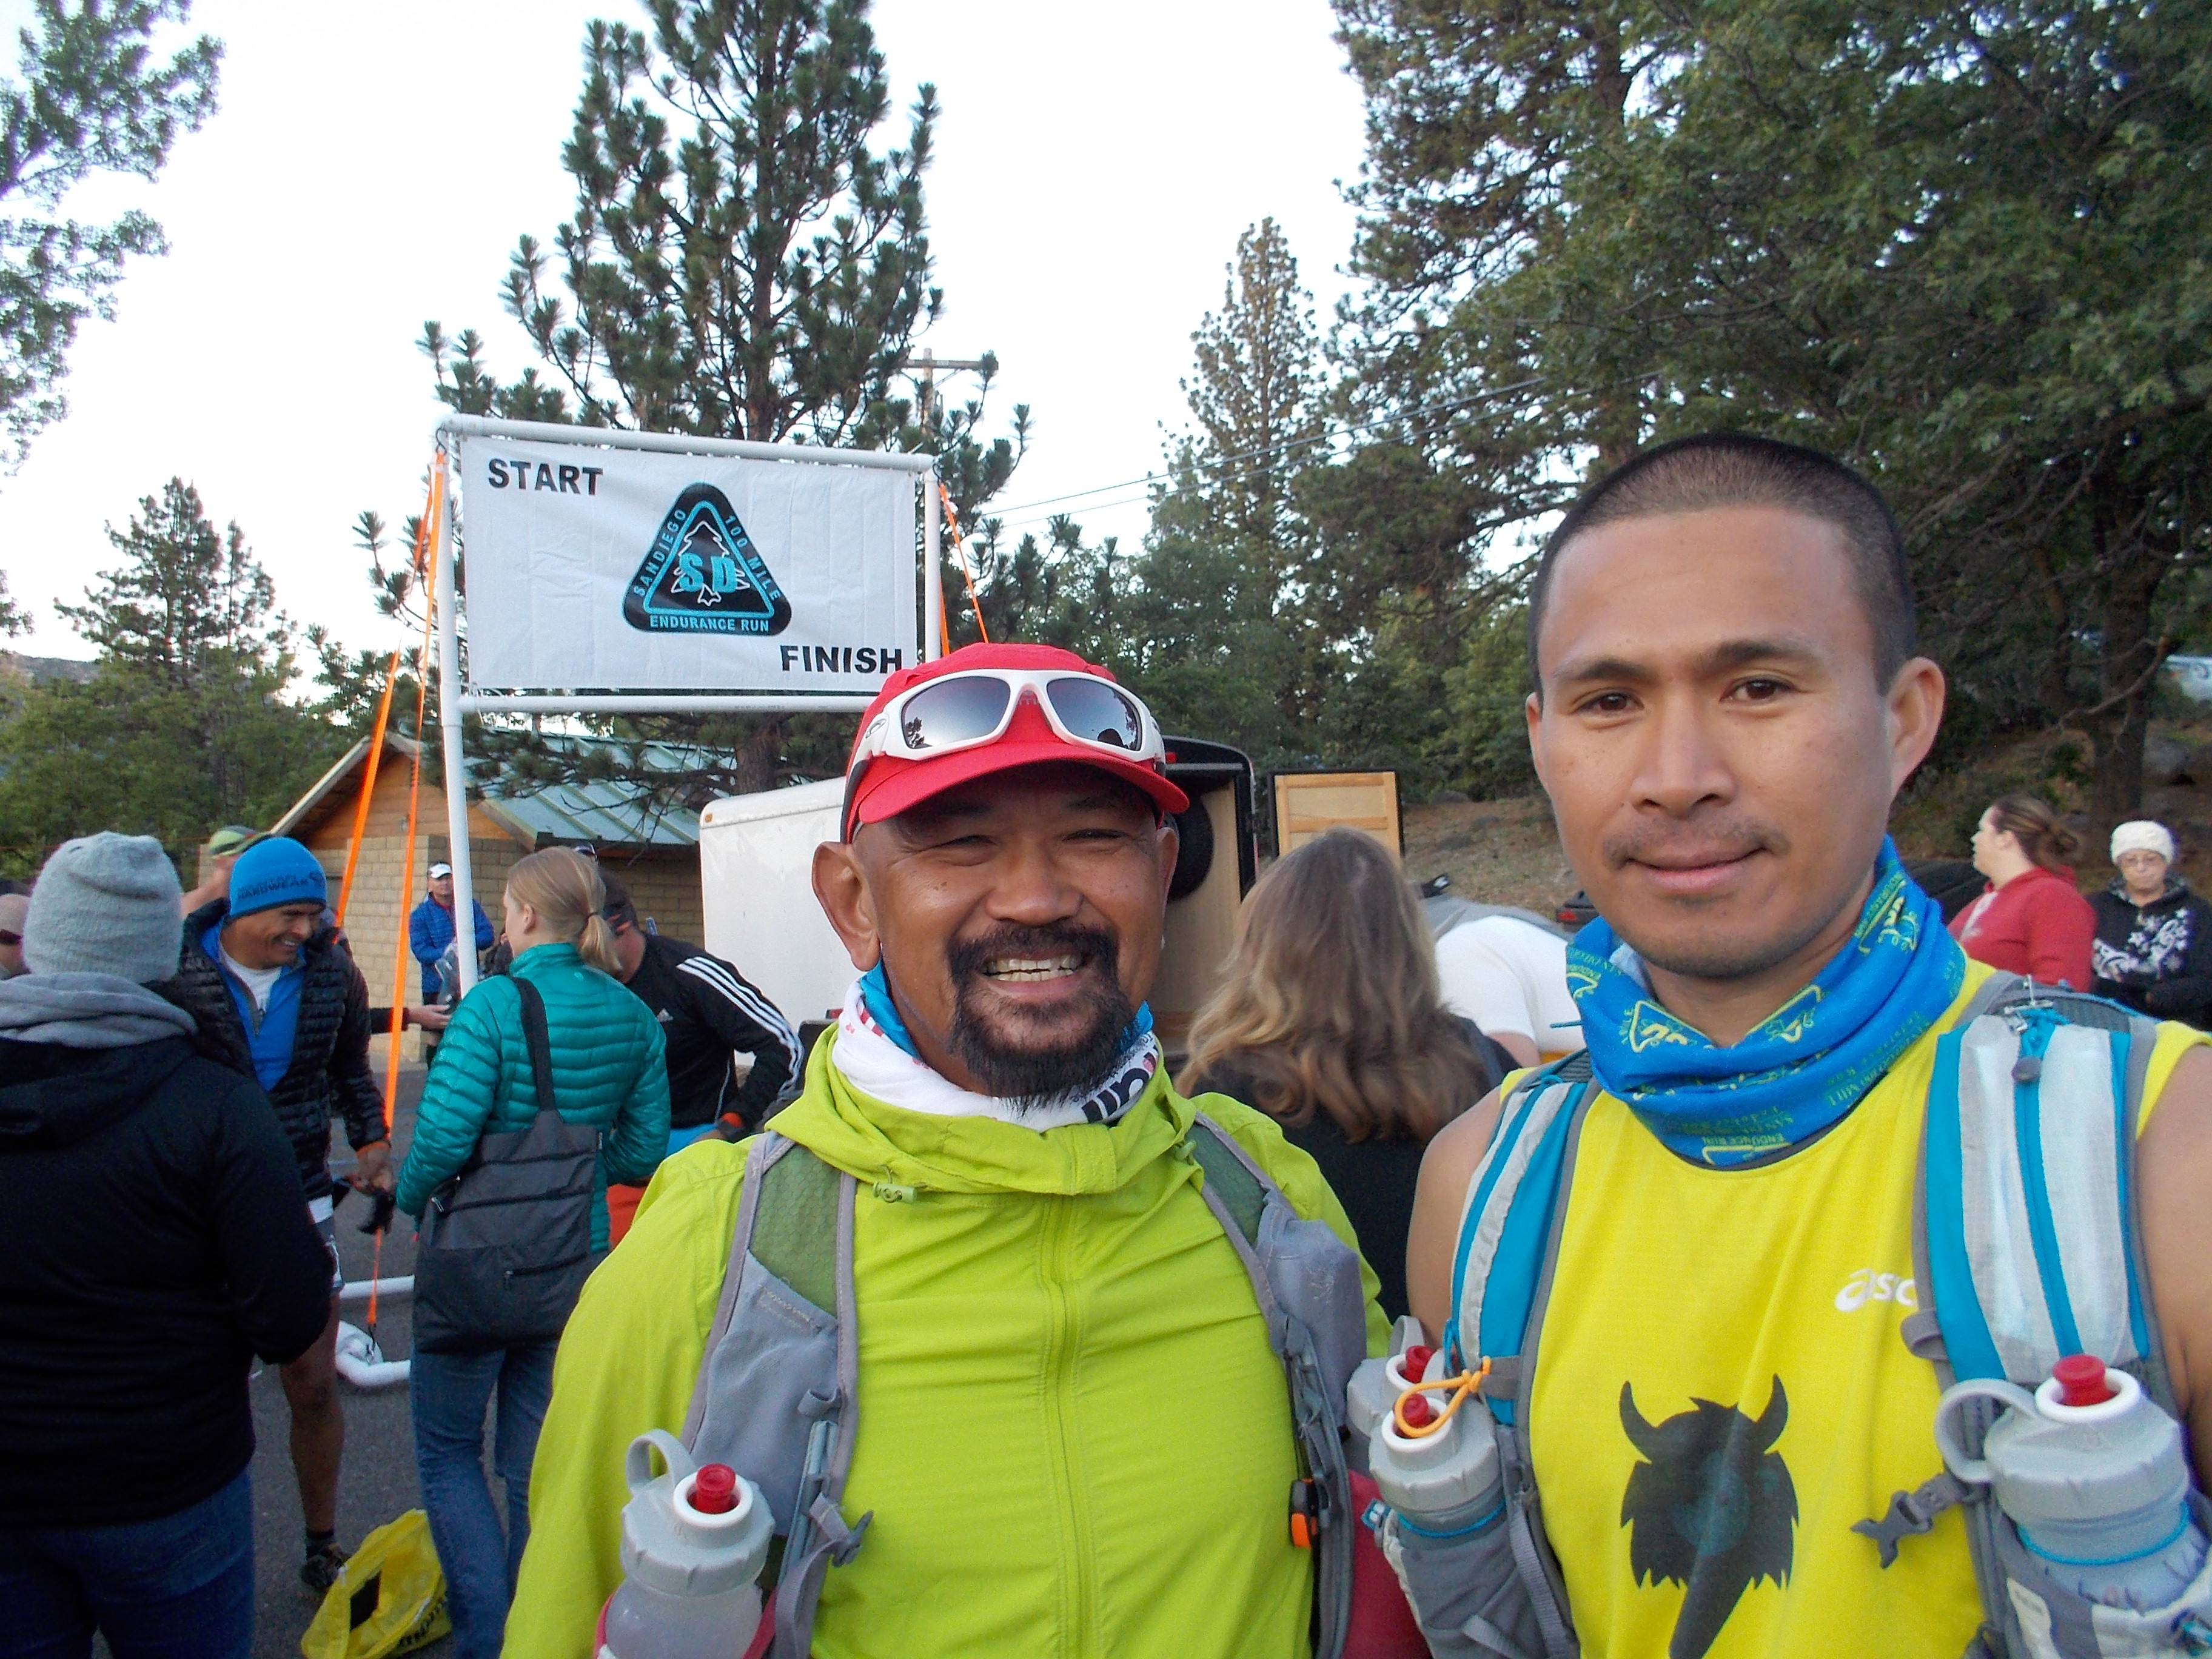


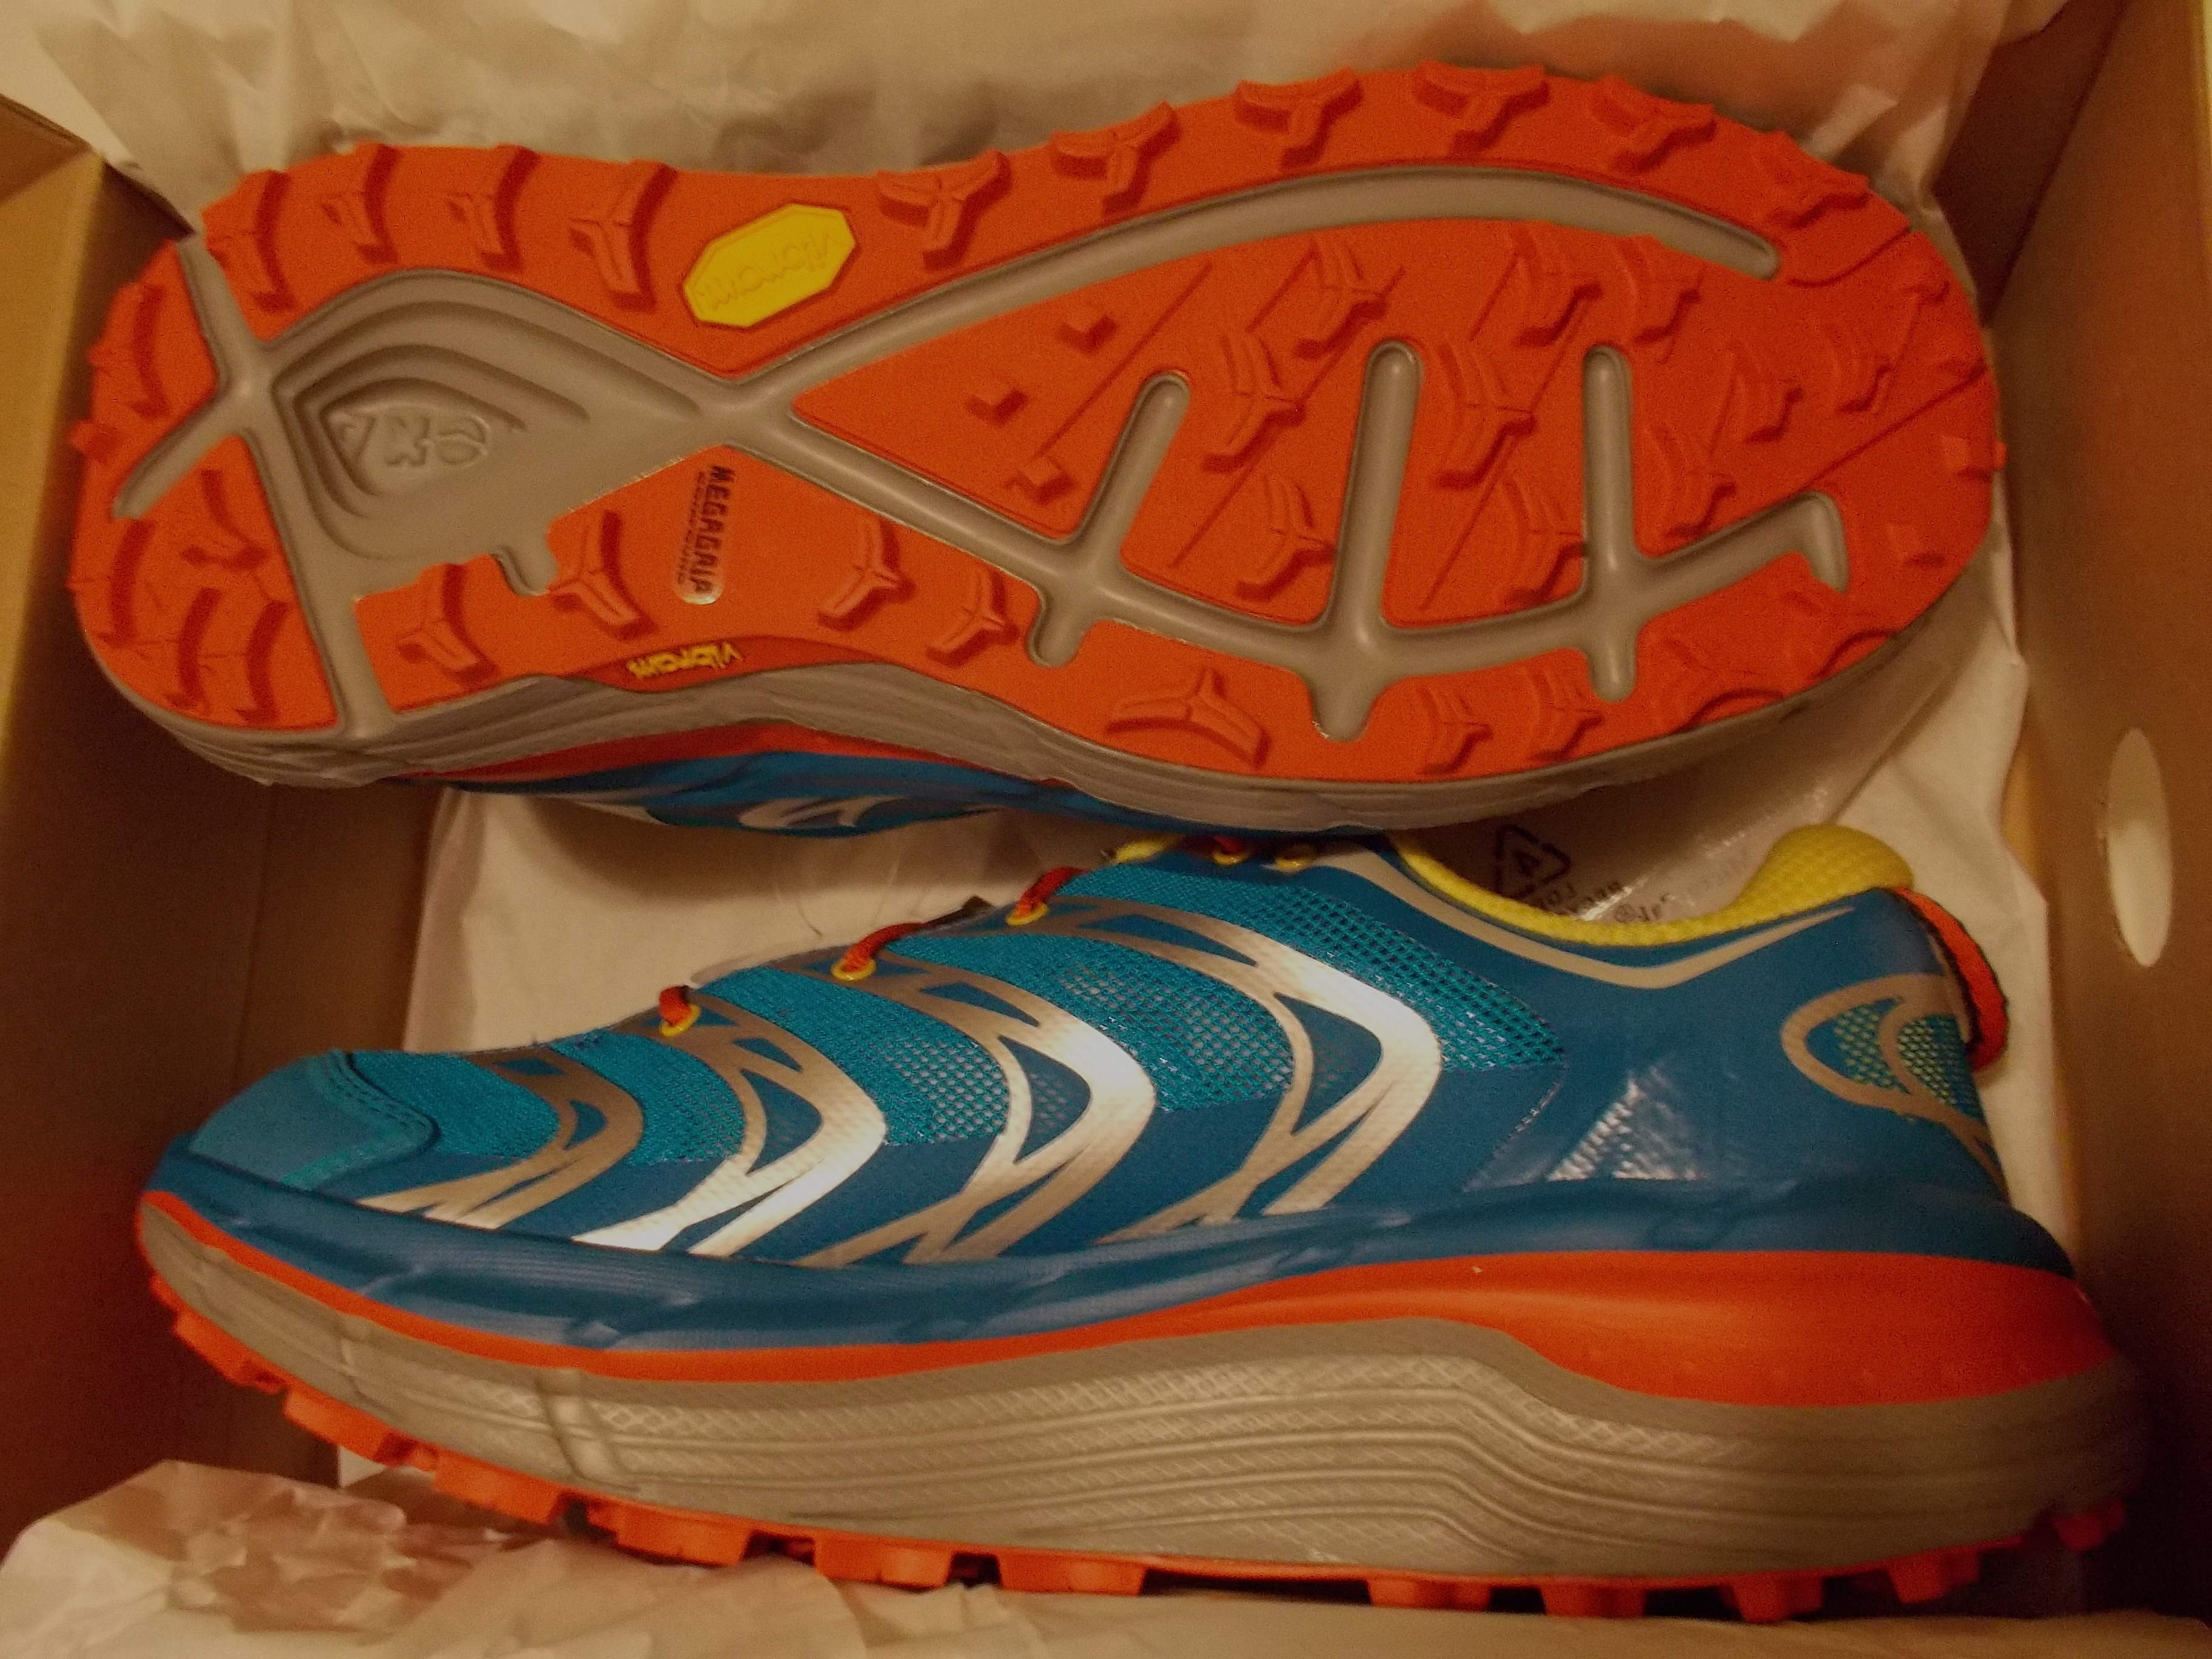
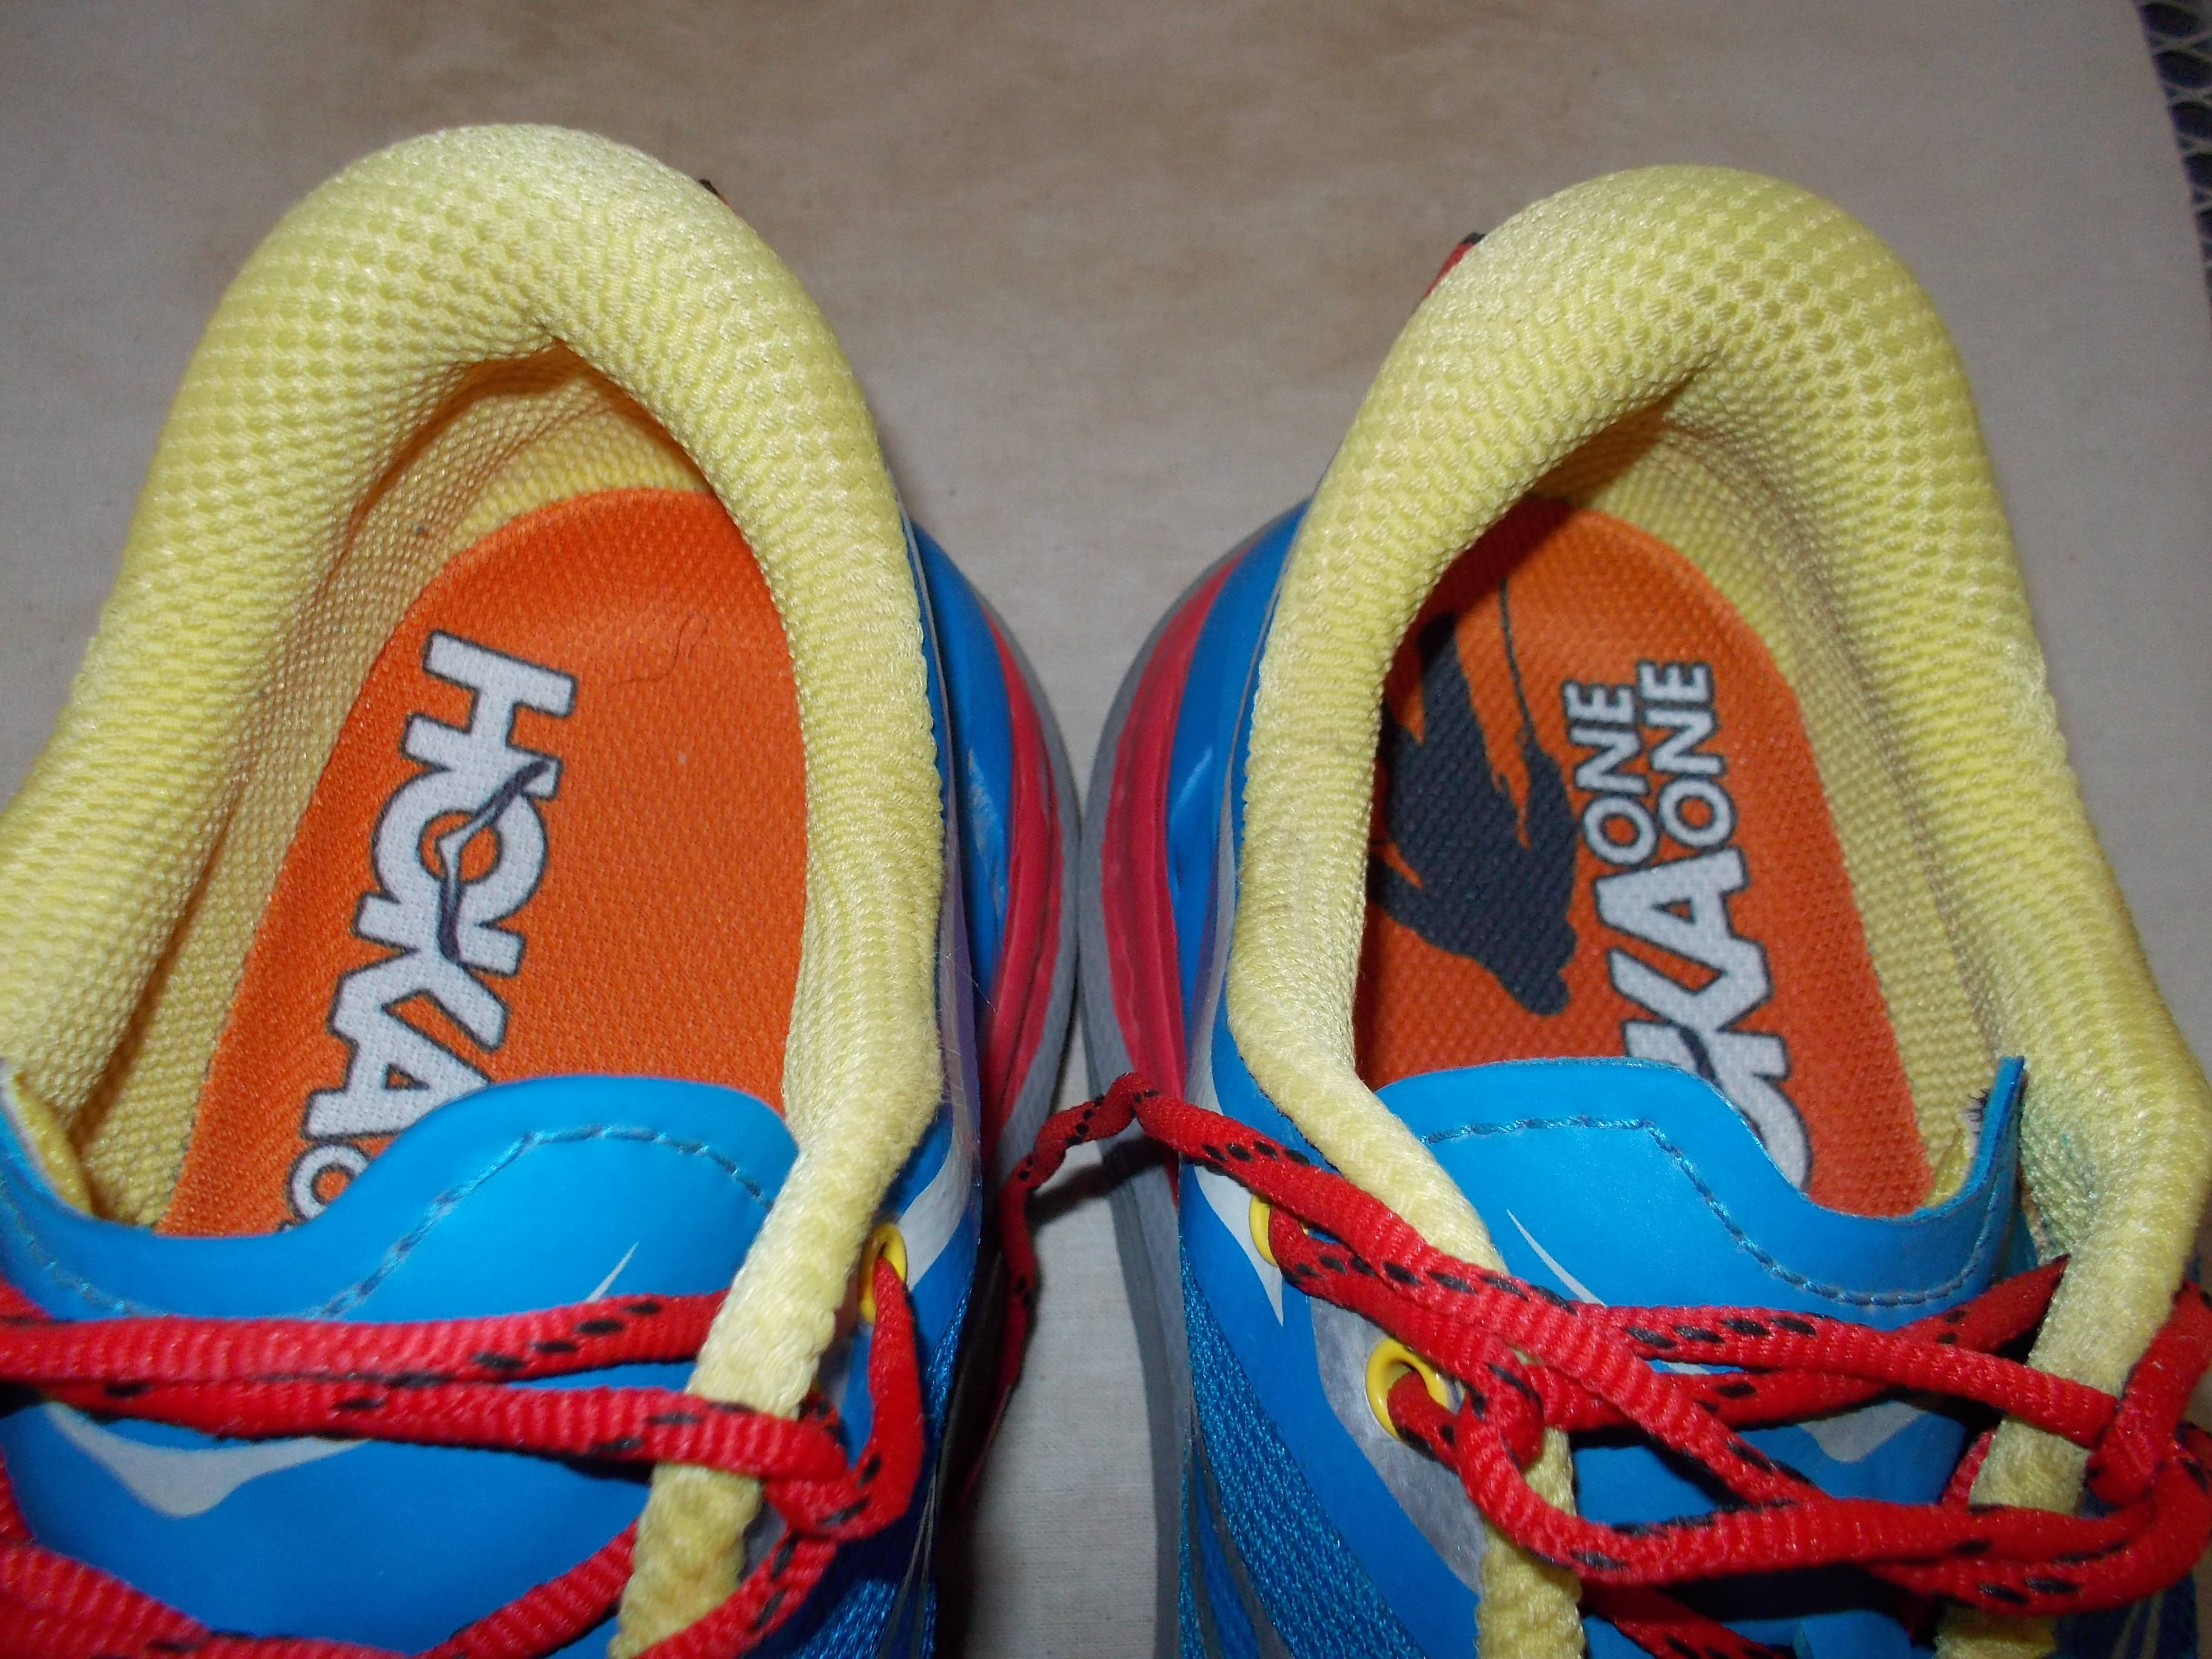
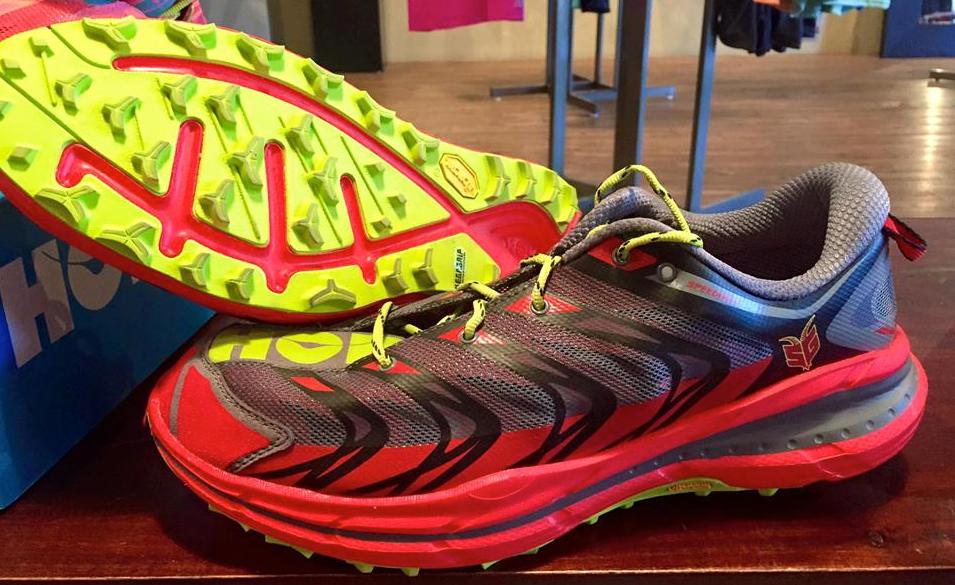


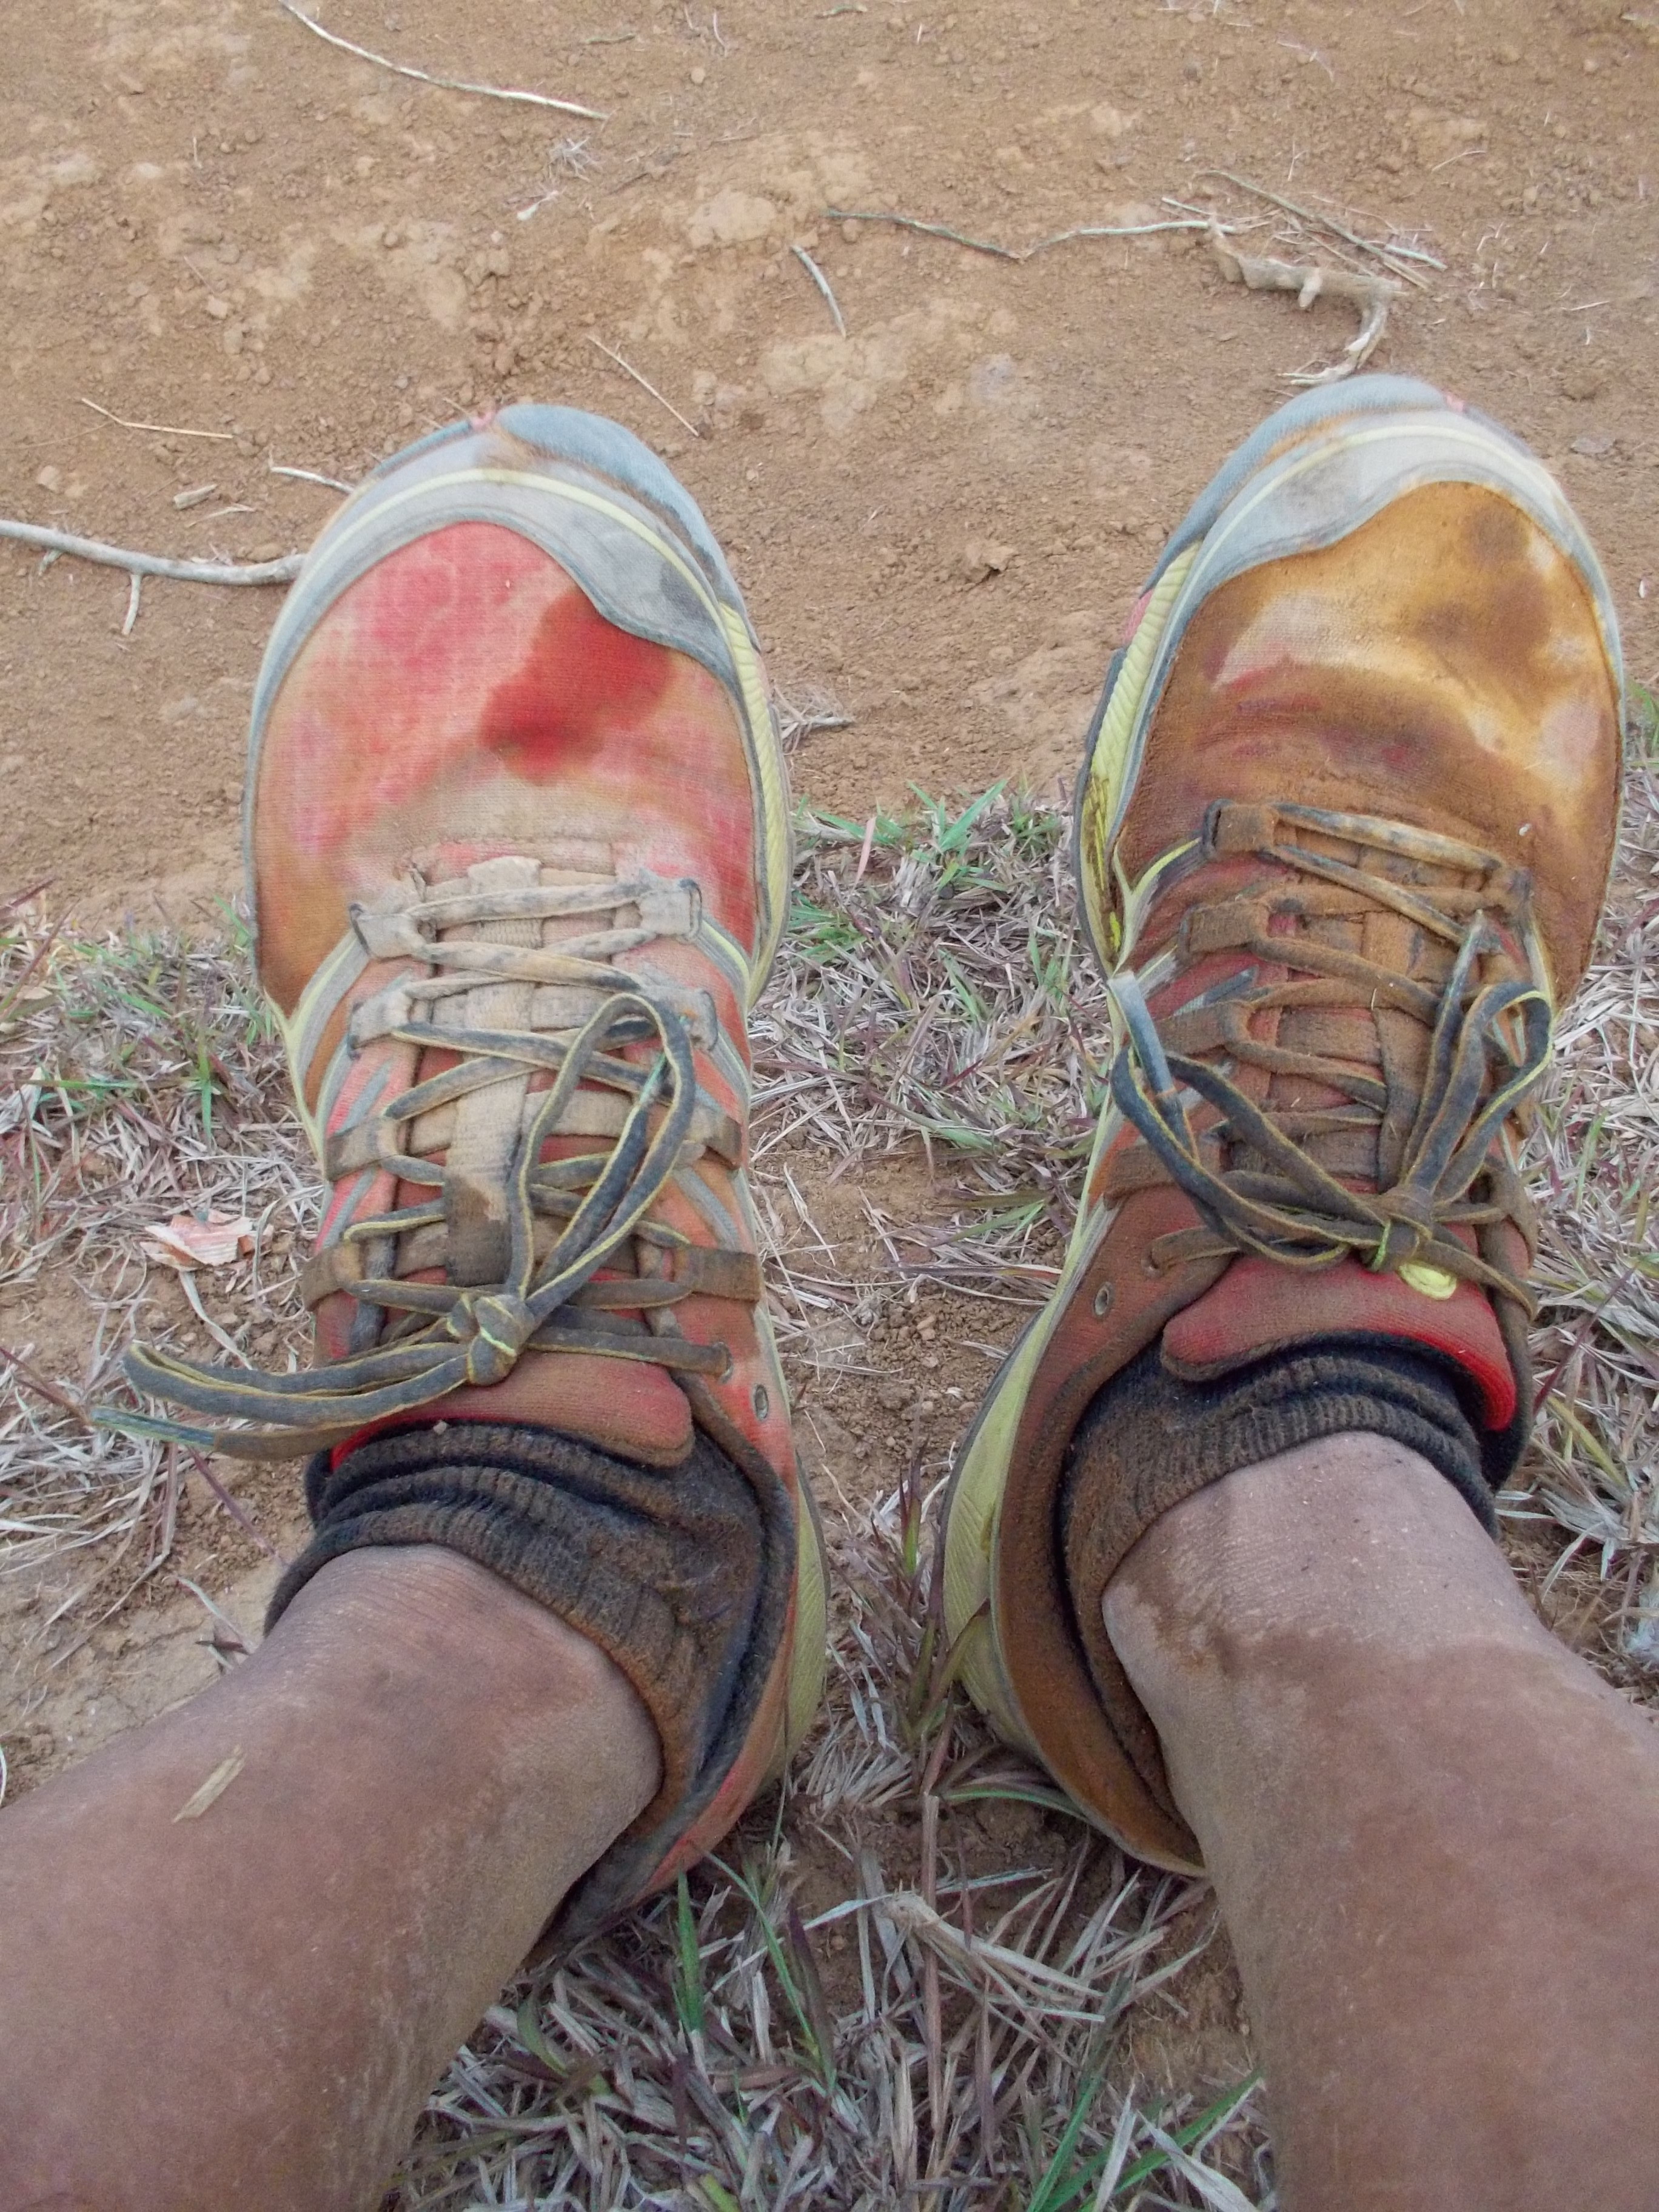

You must be logged in to post a comment.